HP 7960 HP Photosmart 7900 series - (English) Basics Guide - Page 33
print a photo index
 |
UPC - 844844844303
View all HP 7960 manuals
Add to My Manuals
Save this manual to your list of manuals |
Page 33 highlights
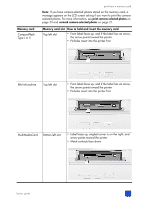
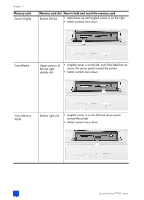
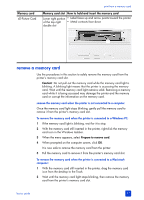
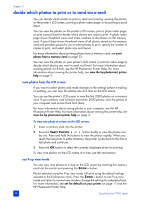
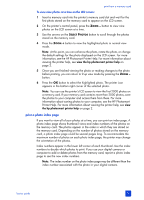
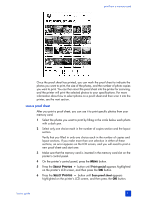
print from a memory card To view nine photos at a time on the LCD screen: 1 Insert a memory card into the printer's memory card slot and wait for the first photo stored on the memory card to appear on the LCD screen. 2 On the printer's control panel, press the ZOOM - button to view nine photos on the LCD screen at a time. 3 Use the arrows on the SELECT PHOTOS button to scroll through the photos stored on the memory card. 4 Press the ZOOM + button to view the highlighted photo in normal view mode. Note: At this point, you can enhance the photo, rotate the photo, or change the default settings for the photo displayed on the LCD screen. For more information, see the HP Photosmart Printer Help. For more information about viewing the printer help, see view the hp photosmart printer help on page 2. 5 Once you are finished viewing the photo or making changes to the photo before printing, you can return to 9-up view mode by pressing the ZOOM - button. 6 Press the OK button to select the highlighted photo. The printer icon appears in the bottom right corner of the selected photo. Note: You can use the printer's LCD screen to view the first 2000 photos on a memory card. If your memory card contains more than 2000 photos, save the photos to your computer and access them from there. For more information about saving photos to your computer, see the HP Photosmart Printer Help. For more information about viewing the printer help, see view the hp photosmart printer help on page 2. print a photo index page If you want to view all of your photos at a time, you can print an index page. A photo index page shows thumbnail views and index numbers of the photos on the memory card. The photos appear in the order in which they are stored on the memory card. Depending on the number of photos stored on the memory card, a photo index page could be several pages long. To accommodate the maximum number of photos on each photo index page, the printer may change the orientation of the photos. Index numbers appear in the lower left corner of each thumbnail. Use the index numbers to decide which photos to print. If you use your digital camera or computer to add or delete photos from the memory card, reprint a photo index page to see the new index numbers. Note: The index number on the photo index page may be different than the index number associated with the photo in your digital camera. basics guide 29
-
 1
1 -
2
-
3
-
4
-
5
-
6
-
7
-
8
-
9
-
10
-
11
-
12
-
13
-
14
-
15
-
16
-
17
-
18
-
19
-
20
-
21
-
22
-
23
-
24
-
25
-
26
-
27
-
 28
28 -
 29
29 -
 30
30 -
 31
31 -
 32
32 -
 33
33 -
 34
34 -
 35
35 -
 36
36 -
 37
37 -
 38
38 -
39
-
40
-
41
-
42
-
43
-
44
-
45
-
46
-
47
-
48
-
49
-
50
-
51
-
52
-
53
-
54
-
55
-
56
-
57
-
58
-
59
-
60
-
61
-
62
-
63
-
64
 |
 |
