HP 8550 HP Color LaserJet 8550, 8550N, 8550DN, 8550GN, 8550MFP Printer - Getti - Page 12
back edge.
 |
View all HP 8550 manuals
Add to My Manuals
Save this manual to your list of manuals |
Page 12 highlights
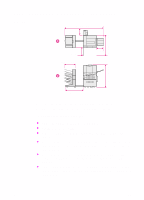
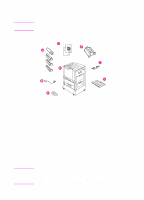
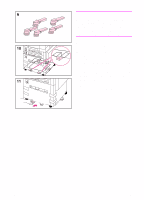
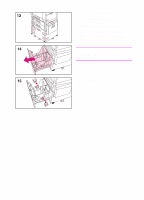
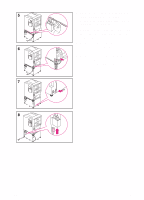
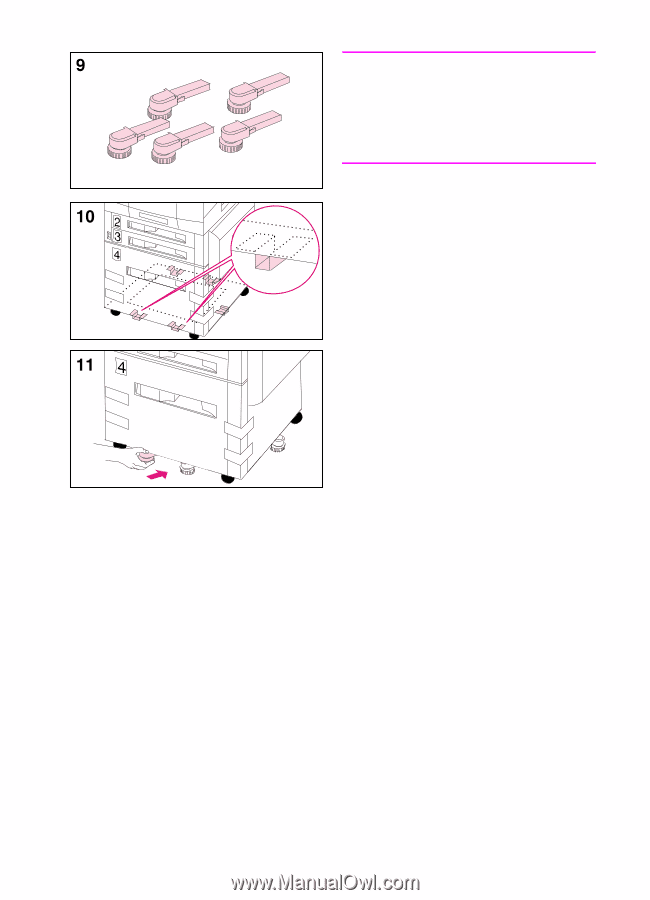
Note Follow steps 9-12 to attach the five stabilizing legs to the bottom of tray 4. If the five stabilizing legs (which are in addition to the four locking wheels) are already attached, proceed to step 13. 9 Locate the five stabilizing legs that came with the printer. 10 Locate the five guides for the stabilizing legs on the bottom of tray 4-two guides at the front edge, one on the right edge, and two on the back edge. 11 Insert a stabilizing leg into one of the guides and push the leg into the guide until it stops. 12 Repeat step 11 above to attach the other four stabilizing legs. 8 EN
-
 1
1 -
2
-
3
-
4
-
5
-
6
-
 7
7 -
 8
8 -
 9
9 -
 10
10 -
 11
11 -
 12
12 -
 13
13 -
 14
14 -
 15
15 -
 16
16 -
 17
17 -
18
-
19
-
20
-
21
-
22
-
23
-
24
-
25
-
26
-
27
-
28
-
29
-
30
-
31
-
32
-
33
-
34
-
35
-
36
-
37
-
38
-
39
-
40
-
41
-
42
-
43
-
44
-
45
-
46
-
47
-
48
-
49
-
50
-
51
-
52
-
53
-
54
-
55
-
56
-
57
-
58
-
59
-
60
-
61
-
62
-
63
-
64
 |
 |
8
EN
Note
Follow steps 9-12 to attach the five
stabilizing legs to the bottom of tray 4. If
the five stabilizing legs (which are in
addition to the four locking wheels) are
already attached, proceed to step 13.
9
Locate the five stabilizing legs that
came with the printer.
10
Locate the five guides for the
stabilizing legs on the bottom of
tray 4—two guides at the front edge,
one on the right edge, and two on the
back edge.
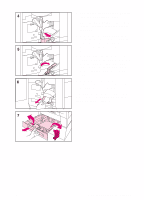
11
Insert a stabilizing leg into one of the
guides and push the leg into the
guide until it stops.
12
Repeat step 11 above to attach the
other four stabilizing legs.