HP 8550 HP Color LaserJet 8550, 8550N, 8550DN, 8550GN, 8550MFP Printer - Getti - Page 32
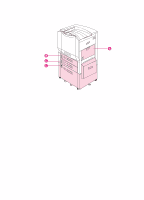
Input Trays.
 |
View all HP 8550 manuals
Add to My Manuals
Save this manual to your list of manuals |
Page 32 highlights
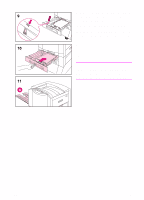
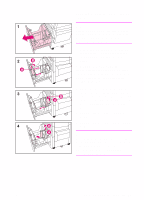
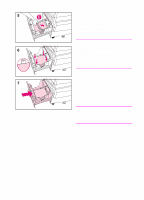
9 Make sure that the media-size tab on the front of the tray is set to the correct media size. 10 Slide the tray back into the printer. 11 Attach the left output bin (A) to the left side of the printer if you did not install an optional multi-bin mailbox. Set the media type for trays 2 and 3 in the printer control panel. For instructions, see "Step 8: Configuring Input Trays." Note Always configure the media type in the printer control panel to prevent users from printing on the wrong media type. 28 EN
-
 1
1 -
2
-
3
-
4
-
5
-
6
-
7
-
8
-
9
-
10
-
11
-
12
-
13
-
14
-
15
-
16
-
17
-
18
-
19
-
20
-
21
-
22
-
23
-
24
-
25
-
26
-
 27
27 -
 28
28 -
 29
29 -
 30
30 -
 31
31 -
 32
32 -
 33
33 -
 34
34 -
 35
35 -
 36
36 -
 37
37 -
38
-
39
-
40
-
41
-
42
-
43
-
44
-
45
-
46
-
47
-
48
-
49
-
50
-
51
-
52
-
53
-
54
-
55
-
56
-
57
-
58
-
59
-
60
-
61
-
62
-
63
-
64
 |
 |

28
EN
9
Make sure that the media-size tab on
the front of the tray is set to the
correct media size.
10
Slide the tray back into the printer.
11
Attach the left output bin (A) to the left
side of the printer if you did not install
an optional multi-bin mailbox.
Set the media type for trays 2 and 3 in
the printer control panel. For
instructions, see “Step 8: Configuring
Input Trays.”
Note
Always configure the media type in the
printer control panel to prevent users
from printing on the wrong media type.