HP 8550 HP Color LaserJet 8550, 8550N, 8550DN, 8550GN, 8550MFP Printer - Getti - Page 17
Plug the male end of the power cord
 |
View all HP 8550 manuals
Add to My Manuals
Save this manual to your list of manuals |
Page 17 highlights
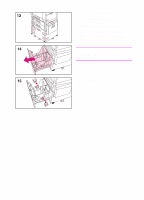
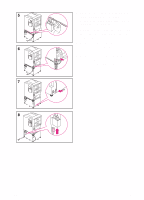
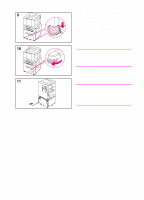
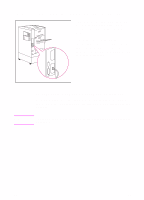
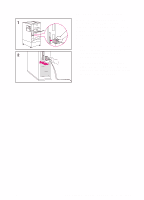
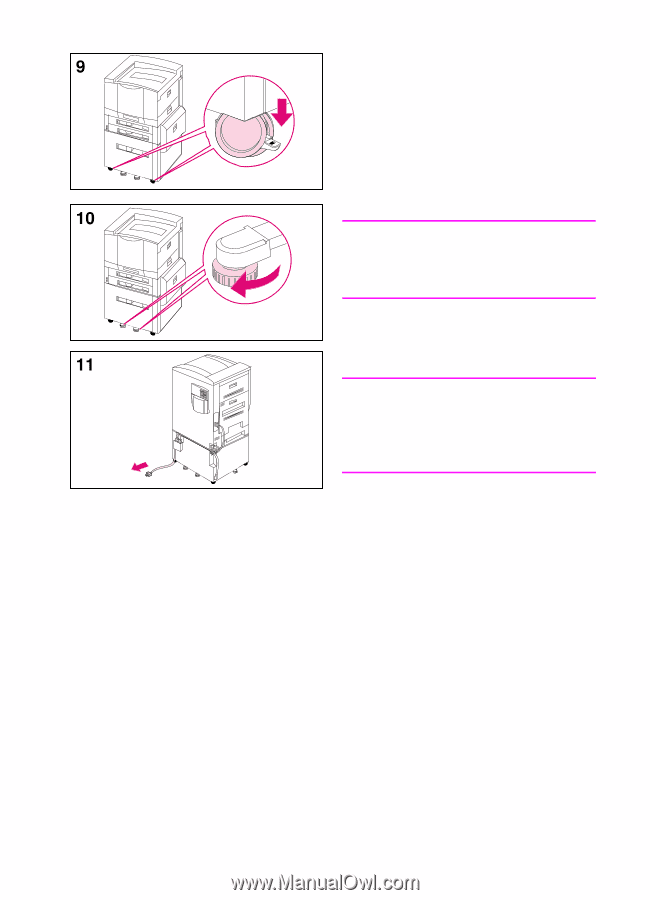
9 Roll the printer to its permanent location, where all four wheels rest on a level floor surface, and stabilize it by pushing the locking tabs on the tray's wheels to the locked position. 10 Rotate the feet of the five stabilizing legs and the anti-tip foot (on the left side of the tray) until they are snug against the floor. WARNING! An unstable printer can tip over and cause injury; make sure that the printer is secured properly. 11 Plug the male end of the power cord into a surge protector or other grounded power source. Note If an optional output device was ordered, see the installation guide included with the output device for installation instructions. EN Step 3: Installing the Cables 13
-
 1
1 -
2
-
3
-
4
-
5
-
6
-
7
-
8
-
9
-
10
-
11
-
 12
12 -
 13
13 -
 14
14 -
 15
15 -
 16
16 -
 17
17 -
 18
18 -
 19
19 -
 20
20 -
 21
21 -
 22
22 -
23
-
24
-
25
-
26
-
27
-
28
-
29
-
30
-
31
-
32
-
33
-
34
-
35
-
36
-
37
-
38
-
39
-
40
-
41
-
42
-
43
-
44
-
45
-
46
-
47
-
48
-
49
-
50
-
51
-
52
-
53
-
54
-
55
-
56
-
57
-
58
-
59
-
60
-
61
-
62
-
63
-
64
 |
 |
EN
Step 3: Installing the Cables
13
9
Roll the printer to its permanent
location, where all four wheels rest on
a level floor surface, and stabilize it by
pushing the locking tabs on the tray's
wheels to the locked position.
10
Rotate the feet of the five stabilizing
legs and the anti-tip foot (on the left
side of the tray) until they are snug
against the floor.
WARNING!
An unstable printer can tip over and
cause injury; make sure that the printer
is secured properly.
11
Plug the male end of the power cord
into a surge protector or other
grounded power source.
Note
If an optional output device was ordered,
see the installation guide included with
the output device for installation
instructions.