HP Color 9850mfp HP Color 9850mfp - Quick Reference Guide - Page 53
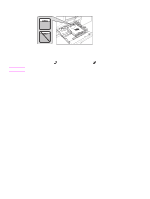
Loading tabbed sheets in the HCI, Press the paper loading button to lower the HCI bottom plate.
 |
View all HP Color 9850mfp manuals
Add to My Manuals
Save this manual to your list of manuals |
Page 53 highlights
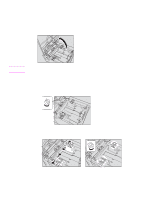
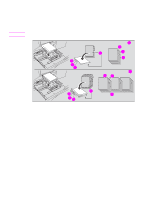
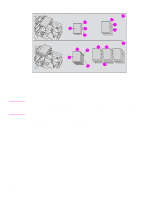
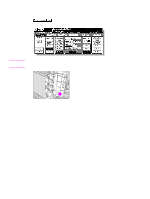
Note Loading tabbed sheets in the HCI Rear Front Rear 3 6 4 5 3 4 Section 1 6 IntroSdueccttiioonn 1 Introduction 1 3 4 5 One finished set 2 3 4 Front 5 5 Three finished sets 1 Example: Three tabbed sheets loaded in position for one finished set 2 Example: Nine tabbed sheets loaded in position for three finished sets 3 First tab 4 Second tab 5 Third tab 6 Printed side The tab extension width must be 12.5 mm (0.5 inch) or less. To load the tabbed sheets into the HCI, contact your service representative to position the rear stopper for the paper size to be loaded. 1 Open the HCI top door. 2 Press the paper loading button to lower the HCI bottom plate. 3 Load the tabbed sheets into the HCI as illustrated above. 4 Close the HCI top door. ENWW Loading paper 47
-
 1
1 -
2
-
3
-
4
-
5
-
6
-
7
-
8
-
9
-
10
-
11
-
12
-
13
-
14
-
15
-
16
-
17
-
18
-
19
-
20
-
21
-
22
-
23
-
24
-
25
-
26
-
27
-
28
-
29
-
30
-
31
-
32
-
33
-
34
-
35
-
36
-
37
-
38
-
39
-
40
-
41
-
42
-
43
-
44
-
45
-
46
-
47
-
 48
48 -
 49
49 -
 50
50 -
 51
51 -
 52
52 -
 53
53 -
 54
54 -
 55
55 -
 56
56 -
 57
57 -
 58
58 -
59
-
60
-
61
-
62
-
63
-
64
-
65
-
66
-
67
-
68
-
69
-
70
-
71
-
72
-
73
-
74
-
75
-
76
-
77
-
78
-
79
-
80
-
81
-
82
 |
 |
