HP Color 9850mfp HP Color 9850mfp - Quick Reference Guide - Page 70
Clearing paper jams, When “JAM” appears on the folder key (or arrow key flashes)
 |
View all HP Color 9850mfp manuals
Add to My Manuals
Save this manual to your list of manuals |
Page 70 highlights
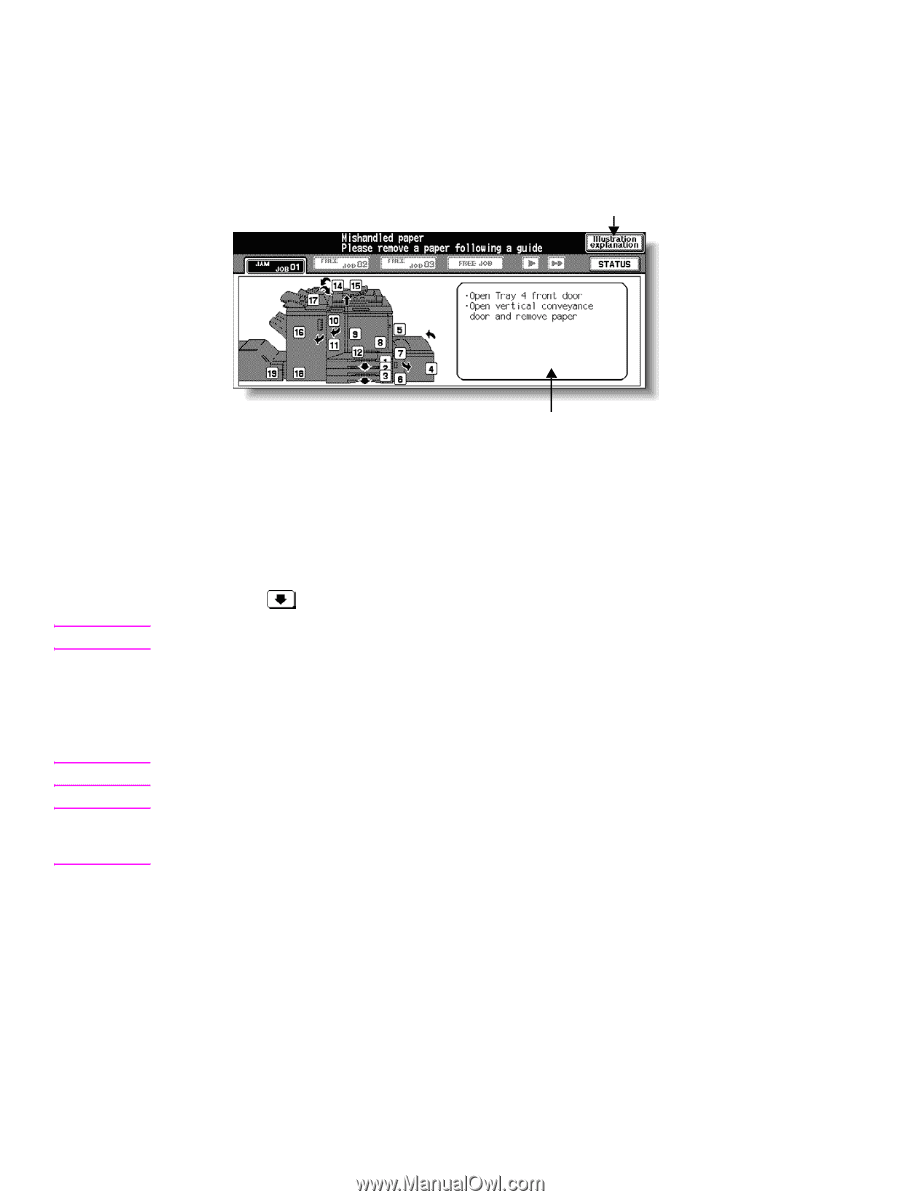
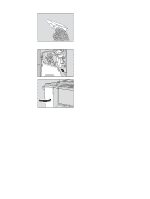
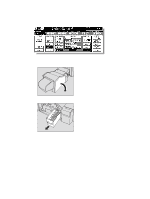
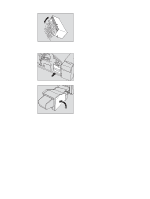
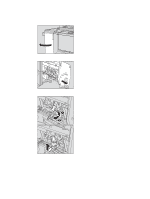
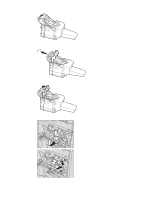
Clearing paper jams When a paper misfeed occurs, the MFP stops making copies and misfed paper codes display on the screen to indicate misfeed area(s). The copying operation cannot be continued until all the misfeed locations are cleared. Illustration explanation key Touch to display the subsequent screens for the disposal action. Note WARNING! CAUTION Paper jam position display Numbers flashing or lighting indicate the jammed positions. Message area An action will be displayed The above screen displays all the jam numbers for the sake of explanation. Actually, only a few numbers appear when a paper misfeed occurs. 1 Touch Illustration explanation on the screen. The screen illustrating the method for the disposal action is displayed. 2 Follow the procedure on the screen to remove the misfed paper. Touch on the screen, if provided, to go to the next page of illustrations. When removing misfed paper, make sure to leave no torn paper inside the engine. 3 When completed, the Main screen is restored. If any misfeed location remains, the screen displays the next disposal procedure in the message area and the location number in the jam position display. Repeat steps 1 to 2 until all the locations are cleared. The drum unit generates high voltage; to avoid electric shock, never touch the area. The internal fuser is very hot; to avoid getting burned, do not touch it. To avoid injury, be careful while removing staples stuck inside the engine. To avoid injury, do not insert fingers into the two RADF (ADF) hinge portions. When "JAM" appears on the folder key (or arrow key flashes) If a misfeed occurs with the print/scan job in progress while you are setting a reserve job, the SCAN or PRINT JOB folder key on the Main screen changes to flashing JAM JOB. When more than four jobs have been specified, and the folder key of the print/scan job in trouble is not currently displayed on the screen, use the arrow key to scroll to the job that is flashing. Follow the procedure below to remove misfed paper. 1 Display the Jam position screen. 64 6 Clearing jams ENWW
-
 1
1 -
2
-
3
-
4
-
5
-
6
-
7
-
8
-
9
-
10
-
11
-
12
-
13
-
14
-
15
-
16
-
17
-
18
-
19
-
20
-
21
-
22
-
23
-
24
-
25
-
26
-
27
-
28
-
29
-
30
-
31
-
32
-
33
-
34
-
35
-
36
-
37
-
38
-
39
-
40
-
41
-
42
-
43
-
44
-
45
-
46
-
47
-
48
-
49
-
50
-
51
-
52
-
53
-
54
-
55
-
56
-
57
-
58
-
59
-
60
-
61
-
62
-
63
-
64
-
 65
65 -
 66
66 -
 67
67 -
 68
68 -
 69
69 -
 70
70 -
 71
71 -
 72
72 -
 73
73 -
 74
74 -
 75
75 -
76
-
77
-
78
-
79
-
80
-
81
-
82
 |
 |