HP DL320 HP ProLiant DL320 Generation 2 Server Setup and Installation Guide - Page 88
Drive Connection Tips, Configuration and Setup Tips, Erase Error Log
 |
UPC - 829160513218
View all HP DL320 manuals
Add to My Manuals
Save this manual to your list of manuals |
Page 88 highlights
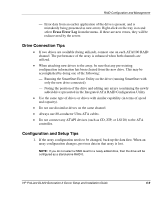
RAID Configuration and Management - Error data from an earlier application of the drive is present, and is mistakenly being presented as new errors. Right-click on the tray icon and select Erase Error Log from the menu. If these are new errors, they will be rediscovered by the server. Drive Connection Tips • If two drives are available (being utilized), connect one on each ATA/100 RAID channel. The performance of the array is enhanced when both channels are utilized. • When attaching new drives to the array, be sure that any pre-existing configuration information has been cleared from the new drive. This may be accomplished by doing one of the following: - Running the SmartStart Erase Utility on the drive (running SmartStart with only the new drive connected) - Noting the position of the drive and editing any arrays (containing the newly added drive) presented in the Integrated ATA RAID Configuration Utility • Use the same type of drives or drives with similar capability (in terms of speed and capacity). • Do not use dissimilar drives on the same channel. • Always use 80-conductor Ultra ATA cables. • Do not connect any ATAPI devices (such as CD, ZIP, or LS120) to the ATA controller. Configuration and Setup Tips 1. If the array configuration needs to be changed, back up the data first. When an array configuration changes, previous data in that array is lost. NOTE: If you do not select a RAID level for a newly added drive, then the drive will be configured as a stand-alone RAID 0. HP ProLiant DL320 Generation 2 Server Setup and Installation Guide 6-9
-
 1
1 -
2
-
3
-
4
-
5
-
6
-
7
-
8
-
9
-
10
-
11
-
12
-
13
-
14
-
15
-
16
-
17
-
18
-
19
-
20
-
21
-
22
-
23
-
24
-
25
-
26
-
27
-
28
-
29
-
30
-
31
-
32
-
33
-
34
-
35
-
36
-
37
-
38
-
39
-
40
-
41
-
42
-
43
-
44
-
45
-
46
-
47
-
48
-
49
-
50
-
51
-
52
-
53
-
54
-
55
-
56
-
57
-
58
-
59
-
60
-
61
-
62
-
63
-
64
-
65
-
66
-
67
-
68
-
69
-
70
-
71
-
72
-
73
-
74
-
75
-
76
-
77
-
78
-
79
-
80
-
81
-
82
-
 83
83 -
 84
84 -
 85
85 -
 86
86 -
 87
87 -
 88
88 -
 89
89 -
 90
90 -
 91
91 -
 92
92 -
 93
93 -
94
-
95
-
96
-
97
-
98
-
99
-
100
-
101
-
102
-
103
-
104
-
105
-
106
-
107
-
108
-
109
-
110
-
111
-
112
-
113
-
114
-
115
-
116
-
117
-
118
-
119
-
120
-
121
-
122
-
123
-
124
-
125
-
126
-
127
-
128
-
129
-
130
-
131
-
132
-
133
-
134
-
135
-
136
-
137
-
138
-
139
 |
 |
