HP EliteDesk 800 65W G2 Maintenance and Service Guide - Page 41
Reverse the removal procedure to install the WLAN antennas and transceivers.
 |
View all HP EliteDesk 800 65W G2 manuals
Add to My Manuals
Save this manual to your list of manuals |
Page 41 highlights
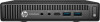
9. Insert a Phillips screwdriver in each knock-out feature and rotate to remove the blank. 10. Feed the external antenna cable through each hole and screw the antenna into position. 11. Connect the external antenna cables to the WLAN module. Reverse the removal procedure to install the WLAN antennas and transceivers. External antenna 33
-
 1
1 -
2
-
3
-
4
-
5
-
6
-
7
-
8
-
9
-
10
-
11
-
12
-
13
-
14
-
15
-
16
-
17
-
18
-
19
-
20
-
21
-
22
-
23
-
24
-
25
-
26
-
27
-
28
-
29
-
30
-
31
-
32
-
33
-
34
-
35
-
 36
36 -
 37
37 -
 38
38 -
 39
39 -
 40
40 -
 41
41 -
 42
42 -
 43
43 -
 44
44 -
 45
45 -
 46
46 -
47
-
48
-
49
-
50
-
51
-
52
-
53
-
54
-
55
-
56
-
57
-
58
-
59
-
60
-
61
-
62
-
63
-
64
-
65
-
66
-
67
-
68
-
69
-
70
-
71
-
72
-
73
-
74
-
75
-
76
-
77
-
78
-
79
-
80
-
81
-
82
-
83
-
84
-
85
-
86
-
87
-
88
-
89
-
90
-
91
-
92
-
93
-
94
-
95
-
96
-
97
-
98
-
99
-
100
-
101
-
102
-
103
-
104
-
105
-
106
-
107
-
108
-
109
-
110
-
111
-
112
-
113
-
114
-
115
-
116
-
117
-
118
-
119
-
120
-
121
-
122
-
123
-
124
-
125
-
126
-
127
-
128
-
129
-
130
-
131
-
132
-
133
-
134
-
135
-
136
-
137
-
138
-
139
-
140
-
141
-
142
-
143
-
144
 |
 |

9.
Insert a Phillips screwdriver in each knock-out feature and rotate to remove the blank.
10.
Feed the external antenna cable through each hole and screw the antenna into position.
11.
Connect the external antenna cables to the WLAN module.
Reverse the removal procedure to install the WLAN antennas and transceivers.
External antenna
33