HP LaserJet 9000 HP LaserJet 9000 Series - Software Technical Reference - Page 78
Ignore Application Collation, Automatic Configuration, NT Forms tab features, Fonts on DIMM
 |
View all HP LaserJet 9000 manuals
Add to My Manuals
Save this manual to your list of manuals |
Page 78 highlights
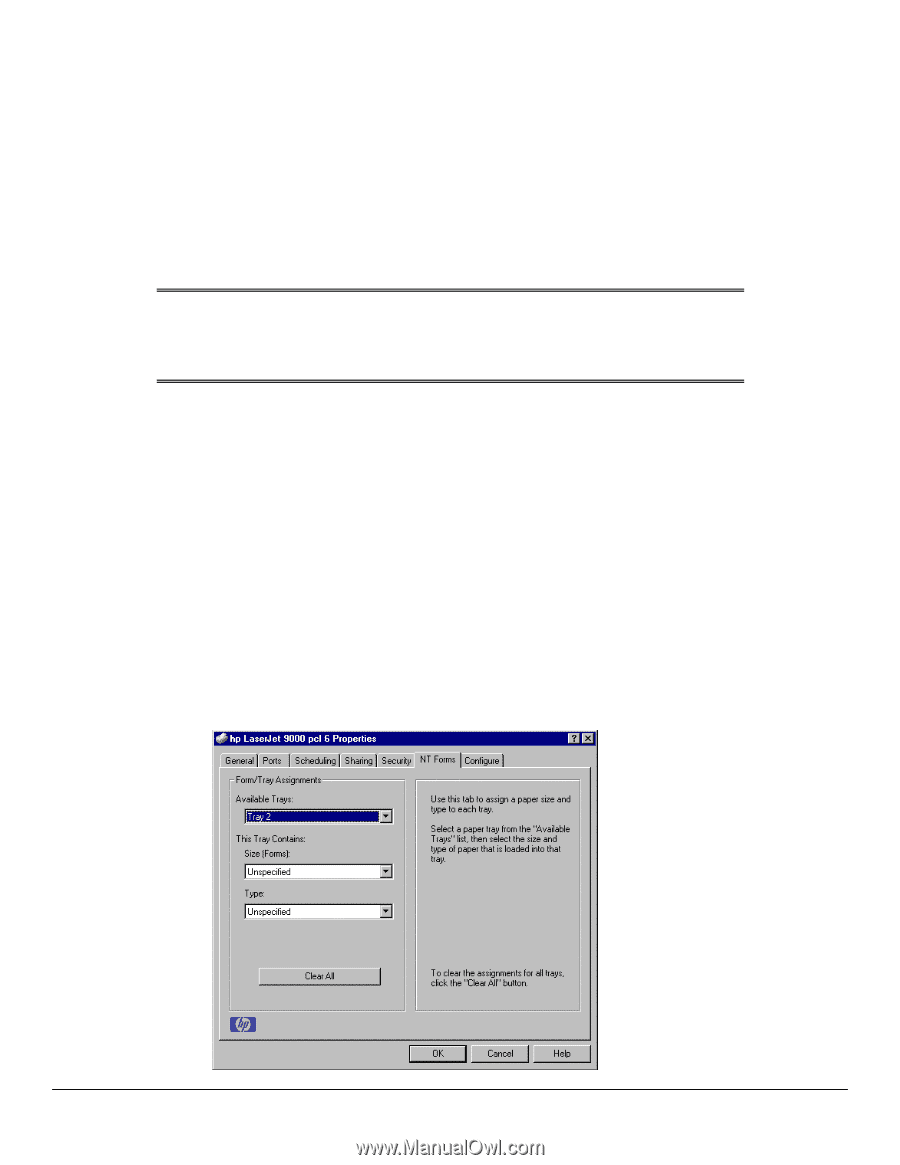
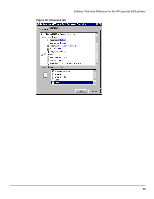
Software Technical Reference for the HP LaserJet 9000 printers 4. Find and select the appropriate Printer Cartridge Metrics (PCM) file that came with the font DIMM. 5. Click Open. 6. If you want, specify a Font DIMM Name in the Add Font DIMM dialog box. 7. Click OK. The selected .PCM file appears in the Installed DIMMs: list. Select the .PCM file to display a list of available fonts in the Fonts on DIMM: list. 8. Click OK to close the Add Font DIMM dialog box. The fonts on the DIMM should now be available on the system. NOTE: When using font DIMMs with the HP LaserJet 9000 PCL 5e and PCL 6 drivers: To install screen fonts that match the font DIMM, use the .hpb file specifically designed to work with that DIMM. If there are no screen fonts for the DIMM, use the printer cartridge metrics (.PCM) file specifically designed to work with that DIMM. Ignore Application Collation Clicking Ignore Application Collation overrides collation settings in software application print options. This option is set by default. The Ignore Application Collation check box is disabled and set to OFF when the Mopier Enabled check box is not selected. Automatic Configuration If you have modified the configuration of the HP LaserJet 9000 printer since installation, click the Update Now button to automatically reflect the new configuration in the driver. This is the third method for using Driver Autoconfiguration. For more information about the Driver Automatic Configuration feature, see "Printer features." NT Forms tab features The NT Forms tab appears only in the Microsoft Windows NT 4.0 and Windows 2000 operating environments. The NT Forms tab (like the Configure tab) can be viewed only from the Properties window. Figure 37: Driver NT Forms tab 70
-
 1
1 -
2
-
3
-
4
-
5
-
6
-
7
-
8
-
9
-
10
-
11
-
12
-
13
-
14
-
15
-
16
-
17
-
18
-
19
-
20
-
21
-
22
-
23
-
24
-
25
-
26
-
27
-
28
-
29
-
30
-
31
-
32
-
33
-
34
-
35
-
36
-
37
-
38
-
39
-
40
-
41
-
42
-
43
-
44
-
45
-
46
-
47
-
48
-
49
-
50
-
51
-
52
-
53
-
54
-
55
-
56
-
57
-
58
-
59
-
60
-
61
-
62
-
63
-
64
-
65
-
66
-
67
-
68
-
69
-
70
-
71
-
72
-
 73
73 -
 74
74 -
 75
75 -
 76
76 -
 77
77 -
 78
78 -
 79
79 -
 80
80 -
 81
81 -
 82
82 -
 83
83 -
84
-
85
-
86
-
87
-
88
-
89
-
90
-
91
-
92
-
93
-
94
-
95
-
96
-
97
-
98
-
99
-
100
-
101
-
102
-
103
-
104
-
105
-
106
-
107
-
108
-
109
-
110
-
111
-
112
-
113
-
114
-
115
-
116
-
117
-
118
-
119
-
120
-
121
-
122
-
123
-
124
-
125
-
126
-
127
-
128
-
129
-
130
-
131
-
132
-
133
-
134
-
135
-
136
-
137
-
138
-
139
-
140
-
141
-
142
-
143
-
144
-
145
-
146
-
147
-
148
-
149
-
150
-
151
-
152
-
153
-
154
-
155
-
156
-
157
-
158
-
159
-
160
-
161
-
162
-
163
-
164
-
165
-
166
-
167
-
168
-
169
-
170
-
171
-
172
-
173
-
174
-
175
-
176
-
177
-
178
-
179
-
180
-
181
-
182
-
183
-
184
 |
 |