HP LaserJet Managed MFP E82540-E82560 User Guide - Page 113
Step two: Con the Scan to Network Folder settings, Step one: Begin the configuration
 |
View all HP LaserJet Managed MFP E82540-E82560 manuals
Add to My Manuals
Save this manual to your list of manuals |
Page 113 highlights
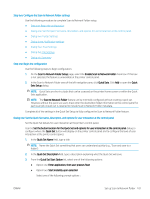
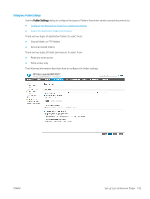
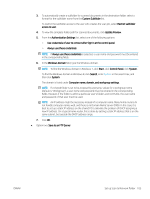
Step two: Configure the Scan to Network Folder settings Use the following procedure to complete Scan to Network Folder setup. ● Step one: Begin the configuration ● Dialog one: Set the Quick Set name, description, and options for user interaction at the control panel ● Dialog two: Folder Settings ● Dialog three: Notification settings ● Dialog four: Scan Settings ● Dialog five: File Settings ● Dialog six: Summary Step one: Begin the configuration Use the following steps to begin configuration. 1. On the Scan to Network Folder Setup page, select the Enable Scan to Network Folder check box. If this box is not selected, the feature is unavailable at the printer control panel. 2. In the Scan to Network Folder area of the left navigation pane, click Quick Sets. Click Add to open the Quick Sets Setup dialog. NOTE: Quick Sets are short-cut jobs that can be accessed on the printer Home screen or within the Quick Sets application. NOTE: The Scan to Network Folder feature can be minimally configured without creating a quick set. However, without the quick set, users must enter the destination folder information at the control panel for each scan job. A quick set is required to include Scan to Network Folder metadata. Complete all of the settings in the Quick Set Setup to fully configure the Scan to Network Folder feature. Dialog one: Set the Quick Set name, description, and options for user interaction at the control panel Set the Quick Set details for user interaction at the printer's control panel. Use the Set the button location for the Quick Set and options for user interaction at the control panel dialog to configure where the Quick Set button will display on the printer control panel and to configure the level of user interaction at the printer control panel. 1. In the Quick Set Name field, type a title. NOTE: Name the Quick Set something that users can understand quickly (e.g., "Scan and save to a folder"). 2. In the Quick Set Description field, type a description explaining what the Quick Set will save. 3. From the Quick Set Start Option list, select one of the following options: ● Option one: Enter application, then user presses Start ● Option two: Start instantly upon selection Select one of the following prompt options : ENWW Set up Scan to Network Folder 101
-
 1
1 -
2
-
3
-
4
-
5
-
6
-
7
-
8
-
9
-
10
-
11
-
12
-
13
-
14
-
15
-
16
-
17
-
18
-
19
-
20
-
21
-
22
-
23
-
24
-
25
-
26
-
27
-
28
-
29
-
30
-
31
-
32
-
33
-
34
-
35
-
36
-
37
-
38
-
39
-
40
-
41
-
42
-
43
-
44
-
45
-
46
-
47
-
48
-
49
-
50
-
51
-
52
-
53
-
54
-
55
-
56
-
57
-
58
-
59
-
60
-
61
-
62
-
63
-
64
-
65
-
66
-
67
-
68
-
69
-
70
-
71
-
72
-
73
-
74
-
75
-
76
-
77
-
78
-
79
-
80
-
81
-
82
-
83
-
84
-
85
-
86
-
87
-
88
-
89
-
90
-
91
-
92
-
93
-
94
-
95
-
96
-
97
-
98
-
99
-
100
-
101
-
102
-
103
-
104
-
105
-
106
-
107
-
 108
108 -
 109
109 -
 110
110 -
 111
111 -
 112
112 -
 113
113 -
 114
114 -
 115
115 -
 116
116 -
 117
117 -
 118
118 -
119
-
120
-
121
-
122
-
123
-
124
-
125
-
126
-
127
-
128
-
129
-
130
-
131
-
132
-
133
-
134
-
135
-
136
-
137
-
138
-
139
-
140
-
141
-
142
-
143
-
144
-
145
-
146
-
147
-
148
-
149
-
150
-
151
-
152
-
153
-
154
-
155
-
156
-
157
-
158
-
159
-
160
-
161
-
162
-
163
-
164
-
165
-
166
-
167
-
168
-
169
-
170
-
171
-
172
-
173
-
174
-
175
-
176
-
177
-
178
-
179
-
180
-
181
-
182
-
183
-
184
-
185
-
186
-
187
-
188
-
189
-
190
-
191
-
192
-
193
-
194
-
195
-
196
-
197
-
198
-
199
-
200
-
201
-
202
-
203
-
204
-
205
-
206
-
207
-
208
-
209
-
210
-
211
-
212
-
213
-
214
-
215
-
216
-
217
-
218
-
219
-
220
-
221
-
222
 |
 |