HP LaserJet Managed MFP E82540-E82560 User Guide - Page 194
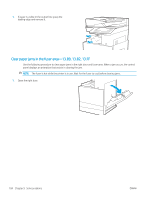
Clear paper jams in tray 2, tray 3—13.A2, 13.A3
 |
View all HP LaserJet Managed MFP E82540-E82560 manuals
Add to My Manuals
Save this manual to your list of manuals |
Page 194 highlights
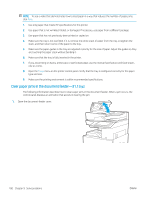
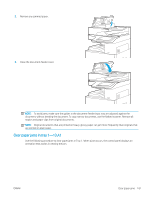
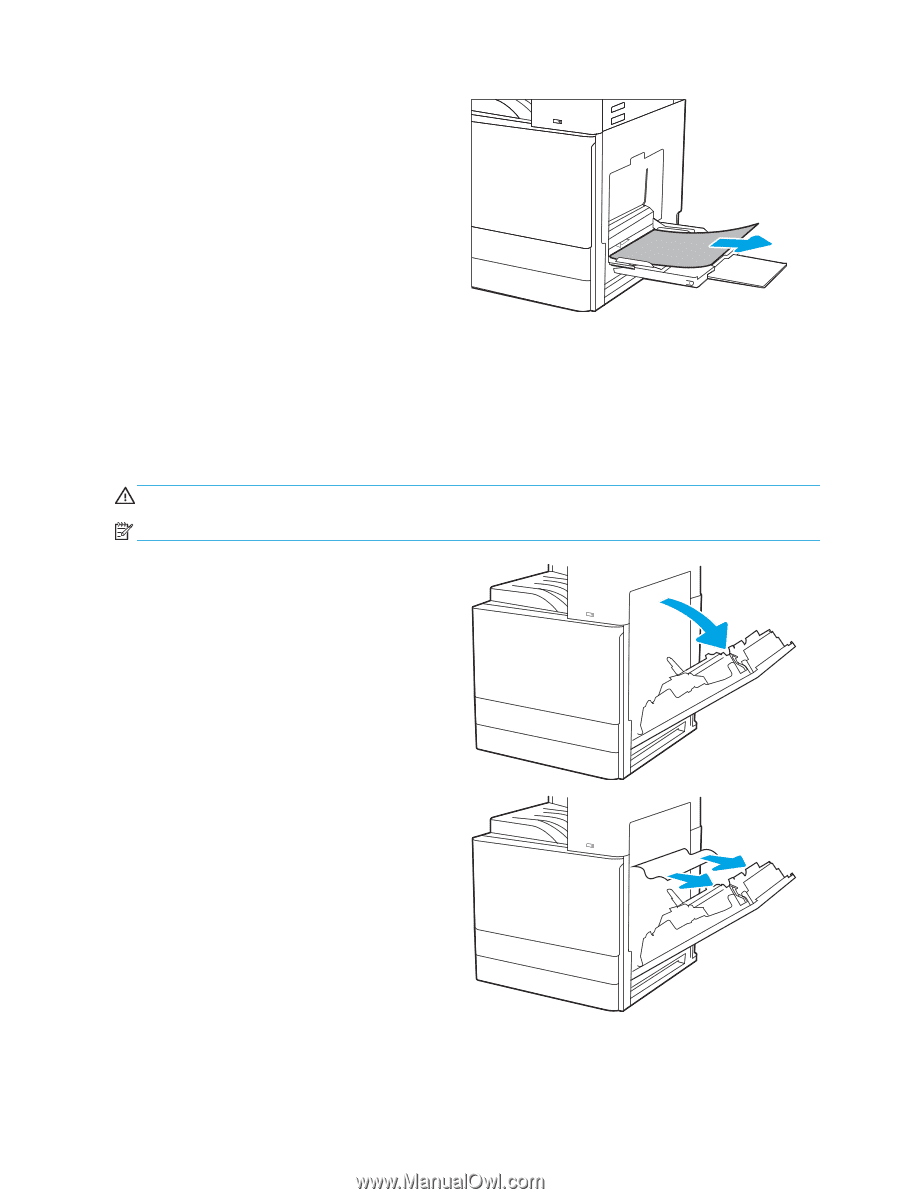
1. Gently remove the jammed paper. 2. Open and then close the front door to resume printing. Clear paper jams in tray 2, tray 3-13.A2, 13.A3 Use the following procedure to check for paper in all possible jam locations related to Tray 2 or Tray 3. When a jam occurs, the control panel might display a message and an animation that assists in clearing the jam. CAUTION: The fuser can be hot while the printer is in use. Wait for the fuser to cool before handling it. NOTE: The procedure to clear a paper jam in Tray 3 is the same as for Tray 2. Only Tray 2 is shown here. 1. Open the right door. 2. Gently remove any jammed paper. 182 Chapter 9 Solve problems ENWW
-
 1
1 -
2
-
3
-
4
-
5
-
6
-
7
-
8
-
9
-
10
-
11
-
12
-
13
-
14
-
15
-
16
-
17
-
18
-
19
-
20
-
21
-
22
-
23
-
24
-
25
-
26
-
27
-
28
-
29
-
30
-
31
-
32
-
33
-
34
-
35
-
36
-
37
-
38
-
39
-
40
-
41
-
42
-
43
-
44
-
45
-
46
-
47
-
48
-
49
-
50
-
51
-
52
-
53
-
54
-
55
-
56
-
57
-
58
-
59
-
60
-
61
-
62
-
63
-
64
-
65
-
66
-
67
-
68
-
69
-
70
-
71
-
72
-
73
-
74
-
75
-
76
-
77
-
78
-
79
-
80
-
81
-
82
-
83
-
84
-
85
-
86
-
87
-
88
-
89
-
90
-
91
-
92
-
93
-
94
-
95
-
96
-
97
-
98
-
99
-
100
-
101
-
102
-
103
-
104
-
105
-
106
-
107
-
108
-
109
-
110
-
111
-
112
-
113
-
114
-
115
-
116
-
117
-
118
-
119
-
120
-
121
-
122
-
123
-
124
-
125
-
126
-
127
-
128
-
129
-
130
-
131
-
132
-
133
-
134
-
135
-
136
-
137
-
138
-
139
-
140
-
141
-
142
-
143
-
144
-
145
-
146
-
147
-
148
-
149
-
150
-
151
-
152
-
153
-
154
-
155
-
156
-
157
-
158
-
159
-
160
-
161
-
162
-
163
-
164
-
165
-
166
-
167
-
168
-
169
-
170
-
171
-
172
-
173
-
174
-
175
-
176
-
177
-
178
-
179
-
180
-
181
-
182
-
183
-
184
-
185
-
186
-
187
-
188
-
 189
189 -
 190
190 -
 191
191 -
 192
192 -
 193
193 -
 194
194 -
 195
195 -
 196
196 -
 197
197 -
 198
198 -
 199
199 -
200
-
201
-
202
-
203
-
204
-
205
-
206
-
207
-
208
-
209
-
210
-
211
-
212
-
213
-
214
-
215
-
216
-
217
-
218
-
219
-
220
-
221
-
222
 |
 |
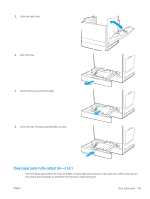
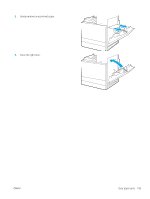
1.
Gently remove the jammed paper.
2.
Open and then close the front door to resume
printing.
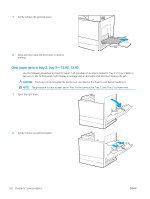
Clear paper jams in tray 2, tray 3—13.A2, 13.A3
Use the following procedure to check for paper in all possible jam locations related to Tray 2 or Tray 3. When a
jam occurs, the control panel might display a message and an animation that assists in clearing the jam.
CAUTION:
The fuser can be hot while the printer is in use. Wait for the fuser to cool before handling it.
NOTE:
The procedure to clear a paper jam in Tray 3 is the same as for Tray 2. Only Tray 2 is shown here.
1.
Open the right door.
2.
Gently remove any jammed paper.
182
Chapter 9
Solve problems
ENWW