HP LaserJet Pro P1102 HP LaserJet Professional P1100 Series Printer - Service - Page 135
Solve image-quality problems, Image defect table, Light print or faded, Toner specks
 |
View all HP LaserJet Pro P1102 manuals
Add to My Manuals
Save this manual to your list of manuals |
Page 135 highlights
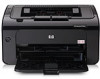
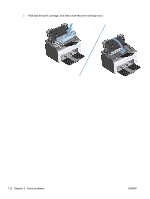
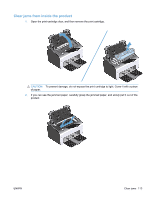
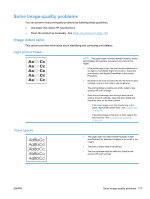
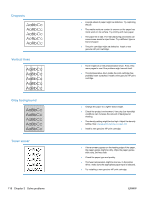
Solve image-quality problems You can prevent most print-quality problems by following these guidelines. ● Use paper that meets HP specifications. ● Clean the product as necessary. See Clean the product on page 123. Image defect table This section provides information about identifying and correcting print defects. Light print or faded NOTE: The paper might not meet Hewlett-Packard's media specifications (for example, the paper is too moist or too rough). 1. If the whole page is light, the print density adjustment is too light or EconoMode might be turned on. Adjust the print density, and disable EconoMode in the product Properties. 2. Redistribute the toner to extend the life. Remove the print cartridge, and tip it from side to side lengthwise. The print cartridge is nearing end of life. Install a new genuine HP print cartridge. 3. Open the print cartridge door during a print job and remove the print cartridge. Open the drum shield and check the toner on the drum surface. ◦ If the toner image is not fully transferring to the paper, replace the transfer roller. See Transfer roller on page 39. ◦ If the toner image on the drum is faint, replace the laser/scanner. See Laser/scanner assembly on page 58. Toner specks ● The paper might not meet Hewlett-Packard's media specifications (for example, the paper is too moist or too rough). ● The product might need to be cleaned. ● The print cartridge might be defective. Install a new genuine HP print cartridge. ENWW Solve image-quality problems 117
-
 1
1 -
2
-
3
-
4
-
5
-
6
-
7
-
8
-
9
-
10
-
11
-
12
-
13
-
14
-
15
-
16
-
17
-
18
-
19
-
20
-
21
-
22
-
23
-
24
-
25
-
26
-
27
-
28
-
29
-
30
-
31
-
32
-
33
-
34
-
35
-
36
-
37
-
38
-
39
-
40
-
41
-
42
-
43
-
44
-
45
-
46
-
47
-
48
-
49
-
50
-
51
-
52
-
53
-
54
-
55
-
56
-
57
-
58
-
59
-
60
-
61
-
62
-
63
-
64
-
65
-
66
-
67
-
68
-
69
-
70
-
71
-
72
-
73
-
74
-
75
-
76
-
77
-
78
-
79
-
80
-
81
-
82
-
83
-
84
-
85
-
86
-
87
-
88
-
89
-
90
-
91
-
92
-
93
-
94
-
95
-
96
-
97
-
98
-
99
-
100
-
101
-
102
-
103
-
104
-
105
-
106
-
107
-
108
-
109
-
110
-
111
-
112
-
113
-
114
-
115
-
116
-
117
-
118
-
119
-
120
-
121
-
122
-
123
-
124
-
125
-
126
-
127
-
128
-
129
-
 130
130 -
 131
131 -
 132
132 -
 133
133 -
 134
134 -
 135
135 -
 136
136 -
 137
137 -
 138
138 -
 139
139 -
 140
140 -
141
-
142
-
143
-
144
-
145
-
146
-
147
-
148
-
149
-
150
-
151
-
152
-
153
-
154
-
155
-
156
-
157
-
158
-
159
-
160
-
161
-
162
-
163
-
164
-
165
-
166
-
167
-
168
-
169
-
170
-
171
-
172
-
173
-
174
-
175
-
176
-
177
-
178
-
179
-
180
-
181
-
182
-
183
-
184
-
185
-
186
-
187
-
188
-
189
-
190
-
191
-
192
-
193
-
194
-
195
-
196
-
197
-
198
-
199
-
200
-
201
-
202
-
203
-
204
-
205
-
206
 |
 |