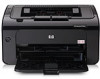
HP LaserJet Pro P1102 HP LaserJet Professional P1100 Series Printer - Service - Page 16

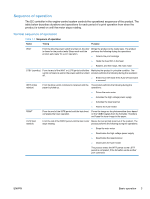
Remove the formatter PCA HP LaserJet Professional P1100w Printer series; 4 of 4 - wireless printer

Page 16 highlights

Figure 2-11 Figure 2-12 Figure 2-13 Figure 2-14 Figure 2-15 Figure 2-16 Figure 2-17 Figure 2-18 Figure 2-19 Figure 2-20 Figure 2-21 Figure 2-22 Figure 2-23 Figure 2-24 Figure 2-25 Figure 2-26 Figure 2-27 Figure 2-28 Figure 2-29 Figure 2-30 Figure 2-31 Figure 2-32 Figure 2-33 Figure 2-34 Figure 2-35 Figure 2-36 Figure 2-37 Figure 2-38 Figure 2-39 Figure 2-40 Figure 2-41 Figure 2-42 Figure 2-43 Figure 2-44 Figure 2-45 Figure 2-46 Figure 2-47 Figure 2-48 Figure 2-49 Figure 2-50 Figure 2-51 Figure 2-52 Figure 2-53 Figure 2-54 Remove the left cover (2 of 5) ...44 Remove the left cover (3 of 5) ...44 Remove the left cover (4 of 5) ...45 Remove the left cover (5 of 5) ...45 Remove the right cover (1 of 3) ...46 Remove the right cover (2 of 3) ...46 Remove the right cover (3 of 3) ...47 Remove the cartridge door (1 of 2 48 Remove the cartridge door (2 of 2 49 Remove the face-down cover (1 of 2 50 Remove the face-down cover (2 of 2 51 Remove the rear cover (1 of 2) ...52 Remove the rear cover (2 of 2) ...53 Remove the formatter PCA (HP LaserJet Professional P1100 Printer series; 1 of 4 55 Remove the formatter PCA (HP LaserJet Professional P1100w Printer series; 2 of 4 55 Remove the formatter PCA (HP LaserJet Professional P1100 Printer series; 3 of 4 56 Remove the formatter PCA (HP LaserJet Professional P1100w Printer series; 4 of 4 56 Remove the wireless PCA ...57 Remove the laser/scanner assembly (1 of 4 58 Remove the laser/scanner assembly (2 of 4 59 Remove the laser/scanner assembly (3 of 4 59 Remove the laser/scanner assembly (4 of 4 60 Reinstall the laser/scanner assembly 60 Remove the pickup assembly (1 of 7 61 Remove the pickup assembly (2 of 7 62 Remove the pickup assembly (3 of 7 62 Remove the pickup assembly (4 of 7 63 Remove the pickup assembly (5 of 7 63 Remove the pickup assembly (6 of 7 64 Remove the pickup assembly (7 of 7 64 Reinstall the pickup assembly (1 of 4; correct ground spring position 65 Reinstall the pickup assembly (2 of 4; incorrect ground spring position 65 Reinstall the pickup assembly (3 of 4; lift plate in raised position 66 Reinstall the pickup assembly (4 of 4; lift plate in lowered position 66 Remove the fuser (1 of 7) ...67 Remove the fuser (2 of 7) ...68 Remove the fuser (3 of 7) ...68 Remove the fuser (4 of 7) ...69 Remove the fuser (5 of 7) ...69 Remove the fuser (6 of 7) ...70 Remove the fuser (7 of 7) ...70 Reinstall the fuser; correct wire harness installation 71 Reinstall the fuser; incorrect wire harness installation 71 Remove the main motor (1 of 7 72 xiv ENWW

  • 1
  • 2
  • 3
  • 4
  • 5
  • 6
  • 7
  • 8
  • 9
  • 10
  • 11
  • 12
  • 13
  • 14
  • 15
  • 16
  • 17
  • 18
  • 19
  • 20
  • 21
  • 22
  • 23
  • 24
  • 25
  • 26
  • 27
  • 28
  • 29
  • 30
  • 31
  • 32
  • 33
  • 34
  • 35
  • 36
  • 37
  • 38
  • 39
  • 40
  • 41
  • 42
  • 43
  • 44
  • 45
  • 46
  • 47
  • 48
  • 49
  • 50
  • 51
  • 52
  • 53
  • 54
  • 55
  • 56
  • 57
  • 58
  • 59
  • 60
  • 61
  • 62
  • 63
  • 64
  • 65
  • 66
  • 67
  • 68
  • 69
  • 70
  • 71
  • 72
  • 73
  • 74
  • 75
  • 76
  • 77
  • 78
  • 79
  • 80
  • 81
  • 82
  • 83
  • 84
  • 85
  • 86
  • 87
  • 88
  • 89
  • 90
  • 91
  • 92
  • 93
  • 94
  • 95
  • 96
  • 97
  • 98
  • 99
  • 100
  • 101
  • 102
  • 103
  • 104
  • 105
  • 106
  • 107
  • 108
  • 109
  • 110
  • 111
  • 112
  • 113
  • 114
  • 115
  • 116
  • 117
  • 118
  • 119
  • 120
  • 121
  • 122
  • 123
  • 124
  • 125
  • 126
  • 127
  • 128
  • 129
  • 130
  • 131
  • 132
  • 133
  • 134
  • 135
  • 136
  • 137
  • 138
  • 139
  • 140
  • 141
  • 142
  • 143
  • 144
  • 145
  • 146
  • 147
  • 148
  • 149
  • 150
  • 151
  • 152
  • 153
  • 154
  • 155
  • 156
  • 157
  • 158
  • 159
  • 160
  • 161
  • 162
  • 163
  • 164
  • 165
  • 166
  • 167
  • 168
  • 169
  • 170
  • 171
  • 172
  • 173
  • 174
  • 175
  • 176
  • 177
  • 178
  • 179
  • 180
  • 181
  • 182
  • 183
  • 184
  • 185
  • 186
  • 187
  • 188
  • 189
  • 190
  • 191
  • 192
  • 193
  • 194
  • 195
  • 196
  • 197
  • 198
  • 199
  • 200
  • 201
  • 202
  • 203
  • 204
  • 205
  • 206

Figure 2-11
Remove the left cover (2 of 5)
.......................................................................................................
44
Figure 2-12
Remove the left cover (3 of 5)
.......................................................................................................
44
Figure 2-13
Remove the left cover (4 of 5)
.......................................................................................................
45
Figure 2-14
Remove the left cover (5 of 5)
.......................................................................................................
45
Figure 2-15
Remove the right cover (1 of 3)
....................................................................................................
46
Figure 2-16
Remove the right cover (2 of 3)
....................................................................................................
46
Figure 2-17
Remove the right cover (3 of 3)
....................................................................................................
47
Figure 2-18
Remove the cartridge door (1 of 2)
...............................................................................................
48
Figure 2-19
Remove the cartridge door (2 of 2)
...............................................................................................
49
Figure 2-20
Remove the face-down cover (1 of 2)
...........................................................................................
50
Figure 2-21
Remove the face-down cover (2 of 2)
...........................................................................................
51
Figure 2-22
Remove the rear cover (1 of 2)
.....................................................................................................
52
Figure 2-23
Remove the rear cover (2 of 2)
.....................................................................................................
53
Figure 2-24
Remove the formatter PCA (HP LaserJet Professional P1100 Printer series; 1 of 4)
..................
55
Figure 2-25
Remove the formatter PCA (HP LaserJet Professional P1100w Printer series; 2 of 4)
...............
55
Figure 2-26
Remove the formatter PCA (HP LaserJet Professional P1100 Printer series; 3 of 4)
..................
56
Figure 2-27
Remove the formatter PCA (HP LaserJet Professional P1100w Printer series; 4 of 4)
...............
56
Figure 2-28
Remove the wireless PCA
............................................................................................................
57
Figure 2-29
Remove the laser/scanner assembly (1 of 4)
...............................................................................
58
Figure 2-30
Remove the laser/scanner assembly (2 of 4)
...............................................................................
59
Figure 2-31
Remove the laser/scanner assembly (3 of 4)
...............................................................................
59
Figure 2-32
Remove the laser/scanner assembly (4 of 4)
...............................................................................
60
Figure 2-33
Reinstall the laser/scanner assembly
...........................................................................................
60
Figure 2-34
Remove the pickup assembly (1 of 7)
...........................................................................................
61
Figure 2-35
Remove the pickup assembly (2 of 7)
...........................................................................................
62
Figure 2-36
Remove the pickup assembly (3 of 7)
...........................................................................................
62
Figure 2-37
Remove the pickup assembly (4 of 7)
...........................................................................................
63
Figure 2-38
Remove the pickup assembly (5 of 7)
...........................................................................................
63
Figure 2-39
Remove the pickup assembly (6 of 7)
...........................................................................................
64
Figure 2-40
Remove the pickup assembly (7 of 7)
...........................................................................................
64
Figure 2-41
Reinstall the pickup assembly (1 of 4; correct ground spring position)
.........................................
65
Figure 2-42
Reinstall the pickup assembly (2 of 4; incorrect ground spring position)
......................................
65
Figure 2-43
Reinstall the pickup assembly (3 of 4; lift plate in raised position)
................................................
66
Figure 2-44
Reinstall the pickup assembly (4 of 4; lift plate in lowered position)
.............................................
66
Figure 2-45
Remove the fuser (1 of 7)
.............................................................................................................
67
Figure 2-46
Remove the fuser (2 of 7)
.............................................................................................................
68
Figure 2-47
Remove the fuser (3 of 7)
.............................................................................................................
68
Figure 2-48
Remove the fuser (4 of 7)
.............................................................................................................
69
Figure 2-49
Remove the fuser (5 of 7)
.............................................................................................................
69
Figure 2-50
Remove the fuser (6 of 7)
.............................................................................................................
70
Figure 2-51
Remove the fuser (7 of 7)
.............................................................................................................
70
Figure 2-52
Reinstall the fuser; correct wire harness installation
.....................................................................
71
Figure 2-53
Reinstall the fuser; incorrect wire harness installation
..................................................................
71
Figure 2-54
Remove the main motor (1 of 7)
...................................................................................................
72
xiv
ENWW