HP OMEN Transcend 14 Maintenance and Service GuideOMEN Transcend 14 inch Gamin - Page 54
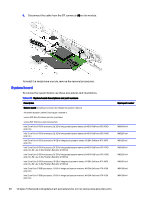
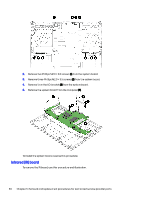
Infrared (IR) board, Remove three Phillips M2.0 × 3.5 screws
 |
View all HP OMEN Transcend 14 manuals
Add to My Manuals
Save this manual to your list of manuals |
Page 54 highlights
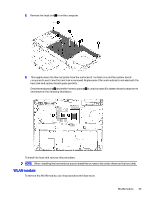
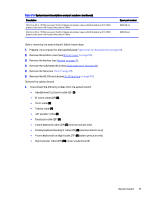
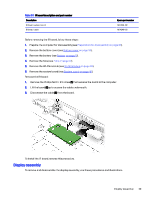
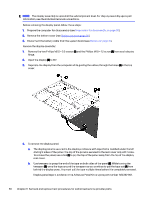
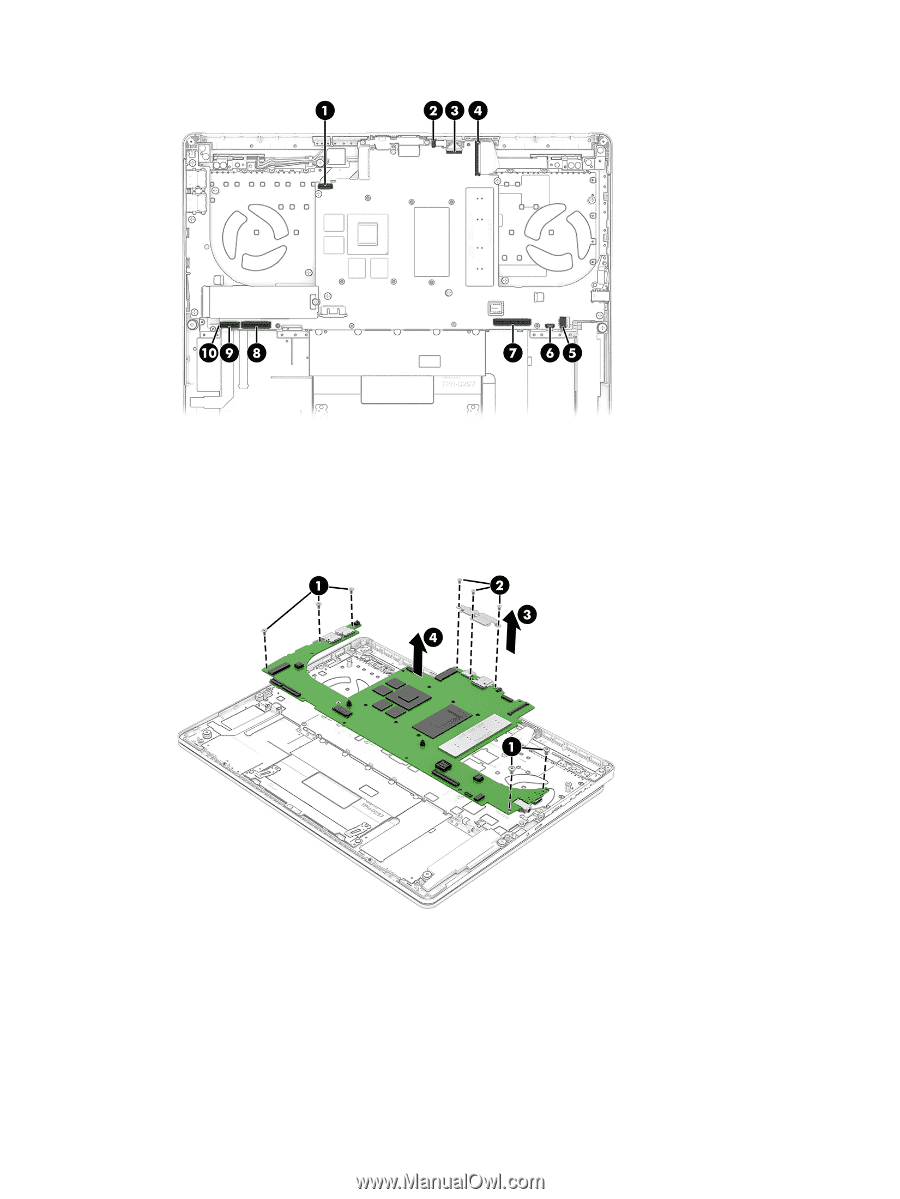
2. Remove five Phillips M2.0 × 4.0 screws (1) from the system board. 3. Remove three Phillips M2.0 × 3.5 screws (2) from the system board. 4. Remove from the I/O bracket (3) from the system board. 5. Remove the system board from the computer (4). To install the system board, reverse this procedure. Infrared (IR) board To remove the IR board, use this procedure and illustration. 48 Chapter 5 Removal and replacement procedures for authorized service provider parts
-
 1
1 -
2
-
3
-
4
-
5
-
6
-
7
-
8
-
9
-
10
-
11
-
12
-
13
-
14
-
15
-
16
-
17
-
18
-
19
-
20
-
21
-
22
-
23
-
24
-
25
-
26
-
27
-
28
-
29
-
30
-
31
-
32
-
33
-
34
-
35
-
36
-
37
-
38
-
39
-
40
-
41
-
42
-
43
-
44
-
45
-
46
-
47
-
48
-
 49
49 -
 50
50 -
 51
51 -
 52
52 -
 53
53 -
 54
54 -
 55
55 -
 56
56 -
 57
57 -
 58
58 -
 59
59 -
60
-
61
-
62
-
63
-
64
-
65
-
66
-
67
-
68
-
69
-
70
-
71
-
72
-
73
-
74
-
75
-
76
-
77
-
78
-
79
-
80
-
81
-
82
 |
 |
2.
Remove five Phillips M2.0 × 4.0 screws
(1)
from the system board.
3.
Remove three Phillips M2.0 × 3.5 screws
(2)
from the system board.
4.
Remove from the I/O bracket
(3)
from the system board.
5.
Remove the system board from the computer
(4)
.
To install the system board, reverse this procedure.
Infrared (IR) board
To remove the IR board, use this procedure and illustration.
48
Chapter 5
Removal and replacement procedures for authorized service provider parts