HP OfficeJet Pro 8020 User Guide - Page 42
Print photos, Paper/Quality
 |
View all HP OfficeJet Pro 8020 manuals
Add to My Manuals
Save this manual to your list of manuals |
Page 42 highlights
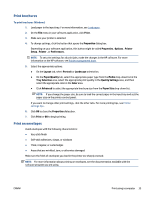
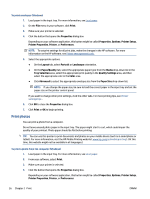
To print envelopes (Windows) 1. Load paper in the input tray. For more information, see Load paper. 2. On the File menu in your software, click Print. 3. Make sure your printer is selected. 4. Click the button that opens the Properties dialog box. Depending on your software application, this button might be called Properties, Options, Printer Setup, Printer Properties, Printer, or Preferences. NOTE: To set print settings for all print jobs, make the changes in the HP software. For more information on the HP software, see Printer management tools. 5. Select the appropriate options. ● On the Layout tab, select Portrait or Landscape orientation. ● On the Paper/Quality tab, select the appropriate paper type from the Media drop-down list in the Tray Selection area, select the appropriate print quality in the Quality Settings area, and then select the appropriate color in the Color area. ● Click Advanced to select the appropriate envelope size from the Paper Size drop-down list. NOTE: If you change the paper size, be sure to load the correct paper in the input tray and set the paper size on the printer control panel. If you want to change other print settings, click the other tabs. For more printing tips, see Printer settings tips . 6. Click OK to close the Properties dialog box. 7. Click Print or OK to begin printing. Print photos You can print a photo from a computer. Do not leave unused photo paper in the input tray. The paper might start to curl, which could impair the quality of your printout. Photo paper should be flat before printing. TIP: You can use this printer to print documents and photos on your mobile device (such as a smartphone or tablet). For more information, visit the HP Mobile Printing website ( www.hp.com/go/mobileprinting ). (At this time, this website might not be available in all languages.) To print a photo from the computer (Windows) 1. Load paper in the input tray. For more information, see Load paper. 2. From your software, select Print. 3. Make sure your printer is selected. 4. Click the button that opens the Properties dialog box. Depending on your software application, this button might be called Properties, Options, Printer Setup, Printer Properties, Printer, or Preferences. 36 Chapter 2 Print ENWW
-
 1
1 -
2
-
3
-
4
-
5
-
6
-
7
-
8
-
9
-
10
-
11
-
12
-
13
-
14
-
15
-
16
-
17
-
18
-
19
-
20
-
21
-
22
-
23
-
24
-
25
-
26
-
27
-
28
-
29
-
30
-
31
-
32
-
33
-
34
-
35
-
36
-
 37
37 -
 38
38 -
 39
39 -
 40
40 -
 41
41 -
 42
42 -
 43
43 -
 44
44 -
 45
45 -
 46
46 -
 47
47 -
48
-
49
-
50
-
51
-
52
-
53
-
54
-
55
-
56
-
57
-
58
-
59
-
60
-
61
-
62
-
63
-
64
-
65
-
66
-
67
-
68
-
69
-
70
-
71
-
72
-
73
-
74
-
75
-
76
-
77
-
78
-
79
-
80
-
81
-
82
-
83
-
84
-
85
-
86
-
87
-
88
-
89
-
90
-
91
-
92
-
93
-
94
-
95
-
96
-
97
-
98
-
99
-
100
-
101
-
102
-
103
-
104
-
105
-
106
-
107
-
108
-
109
-
110
-
111
-
112
-
113
-
114
-
115
-
116
-
117
-
118
-
119
-
120
-
121
-
122
-
123
-
124
-
125
-
126
-
127
-
128
-
129
-
130
-
131
-
132
-
133
-
134
-
135
-
136
-
137
-
138
-
139
-
140
-
141
-
142
-
143
-
144
-
145
-
146
-
147
-
148
-
149
-
150
-
151
-
152
-
153
-
154
-
155
-
156
-
157
-
158
-
159
-
160
-
161
-
162
-
163
-
164
-
165
-
166
-
167
-
168
-
169
-
170
-
171
-
172
-
173
-
174
-
175
-
176
-
177
-
178
-
179
-
180
-
181
-
182
-
183
-
184
-
185
-
186
-
187
-
188
-
189
-
190
-
191
-
192
-
193
-
194
-
195
-
196
-
197
-
198
-
199
-
200
-
201
-
202
-
203
-
204
-
205
 |
 |
