HP OfficeJet Pro 8020 User Guide - Page 72
Delete phone book contacts, Phone Book, Group, Plus Sign, Number of Members, Select, Create, Delete
 |
View all HP OfficeJet Pro 8020 manuals
Add to My Manuals
Save this manual to your list of manuals |
Page 72 highlights
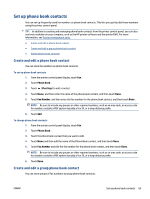
To set up group phone book contacts NOTE: Before you can create a group phone book contact, you must have already created at least one phone book contact. 1. From the printer control panel display, touch Fax . 2. Touch Phone Book , then touch and select ( Group ) to switch to the group phone book. 3. Touch (Plus Sign) to add a group. 4. Touch Name, and then enter the name of the group, and then touch Done . 5. Touch Number of Members, select the phone book contacts you want to include in this group, and then touch Select. 6. Touch Create. To change group phone book contacts 1. From the printer control panel display, touch Fax . 2. Touch Phone Book , then touch and select ( Group ) to switch to the group phone book. 3. Touch the group phone book contact that you want to edit. 4. Touch Name and then edit the name of the group phone book contact, and then touch Done . 5. Touch Number of Members. 6. If you want to add a contact to the group, touch Select. (Plus Sign). Touch a contact name, and then touch NOTE: If you want to remove a contact from the group, touch to deselect the contact. 7. Touch Done . Delete phone book contacts You can delete phone book contacts or group phone book contacts. To delete phone book contacts 1. From the printer control panel display, touch Fax . 2. Touch Phone Book . 3. Touch the name of the phone book contact you want to delete. 4. Touch Delete. 5. Touch Yes to confirm. To delete group phone book contacts 1. From the printer control panel display, touch Fax . 2. Touch Phone Book , then touch and select ( Group ) to switch to the group phone book. 66 Chapter 4 Fax ENWW
-
 1
1 -
2
-
3
-
4
-
5
-
6
-
7
-
8
-
9
-
10
-
11
-
12
-
13
-
14
-
15
-
16
-
17
-
18
-
19
-
20
-
21
-
22
-
23
-
24
-
25
-
26
-
27
-
28
-
29
-
30
-
31
-
32
-
33
-
34
-
35
-
36
-
37
-
38
-
39
-
40
-
41
-
42
-
43
-
44
-
45
-
46
-
47
-
48
-
49
-
50
-
51
-
52
-
53
-
54
-
55
-
56
-
57
-
58
-
59
-
60
-
61
-
62
-
63
-
64
-
65
-
66
-
 67
67 -
 68
68 -
 69
69 -
 70
70 -
 71
71 -
 72
72 -
 73
73 -
 74
74 -
 75
75 -
 76
76 -
 77
77 -
78
-
79
-
80
-
81
-
82
-
83
-
84
-
85
-
86
-
87
-
88
-
89
-
90
-
91
-
92
-
93
-
94
-
95
-
96
-
97
-
98
-
99
-
100
-
101
-
102
-
103
-
104
-
105
-
106
-
107
-
108
-
109
-
110
-
111
-
112
-
113
-
114
-
115
-
116
-
117
-
118
-
119
-
120
-
121
-
122
-
123
-
124
-
125
-
126
-
127
-
128
-
129
-
130
-
131
-
132
-
133
-
134
-
135
-
136
-
137
-
138
-
139
-
140
-
141
-
142
-
143
-
144
-
145
-
146
-
147
-
148
-
149
-
150
-
151
-
152
-
153
-
154
-
155
-
156
-
157
-
158
-
159
-
160
-
161
-
162
-
163
-
164
-
165
-
166
-
167
-
168
-
169
-
170
-
171
-
172
-
173
-
174
-
175
-
176
-
177
-
178
-
179
-
180
-
181
-
182
-
183
-
184
-
185
-
186
-
187
-
188
-
189
-
190
-
191
-
192
-
193
-
194
-
195
-
196
-
197
-
198
-
199
-
200
-
201
-
202
-
203
-
204
-
205
 |
 |