HP Pavilion Media Center m7600 HP Media Center PC - Software Guide - Page 92
Burning a video project to disc, Sonic MyDVD Help
 |
View all HP Pavilion Media Center m7600 manuals
Add to My Manuals
Save this manual to your list of manuals |
Page 92 highlights
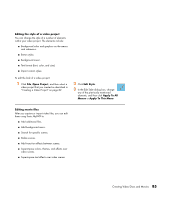
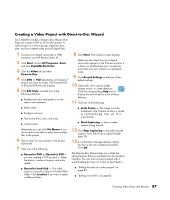
To edit your video files: 1 Click File, Open Project, and then select a video project that you created as described in "Creating a Video Project" on page 82. 2 Click Edit Movie and skip to step 3. 3 If you have already captured video files for this project, they appear along the bottom as a storyboard. If you have video files on your hard disk drive you would like to add to this project, click Add Files. 4 Click one of the four tabs (Fades and dissolves, Filters, Text, or Themes and backgrounds) next to the preview screen. 5 Drag and drop any of the effects over scenes (or between them for transitions) in the storyboard. 6 Click OK to save the edits. For more information about any of the editing features, click Help and then Sonic MyDVD Help from within the Edit window. Burning a video project to disc After you are satisfied with the contents and style of your video project, you can burn it to a DVD or VCD disc as follows: 1 Click File, Open Project, and then select a video project that you created as described in "Creating a Video Project" on page 82. 2 In the Quality area, set the recording quality and the DVD or VCD type: 3 Insert the selected type of disc into the appropriate drive tray, close it, and click Burn. For detailed information about DVD and VCD recording quality and time, see: ■ The quality settings range from HQ (the highest quality, but uses the most disc space), to EP (lowest quality, but you can fit more files). ■ "Video Quality and Disc Size" on page 88. ■ "DVD Recording Time" on page 89. As you select different quality settings, the disc space remaining indicator displays how much blank space there is on the disc for this mode. ■ The DVD formats include 2xDVD (8.5GB) (Double-layer), DVD (4.7GB) (the default setting), DVD-RAM (2.6GB), and DVD (1.4GB). Some of these formats may not be supported by your model of PC. 86 HP Media Center PC Software Guide
-
 1
1 -
2
-
3
-
4
-
5
-
6
-
7
-
8
-
9
-
10
-
11
-
12
-
13
-
14
-
15
-
16
-
17
-
18
-
19
-
20
-
21
-
22
-
23
-
24
-
25
-
26
-
27
-
28
-
29
-
30
-
31
-
32
-
33
-
34
-
35
-
36
-
37
-
38
-
39
-
40
-
41
-
42
-
43
-
44
-
45
-
46
-
47
-
48
-
49
-
50
-
51
-
52
-
53
-
54
-
55
-
56
-
57
-
58
-
59
-
60
-
61
-
62
-
63
-
64
-
65
-
66
-
67
-
68
-
69
-
70
-
71
-
72
-
73
-
74
-
75
-
76
-
77
-
78
-
79
-
80
-
81
-
82
-
83
-
84
-
85
-
86
-
 87
87 -
 88
88 -
 89
89 -
 90
90 -
 91
91 -
 92
92 -
 93
93 -
 94
94 -
 95
95 -
 96
96 -
 97
97 -
98
-
99
-
100
-
101
-
102
-
103
-
104
-
105
-
106
-
107
-
108
-
109
-
110
-
111
-
112
-
113
-
114
-
115
-
116
-
117
-
118
-
119
-
120
-
121
-
122
-
123
-
124
-
125
-
126
-
127
-
128
 |
 |
