HP Photosmart 720 HP Photosmart 720 series digital camera - (English) User Gui - Page 38
Date & time, Welcome screen, Setup, Setting the date and, This Image, HP Logo
 |
View all HP Photosmart 720 manuals
Add to My Manuals
Save this manual to your list of manuals |
Page 38 highlights
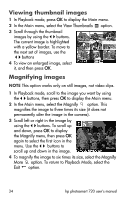
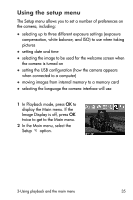
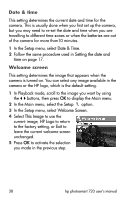
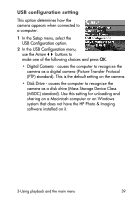
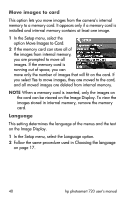
Date & time This setting determines the current date and time for the camera. This is usually done when you first set up the camera, but you may need to re-set the date and time when you are travelling to different time zones or when the batteries are out of the camera for more than10 minutes. 1 In the Setup menu, select Date & Time. 2 Follow the same procedure used in Setting the date and time on page 17. Welcome screen This setting determines the image that appears when the camera is turned on. You can select any image available in the camera or the HP logo, which is the default setting. 1 In Playback mode, scroll to the image you want by using the buttons, then press OK to display the Main menu. 2 In the Main menu, select the Setup option. 3 In the Setup menu, select Welcome Screen. 4 Select This Image to use the current image, HP Logo to return to the factory setting, or Exit to leave the current welcome screen unchanged. 5 Press OK to activate the selection you made in the previous step. 38 hp photosmart 720 user's manual
-
 1
1 -
2
-
3
-
4
-
5
-
6
-
7
-
8
-
9
-
10
-
11
-
12
-
13
-
14
-
15
-
16
-
17
-
18
-
19
-
20
-
21
-
22
-
23
-
24
-
25
-
26
-
27
-
28
-
29
-
30
-
31
-
32
-
 33
33 -
 34
34 -
 35
35 -
 36
36 -
 37
37 -
 38
38 -
 39
39 -
 40
40 -
 41
41 -
 42
42 -
 43
43 -
44
-
45
-
46
-
47
-
48
-
49
-
50
-
51
-
52
-
53
-
54
-
55
-
56
-
57
-
58
-
59
-
60
-
61
-
62
-
63
-
64
-
65
-
66
-
67
-
68
-
69
-
70
-
71
-
72
-
73
-
74
-
75
-
76
-
77
-
78
-
79
-
80
-
81
-
82
-
83
-
84
-
85
-
86
-
87
-
88
 |
 |