HP Photosmart C6300 Basic Guide - Page 33
Step 2: Make sure that the HP All-in-One is connected to your network - windows 8
 |
View all HP Photosmart C6300 manuals
Add to My Manuals
Save this manual to your list of manuals |
Page 33 highlights
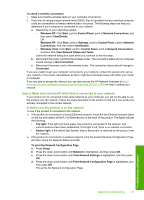
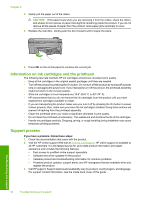
To check a wireless connection 1. Make sure that the wireless radio on your computer is turned on. 2. If you are not using a unique network name (SSID), then it is possible that your wireless computer could be connected to a nearby network that is not yours. The following steps can help you determine if your computer is connected to your network. a. Depending on your operating system: • Windows XP: Click Start, point to Control Panel, point to Network Connections, and then select View/Details. OR Windows XP: Click Start, point to Settings, point to Control Panel, point to Network Connections, and then select View/Details. • Windows Vista: Click Start, point to Control Panel, point to Network Connections, and then click View Network Status and Tasks. Leave the network dialog box open while you continue to the next step. b. Disconnect the power cord from the wireless router. The connection status of your computer should change to Not Connected. c. Reconnect the power cord to the wireless router. The connection status should change to Connected. If you are unable to get your computer connected to your network, contact the person who set up your network or the router manufacturer as there might be a hardware issue with either your router or computer. If you are able to access the Internet, you can also access the HP Network Assistant at http:// www.hp.com/sbso/wireless/tools-setup.html?jumpid=reg_R1002_USEN for help in setting up a network. Step 2: Make sure that the HP All-in-One is connected to your network If your product is not connected to the same network as your computer, you will not be able to use the product over the network. Follow the steps described in this section to find out if your product is actively connected to the correct network. A: Make sure the product is on the network To see if the product is connected to the network: ▲ If the product is connected to a wired (Ethernet) network, check the two Ethernet indicator lights on the top and bottom of the RJ-45 Ethernet jack on the back of the product. The lights indicate the following: • Top light: If the light is lit solid green, the product is connected to the network, and communications have been established. If the light is off, there is no network connection. • Bottom light: If the yellow light flashes, data is being sent or received by the product over the network. ▲ If the product is connected to a wireless network, print the product Network Configuration Page, and then check the Network Status and URL. To print the Network Configuration Page a. Press Setup. b. Press the down arrow button until Network is highlighted, and then press OK. c. Press the down arrow button until View Network Settings is highlighted, and then press OK. d. Press the down arrow button until Print Network Configuration Page is highlighted, and then press OK. This prints the Network Configuration Page. Troubleshooting and support Network troubleshooting 31
-
 1
1 -
2
-
3
-
4
-
5
-
6
-
7
-
8
-
9
-
10
-
11
-
12
-
13
-
14
-
15
-
16
-
17
-
18
-
19
-
20
-
21
-
22
-
23
-
24
-
25
-
26
-
27
-
 28
28 -
 29
29 -
 30
30 -
 31
31 -
 32
32 -
 33
33 -
 34
34 -
 35
35 -
 36
36 -
 37
37 -
 38
38 -
39
 |
 |
