HP Photosmart M23 HP Photosmart M22/23 Digital Camera with HP Instant Share - - Page 112
Configuring the Camera as a Disk Drive, Disk Drive, Setup Menu, Live View/Playback
 |
View all HP Photosmart M23 manuals
Add to My Manuals
Save this manual to your list of manuals |
Page 112 highlights
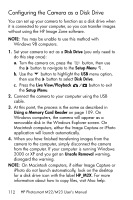
Configuring the Camera as a Disk Drive You can set up your camera to function as a disk drive when it is connected to your computer, so you can transfer images without using the HP Image Zone software. NOTE: You may be unable to use this method with Windows 98 computers. 1. Set your camera to act as a Disk Drive (you only need to do this step once): a. Turn the camera on, press the button, then use the button to navigate to the Setup Menu . b. Use the button to highlight the USB menu option, then use the button to select Disk Drive. c. Press the Live View/Playback the Setup Menu. button to exit 2. Connect the camera to your computer using the USB cable. 3. At this point, the process is the same as described in Using a Memory Card Reader on page 109. On Windows computers, the camera will appear as a removable disk in the Windows Explorer screen. On Macintosh computers, either the Image Capture or iPhoto application will launch automatically. 4. When you have finished transferring images from the camera to the computer, simply disconnect the camera from the computer. If your computer is running Windows 2000 or XP and you get an Unsafe Removal warning, disregard the warning. NOTE: On Macintosh computers, if either Image Capture or iPhoto do not launch automatically, look on the desktop for a disk drive icon with the label HP_M2X. For more information about how to copy files, visit Mac help. 112 HP Photosmart M22/M23 User's Manual
-
 1
1 -
2
-
3
-
4
-
5
-
6
-
7
-
8
-
9
-
10
-
11
-
12
-
13
-
14
-
15
-
16
-
17
-
18
-
19
-
20
-
21
-
22
-
23
-
24
-
25
-
26
-
27
-
28
-
29
-
30
-
31
-
32
-
33
-
34
-
35
-
36
-
37
-
38
-
39
-
40
-
41
-
42
-
43
-
44
-
45
-
46
-
47
-
48
-
49
-
50
-
51
-
52
-
53
-
54
-
55
-
56
-
57
-
58
-
59
-
60
-
61
-
62
-
63
-
64
-
65
-
66
-
67
-
68
-
69
-
70
-
71
-
72
-
73
-
74
-
75
-
76
-
77
-
78
-
79
-
80
-
81
-
82
-
83
-
84
-
85
-
86
-
87
-
88
-
89
-
90
-
91
-
92
-
93
-
94
-
95
-
96
-
97
-
98
-
99
-
100
-
101
-
102
-
103
-
104
-
105
-
106
-
 107
107 -
 108
108 -
 109
109 -
 110
110 -
 111
111 -
 112
112 -
 113
113 -
 114
114 -
 115
115 -
 116
116 -
 117
117 -
118
-
119
-
120
-
121
-
122
-
123
-
124
-
125
-
126
-
127
-
128
-
129
-
130
-
131
-
132
-
133
-
134
-
135
-
136
-
137
-
138
-
139
-
140
-
141
-
142
-
143
-
144
-
145
-
146
-
147
-
148
-
149
-
150
-
151
-
152
-
153
-
154
-
155
-
156
-
157
-
158
-
159
-
160
-
161
-
162
-
163
-
164
-
165
-
166
-
167
-
168
-
169
-
170
-
171
-
172
-
173
-
174
-
175
-
176
-
177
-
178
-
179
-
180
 |
 |
