HP Photosmart M23 HP Photosmart M22/23 Digital Camera with HP Instant Share - - Page 75
Record Audio
 |
View all HP Photosmart M23 manuals
Add to My Manuals
Save this manual to your list of manuals |
Page 75 highlights
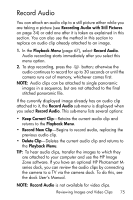
Record Audio You can attach an audio clip to a still picture either while you are taking a picture (see Recording Audio with Still Pictures on page 34) or add one after it is taken as explained in this section. You can also use the method in this section to replace an audio clip already attached to an image. 1. In the Playback Menu (page 67), select Record Audio. Audio recording starts immediately after you select this menu option. 2. To stop recording, press the button; otherwise the audio continues to record for up to 30 seconds or until the camera runs out of memory, whichever comes first. NOTE: Audio clips can be attached to single panoramic images in a sequence, but are not attached to the final stitched panoramic file. If the currently displayed image already has an audio clip attached to it, the Record Audio sub-menu is displayed when you select Record Audio. This sub-menu lists several options: • Keep Current Clip-Retains the current audio clip and returns to the Playback Menu. • Record New Clip-Begins to record audio, replacing the previous audio clip. • Delete Clip-Deletes the current audio clip and returns to the Playback Menu. TIP: To hear audio clips, transfer the images to which they are attached to your computer and use the HP Image Zone software. If you have an optional HP Photosmart Mseries dock, you can review the audio clips by connecting the camera to a TV via the camera dock. To do this, see the dock User's Manual. NOTE: Record Audio is not available for video clips. Reviewing Images and Video Clips 75
-
 1
1 -
2
-
3
-
4
-
5
-
6
-
7
-
8
-
9
-
10
-
11
-
12
-
13
-
14
-
15
-
16
-
17
-
18
-
19
-
20
-
21
-
22
-
23
-
24
-
25
-
26
-
27
-
28
-
29
-
30
-
31
-
32
-
33
-
34
-
35
-
36
-
37
-
38
-
39
-
40
-
41
-
42
-
43
-
44
-
45
-
46
-
47
-
48
-
49
-
50
-
51
-
52
-
53
-
54
-
55
-
56
-
57
-
58
-
59
-
60
-
61
-
62
-
63
-
64
-
65
-
66
-
67
-
68
-
69
-
 70
70 -
 71
71 -
 72
72 -
 73
73 -
 74
74 -
 75
75 -
 76
76 -
 77
77 -
 78
78 -
 79
79 -
 80
80 -
81
-
82
-
83
-
84
-
85
-
86
-
87
-
88
-
89
-
90
-
91
-
92
-
93
-
94
-
95
-
96
-
97
-
98
-
99
-
100
-
101
-
102
-
103
-
104
-
105
-
106
-
107
-
108
-
109
-
110
-
111
-
112
-
113
-
114
-
115
-
116
-
117
-
118
-
119
-
120
-
121
-
122
-
123
-
124
-
125
-
126
-
127
-
128
-
129
-
130
-
131
-
132
-
133
-
134
-
135
-
136
-
137
-
138
-
139
-
140
-
141
-
142
-
143
-
144
-
145
-
146
-
147
-
148
-
149
-
150
-
151
-
152
-
153
-
154
-
155
-
156
-
157
-
158
-
159
-
160
-
161
-
162
-
163
-
164
-
165
-
166
-
167
-
168
-
169
-
170
-
171
-
172
-
173
-
174
-
175
-
176
-
177
-
178
-
179
-
180
 |
 |
