HP Visualize b1000 hp Visualize b1000, c3000, c3600 workstations parts replace - Page 12
Front Panel
 |
View all HP Visualize b1000 manuals
Add to My Manuals
Save this manual to your list of manuals |
Page 12 highlights
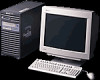
Parts Removal and Replacement Front Panel Front Panel This section describes how to remove and replace the Front Panel. NOTE Prior to removing the Front Panel, the Terminators and Cables need to be removed from the back of the workstation. See the appropriate section(s) for the steps on how to remove this component. Removing the Front Panel 1. Facing the front of the workstation, unlock the front panel if necessary, and open it by pressing the two latch buttons located on the right side of the panel, as shown below. Figure 2-3. Opening and Removing the Front Panel Front-Panel Latch Buttons 2. Swing the panel to the left until it unhinges, and then lift it away from the workstation. Set it aside. 12 Chapter 2
-
 1
1 -
2
-
3
-
4
-
5
-
6
-
 7
7 -
 8
8 -
 9
9 -
 10
10 -
 11
11 -
 12
12 -
 13
13 -
 14
14 -
 15
15 -
 16
16 -
 17
17 -
18
-
19
-
20
-
21
-
22
-
23
-
24
-
25
-
26
-
27
-
28
-
29
-
30
-
31
-
32
-
33
-
34
-
35
-
36
-
37
-
38
-
39
-
40
-
41
-
42
-
43
-
44
-
45
-
46
-
47
-
48
 |
 |

12
Chapter 2
Parts Removal and Replacement
Front Panel
Front Panel
This section describes how to remove and replace the Front Panel.
NOTE
Prior to removing the Front Panel, the Terminators and Cables need to be
removed from the back of the workstation. See the appropriate section(s) for
the steps on how to remove this component.
Removing the Front Panel
1.
Facing the front of the workstation, unlock the front panel if necessary, and open it by
pressing the two latch buttons located on the right side of the panel, as shown below.
Figure 2-3. Opening and Removing the Front Panel
2. Swing the panel to the left until it unhinges, and then lift it away from the workstation.
Set it aside.
Front-Panel
Latch Buttons