HP Visualize b1000 hp Visualize b1000, c3000, c3600 workstations parts replace - Page 44
Removing and Replacing the System Board Cooling Fans
 |
View all HP Visualize b1000 manuals
Add to My Manuals
Save this manual to your list of manuals |
Page 44 highlights
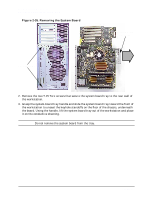
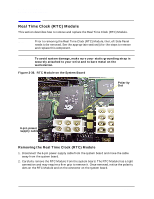
Parts Removal and Replacement Removing and Replacing the System Board Cooling Fans Removing and Replacing the System Board Cooling Fans This section describes how to remove and replace the System Board Cooling Fans. NOTE Prior to removing the System Board Cooling Fans, the Left Side Panel, Power Supply, and Air Divider need to be removed. See the appropriate section(s) for the steps on removing and replacing these components. Figure 2-37. Top Fan Rivets Top Fan Rivets Fan #3 Lower Fan Rivets Fan #2 Lower Fan Rivets NOTE When the fan failed, it was identified on the front panel display. Fan #2 refers to the lower fan and Fan #3 refers to the top fan. 1. Locate the fan that failed. 2. While holding the faulty fan, pull out the plastic rivets from the back of the workstation. Snug rivets may need to be pried out with a tool. For the top fan, pull it toward the front of the workstation to remove it. For the lower fan, slide it toward the bottom of the workstation and lift it out. 44 Chapter 2
-
 1
1 -
2
-
3
-
4
-
5
-
6
-
7
-
8
-
9
-
10
-
11
-
12
-
13
-
14
-
15
-
16
-
17
-
18
-
19
-
20
-
21
-
22
-
23
-
24
-
25
-
26
-
27
-
28
-
29
-
30
-
31
-
32
-
33
-
34
-
35
-
36
-
37
-
38
-
 39
39 -
 40
40 -
 41
41 -
 42
42 -
 43
43 -
 44
44 -
 45
45 -
 46
46 -
 47
47 -
 48
48
 |
 |
