HP Z210 HP Z210 Workstation Series User Guide - Page 53
Installing a hard disk drive, Installing an HDD in an HP Z210 CMT Workstation
 |
View all HP Z210 manuals
Add to My Manuals
Save this manual to your list of manuals |
Page 53 highlights
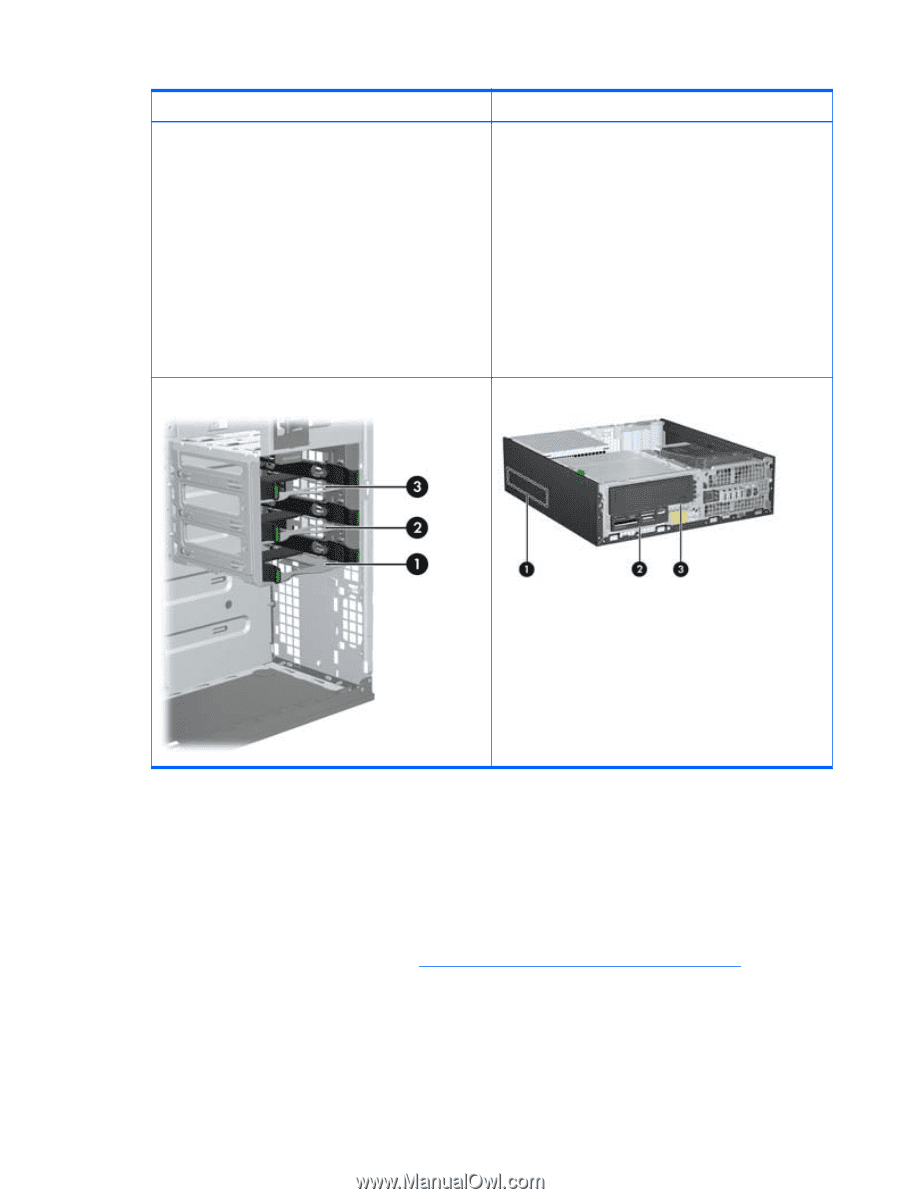
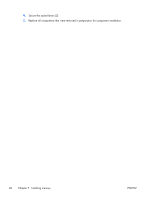
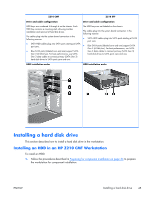
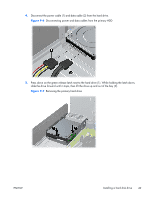
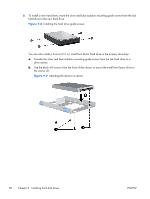
Z210 CMT Z210 SFF Drive and cable configuration Drive and cable configuration HDD bays are numbered 4 through 6 on the chassis. Each HDD bay contains a mounting sled, allowing tool-less installation and removal of hard disk drives. The cables plug into the system board connectors in the following manner: ● SATA HDD cables plug into SATA ports starting at SATA port zero. ● Blue SATA ports (labeled zero and one) support SATA Gen 3 (6 Gbit/sec). For best performance, use SATA Gen 3 data cables to connect primary (SATA Gen 3) hard disk drives to SATA ports zero and one. The HDD bays are not labeled on the chassis. The cables plug into the system board connectors in the following manner: ● SATA HDD cables plug into SATA ports starting at SATA port zero. ● Blue SATA ports (labeled zero and one) support SATA Gen 3 (6 Gbit/sec). For best performance, use SATA Gen 3 data cables to connect primary (SATA Gen 3) hard disk drives to SATA ports zero and one. HDD installation order HDD installation order Installing a hard disk drive This section describes how to install a hard disk drive in the workstation. Installing an HDD in an HP Z210 CMT Workstation To install an HDD: 1. Follow the procedures described in Preparing for component installation on page 34 to prepare the workstation for component installation. ENWW Installing a hard disk drive 45
-
 1
1 -
2
-
3
-
4
-
5
-
6
-
7
-
8
-
9
-
10
-
11
-
12
-
13
-
14
-
15
-
16
-
17
-
18
-
19
-
20
-
21
-
22
-
23
-
24
-
25
-
26
-
27
-
28
-
29
-
30
-
31
-
32
-
33
-
34
-
35
-
36
-
37
-
38
-
39
-
40
-
41
-
42
-
43
-
44
-
45
-
46
-
47
-
 48
48 -
 49
49 -
 50
50 -
 51
51 -
 52
52 -
 53
53 -
 54
54 -
 55
55 -
 56
56 -
 57
57 -
 58
58 -
59
-
60
-
61
-
62
-
63
-
64
-
65
-
66
-
67
-
68
 |
 |