HP Z210 HP Z210 Workstation Series User Guide - Page 64
Installing an optical drive in an HP Z210 SFF Workstation, CAUTION,
 |
View all HP Z210 manuals
Add to My Manuals
Save this manual to your list of manuals |
Page 64 highlights
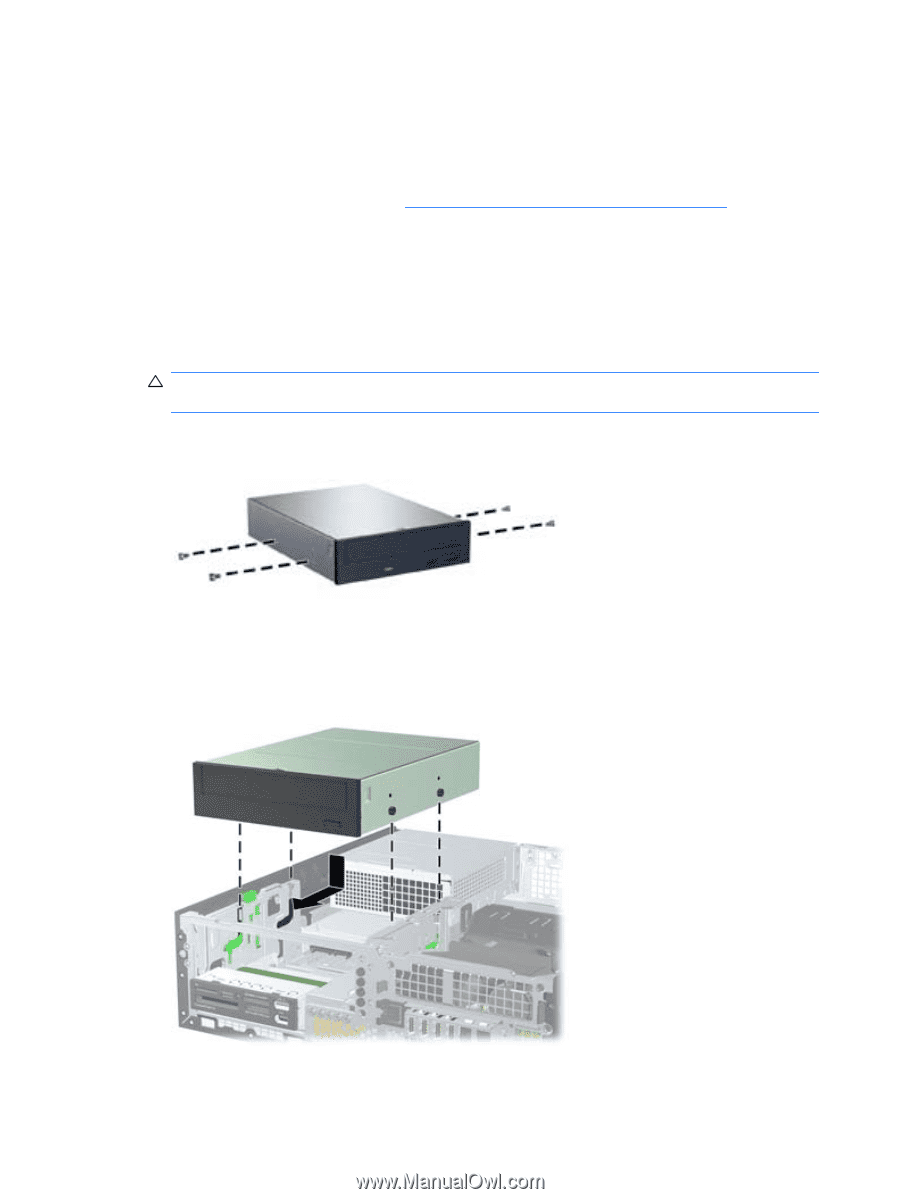
Installing an optical drive in an HP Z210 SFF Workstation To install or re-install an optical drive in an HP Z210 SFF Workstation: 1. Follow the procedures described in Preparing for component installation on page 34 to prepare the workstation for component installation. 2. Remove the front bezel. 3. If necessary remove the bezel blank. 4. Install four M3 metric guide screws in the lower holes on each side of the drive. Either re-use the screws used by your previous optical drive or use the extra HP-provided guide screws mounted on the front of the chassis. CAUTION: Use only 5-mm long screws as guide screws. Longer screws can damage the internal components of the drive. Figure 10-6 Installing Guide Screws in the Optical Drive 5. Position the guide screws on the drive into the J-slots in the drive bay. Then slide the drive toward the front of the computer until it locks into place. Figure 10-7 Installing the Optical Drive 56 Chapter 10 Installing optical disk drives ENWW
-
 1
1 -
2
-
3
-
4
-
5
-
6
-
7
-
8
-
9
-
10
-
11
-
12
-
13
-
14
-
15
-
16
-
17
-
18
-
19
-
20
-
21
-
22
-
23
-
24
-
25
-
26
-
27
-
28
-
29
-
30
-
31
-
32
-
33
-
34
-
35
-
36
-
37
-
38
-
39
-
40
-
41
-
42
-
43
-
44
-
45
-
46
-
47
-
48
-
49
-
50
-
51
-
52
-
53
-
54
-
55
-
56
-
57
-
58
-
 59
59 -
 60
60 -
 61
61 -
 62
62 -
 63
63 -
 64
64 -
 65
65 -
 66
66 -
 67
67 -
 68
68
 |
 |