HP c3700 hp Visualize b2000 UNIX workstation service handbook (a5983-90039) - Page 34
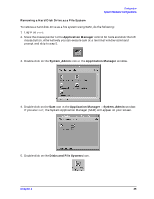
Application Manager -- System_Admin
 |
View all HP c3700 manuals
Add to My Manuals
Save this manual to your list of manuals |
Page 34 highlights
Configuration System Hardware Configurations 4. Double-click on the Sam icon in the Application Manager -- System_Admin window. If you are root, the System Application Manager (SAM) will appear on the screen. 5. Double-click on the Disks and File Systems icon. 6. Double-click on the Disk Devices icon. The following screen message is displayed: Scanning the system's hardware... The Disk and File Systems window opens containing a list of drives installed in this workstation. From the list of devices, choose the hard disk drive you would like to configure as a file system by clicking on the device to highlight it. 7. Click on Add in the Actions menu. For this example you will select the item Not Using the Logical Volume Manager. However, you can select any appropriate item from the Actions menu. 8. Enter the mount directory name (for example, /disk1) in the Mount Directory field of the Add Disk without LVM window. 9. Click on the OK button in the Add Disk without LVM window. You will need to wait for a short time before the new file system is created and the hard disk drive is mounted. When the Add Disk without LVM window disappears and HFS appears in the Use column of the Disk and File Systems window, your task will be complete. 34 Chapter 2
-
 1
1 -
2
-
3
-
4
-
5
-
6
-
7
-
8
-
9
-
10
-
11
-
12
-
13
-
14
-
15
-
16
-
17
-
18
-
19
-
20
-
21
-
22
-
23
-
24
-
25
-
26
-
27
-
28
-
 29
29 -
 30
30 -
 31
31 -
 32
32 -
 33
33 -
 34
34 -
 35
35 -
 36
36 -
 37
37 -
 38
38 -
 39
39 -
40
-
41
-
42
-
43
-
44
-
45
-
46
-
47
-
48
-
49
-
50
-
51
-
52
-
53
-
54
-
55
-
56
-
57
-
58
-
59
-
60
-
61
-
62
-
63
-
64
-
65
-
66
-
67
-
68
-
69
-
70
-
71
-
72
-
73
-
74
-
75
-
76
-
77
-
78
-
79
-
80
-
81
-
82
-
83
-
84
-
85
-
86
-
87
-
88
-
89
-
90
-
91
-
92
-
93
-
94
-
95
-
96
-
97
-
98
-
99
-
100
-
101
-
102
-
103
-
104
-
105
-
106
-
107
-
108
-
109
-
110
-
111
-
112
-
113
-
114
-
115
-
116
-
117
-
118
-
119
-
120
-
121
-
122
-
123
-
124
-
125
-
126
-
127
-
128
-
129
-
130
-
131
-
132
-
133
-
134
-
135
-
136
-
137
-
138
-
139
-
140
-
141
-
142
-
143
-
144
-
145
-
146
-
147
-
148
-
149
-
150
-
151
-
152
-
153
-
154
-
155
-
156
-
157
-
158
-
159
-
160
-
161
-
162
-
163
-
164
-
165
-
166
-
167
-
168
-
169
-
170
-
171
-
172
-
173
-
174
-
175
-
176
-
177
-
178
-
179
-
180
-
181
-
182
-
183
-
184
-
185
-
186
-
187
-
188
-
189
-
190
-
191
-
192
-
193
-
194
-
195
-
196
-
197
-
198
-
199
-
200
-
201
-
202
-
203
-
204
 |
 |
