HP dx2310 Service Reference Guide: HP Compaq dx2310 MT/dx2318 MT Business PCs, - Page 10
Computer Setup Utilities
 |
View all HP dx2310 manuals
Add to My Manuals
Save this manual to your list of manuals |
Page 10 highlights
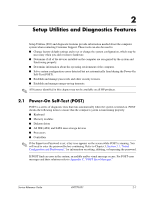
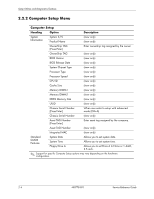
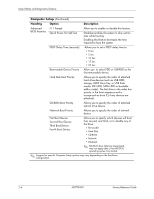
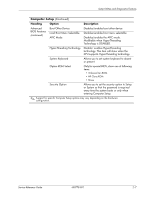
Setup Utilities and Diagnostics Features 2.2 Computer Setup Utilities Use Computer Setup Utilities (F10) to: ■ Modify or restore factory default settings. ■ Set the system date and time. ■ Set, view, change, or verify the system configuration including settings for processor, graphics, memory, audio, storage, communications, and input devices. ■ Modify the boot order of bootable devices such as hard drives, diskette drives, optical drives, USB devices. ■ Configure the boot priority of IDE (ATA) and SATA hard drive controllers. ■ Enable or disable Network Server Mode, which allows the computer to boot the operating system when the power-on password is enabled with or without a keyboard or mouse attached. When attached to the system, the keyboard and mouse remain locked until the power-on password is entered. ■ Enable supervisor password prompting during system restarts (warm boots) as well as during power-on. ■ Establish a supervisor password that controls access to Computer Setup (F10) Utility and the settings described in this section. ■ Enable or disable removable media boot ability. ■ Enable or disable removable media write ability (when supported by hardware). ■ Solve system configuration errors detected but not automatically fixed during the Power-On Self-Test (POST). ■ Execute self-tests on a specified IDE (ATA) hard drive (when supported by the drive). 2.2.1 Using Computer Setup (F10) Utilities Computer Setup can be accessed only by turning on the computer or restarting the system. To access the Computer Setup Utilities menu, complete the following steps: 1. Turn on or restart the computer. If you are in Windows, click Start > Shut Down > Restart. 2. As soon as the computer is turned on, press and hold the F10 key until you enter Computer Setup. Press Enter to bypass the title screen, if necessary. ✎ If you do not press the F10 key at the appropriate time, you must turn the computer off, then on again, and press the F10 key again to access the utility. If you are using a PS/2 keyboard, you may see a Keyboard Error message-disregard it. 2-2 490778-001 Service Reference Guide
-
 1
1 -
2
-
3
-
4
-
 5
5 -
 6
6 -
 7
7 -
 8
8 -
 9
9 -
 10
10 -
 11
11 -
 12
12 -
 13
13 -
 14
14 -
 15
15 -
16
-
17
-
18
-
19
-
20
-
21
-
22
-
23
-
24
-
25
-
26
-
27
-
28
-
29
-
30
-
31
-
32
-
33
-
34
-
35
-
36
-
37
-
38
-
39
-
40
-
41
-
42
-
43
-
44
-
45
-
46
-
47
-
48
-
49
-
50
-
51
-
52
-
53
-
54
-
55
-
56
-
57
-
58
-
59
-
60
-
61
-
62
-
63
-
64
-
65
-
66
-
67
-
68
-
69
-
70
-
71
-
72
-
73
-
74
-
75
-
76
-
77
-
78
-
79
-
80
-
81
-
82
-
83
-
84
-
85
-
86
-
87
-
88
-
89
-
90
-
91
-
92
-
93
-
94
-
95
-
96
-
97
 |
 |
