HP iPAQ rx4200 HP iPAQ Additional Product Information - Page 37
Downloading Messages, Downloading Messages from a Server, Installing an Online Address Book
 |
View all HP iPAQ rx4200 manuals
Add to My Manuals
Save this manual to your list of manuals |
Page 37 highlights
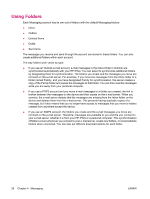
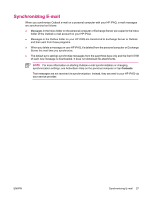
English Downloading Messages To send and receive e-mail for an Outlook E-mail account, begin synchronization through ActiveSync. Tip By default, messages you send are not saved on your HP iPAQ to help conserve memory. If you want to keep copies of sent messages, in the messaging list, tap Menu > Tools > Options > Message tab, and select the Keep copies of sent items in Sent folder check box. If your account is an Outlook E-mail or IMAP4 account, you must also select the Sent Items folder for synchronization. To do this, tap Menu > Tools > Manage Folders and select the check box next to the folder. Downloading Messages from a Server 1. Tap Start > Messaging > Menu > Switch Accounts and tap the desired account. 2. Tap Menu > Send/Receive. The messages on your HP iPAQ and e-mail server are synchronized: new messages are downloaded to the device Inbox folder, messages in the device Outbox folder are sent, and messages that have been deleted from the server are removed from the device Inbox folder. Tip If you want to read the entire message, tap Menu > Download Message while in the message window. If you are in the message list, tap and hold the message, and then tap Menu > Download Message. The message is downloaded the next time you send and receive e-mail. This also downloads message attachments if you selected those options when you set up the e-mail account. The size column in the message list displays the local size and server size of a message. Even when an entire message has been downloaded, these numbers may differ because the size of a message can vary between the server and the device. Installing an Online Address Book Many e-mail servers, including servers running Exchange Server, can verify names with an online address book, called a directory service, using Lightweight Directory Access Protocol (LDAP). When you create an e-mail account, the e-mail server's directory service is added to the Address tab, and you are given the option to enable it. After it is enabled, Messaging checks your contact list and then the directory service to verify names that you enter in the To, Cc, and Bcc fields. To enable a directory service or if you want to use additional services, follow these steps: 1. If you are adding a new account, ask your network administrator for the name of the directory service and the server. 2. Tap Start > Messaging. 3. In the message list, tap Menu > Tools > Options > Address tab. 4. In the In Contacts, get e-mail addresses from list, select which e-mail address book to check in All e-mail fields. All e-mail fields are checked first unless you select None. 5. If your e-mail server is already listed, select the server's directory service check box to enable it and tap OK. 6. If your e-mail service is not listed, tap Add. 7. In the Directory name and Server boxes, enter the LDAP directory and server names. ENWW Using Messaging 31
-
 1
1 -
2
-
3
-
4
-
5
-
6
-
7
-
8
-
9
-
10
-
11
-
12
-
13
-
14
-
15
-
16
-
17
-
18
-
19
-
20
-
21
-
22
-
23
-
24
-
25
-
26
-
27
-
28
-
29
-
30
-
31
-
 32
32 -
 33
33 -
 34
34 -
 35
35 -
 36
36 -
 37
37 -
 38
38 -
 39
39 -
 40
40 -
 41
41 -
 42
42 -
43
-
44
-
45
-
46
-
47
-
48
-
49
-
50
-
51
-
52
-
53
-
54
-
55
-
56
-
57
-
58
-
59
-
60
-
61
-
62
-
63
-
64
-
65
-
66
-
67
-
68
-
69
-
70
-
71
-
72
-
73
-
74
-
75
-
76
-
77
-
78
-
79
-
80
-
81
-
82
-
83
-
84
-
85
-
86
-
87
-
88
-
89
-
90
-
91
-
92
-
93
-
94
-
95
-
96
-
97
-
98
-
99
-
100
-
101
 |
 |