HP xp8000 HP xp8000 series digital projector - (English) Reference Guide - Page 18
To install on a table, To install on the ceiling, setup > Projector position., Front Table
 |
View all HP xp8000 manuals
Add to My Manuals
Save this manual to your list of manuals |
Page 18 highlights
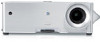
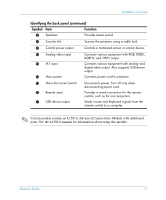
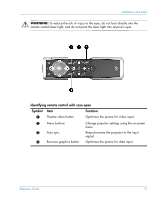
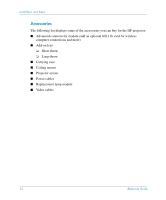
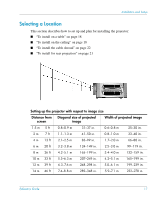
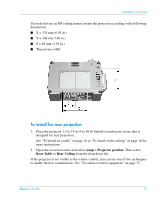
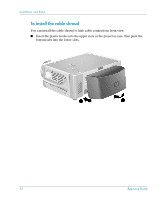
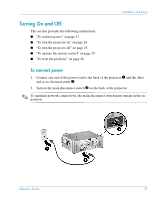
Installation and Setup If you do not want to use the distance table, you can use the following equations to help determine where to install the projector relative to the screen. Calculating projection dimensions distance from screen = A × width of screen min and max distance from screen = B width of screen = 0.8 × diagonal of screen (for 4:3 screen) projector lens at same level as bottom or top of screen A = 1.98 to 2.38 B = 1.5 to 14 m (5 to 46 ft) If your installation does not fall within these ranges, an add-on lens might be required. See "To install an add-on lens" on page 57. To install on a table 1. Place the projector on a stable platform located 1.5 to 14 m (5 to 46 ft) in front of the screen. 2. Connect all necessary cables to the projector. 3. If necessary, set the projector to match the installation. Open the on-screen menu and select setup > Projector position. Then choose Front Table from the drop-down list. To install on the ceiling Your ceiling mount might differ from the one shown in the following images. However, the installation steps are basically the same. ✎ HP recommends that a qualified carpenter or electrician install the ceiling mount. 18 Reference Guide
-
 1
1 -
2
-
3
-
4
-
5
-
6
-
7
-
8
-
9
-
10
-
11
-
12
-
 13
13 -
 14
14 -
 15
15 -
 16
16 -
 17
17 -
 18
18 -
 19
19 -
 20
20 -
 21
21 -
 22
22 -
 23
23 -
24
-
25
-
26
-
27
-
28
-
29
-
30
-
31
-
32
-
33
-
34
-
35
-
36
-
37
-
38
-
39
-
40
-
41
-
42
-
43
-
44
-
45
-
46
-
47
-
48
-
49
-
50
-
51
-
52
-
53
-
54
-
55
-
56
-
57
-
58
-
59
-
60
-
61
-
62
-
63
-
64
-
65
-
66
-
67
-
68
-
69
-
70
-
71
-
72
-
73
-
74
-
75
-
76
-
77
-
78
-
79
-
80
-
81
-
82
-
83
-
84
-
85
-
86
-
87
-
88
-
89
-
90
-
91
-
92
-
93
-
94
-
95
-
96
-
97
-
98
 |
 |