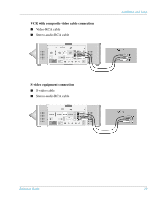
HP xp8000 HP xp8000 series digital projector - (English) Reference Guide - Page 24
To turn the projector on, The power button blinks while the projector warms up. When the lamp turns
 |
View all HP xp8000 manuals
Add to My Manuals
Save this manual to your list of manuals |
Page 24 highlights
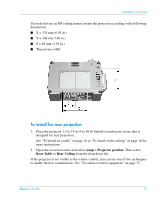
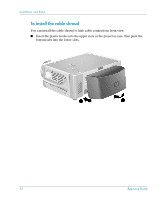
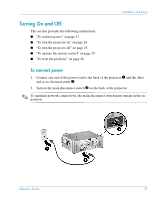
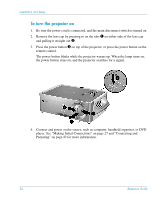
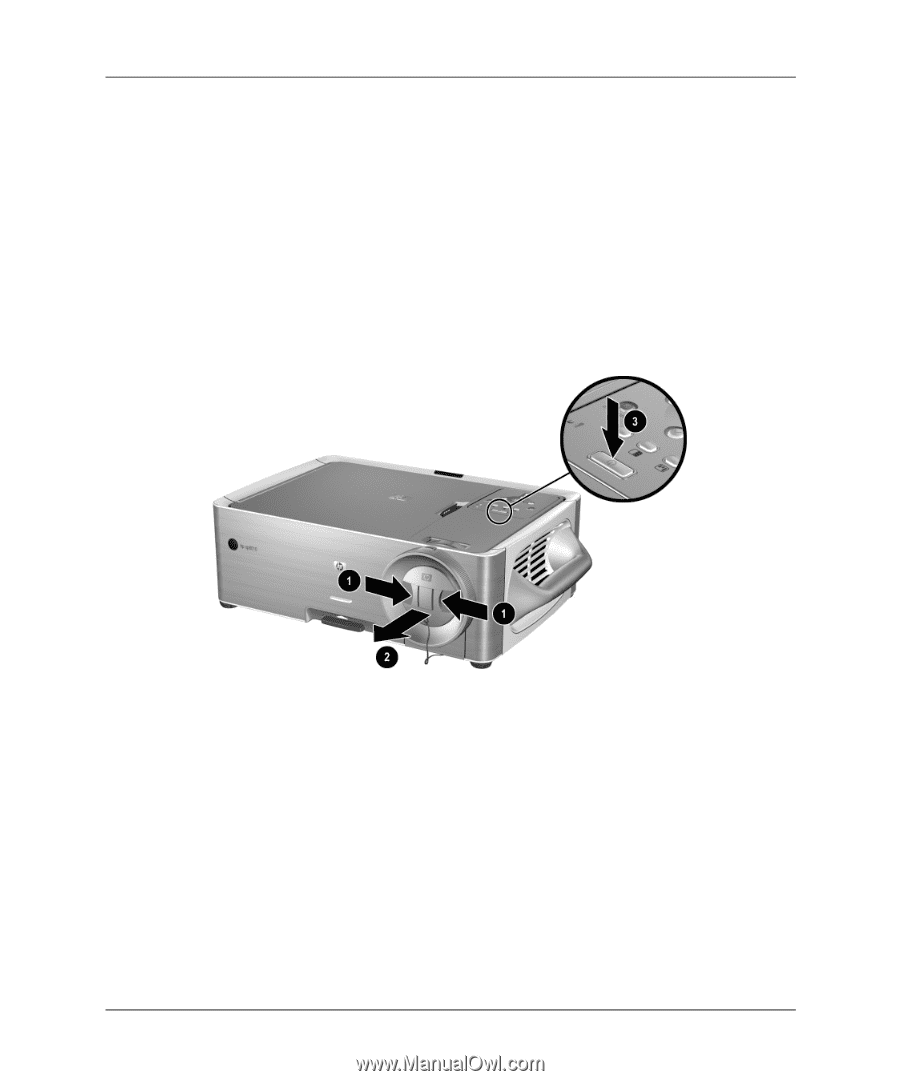
Installation and Setup To turn the projector on 1. Be sure the power cord is connected, and the main disconnect switch is turned on. 2. Remove the lens cap by pressing in on the tabs 1 on either side of the lens cap and pulling it straight out 2. 3. Press the power button 3 on top of the projector, or press the power button on the remote control. The power button blinks while the projector warms up. When the lamp turns on, the power button stays on, and the projector searches for a signal. 4. Connect and power on the source, such as computer, handheld organizer, or DVD player. See "Making Initial Connections" on page 27 and "Connecting and Preparing" on page 43 for more information. 24 Reference Guide
-
 1
1 -
2
-
3
-
4
-
5
-
6
-
7
-
8
-
9
-
10
-
11
-
12
-
13
-
14
-
15
-
16
-
17
-
18
-
 19
19 -
 20
20 -
 21
21 -
 22
22 -
 23
23 -
 24
24 -
 25
25 -
 26
26 -
 27
27 -
 28
28 -
 29
29 -
30
-
31
-
32
-
33
-
34
-
35
-
36
-
37
-
38
-
39
-
40
-
41
-
42
-
43
-
44
-
45
-
46
-
47
-
48
-
49
-
50
-
51
-
52
-
53
-
54
-
55
-
56
-
57
-
58
-
59
-
60
-
61
-
62
-
63
-
64
-
65
-
66
-
67
-
68
-
69
-
70
-
71
-
72
-
73
-
74
-
75
-
76
-
77
-
78
-
79
-
80
-
81
-
82
-
83
-
84
-
85
-
86
-
87
-
88
-
89
-
90
-
91
-
92
-
93
-
94
-
95
-
96
-
97
-
98
 |
 |
24
Reference Guide
Installation and Setup
To turn the projector on
1.
Be sure the power cord is connected, and the main disconnect switch is turned on.
2.
Remove the lens cap by pressing in on the tabs
1
on either side of the lens cap
and pulling it straight out
2
.
3.
Press the power button
3
on top of the projector, or press the power button on the
remote control.
The power button blinks while the projector warms up. When the lamp turns on,
the power button stays on, and the projector searches for a signal.
4.
Connect and power on the source, such as computer, handheld organizer, or DVD
player. See “Making Initial Connections” on page 27 and “Connecting and
Preparing” on page 43 for more information.