HP xp8000 HP xp8000 series digital projector - (English) Reference Guide - Page 21
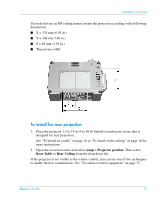
To install for rear projection, setup > Projector position., Rear Table, Rear Ceiling
 |
View all HP xp8000 manuals
Add to My Manuals
Save this manual to your list of manuals |
Page 21 highlights
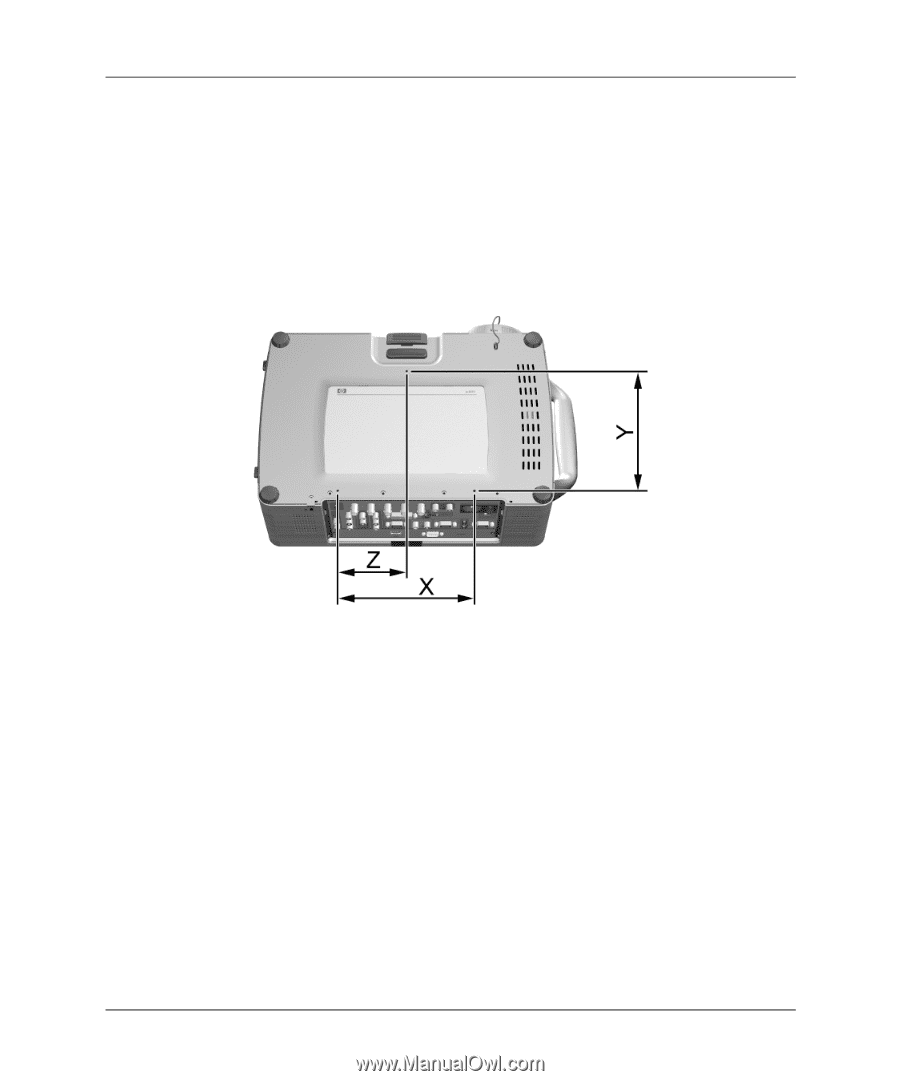
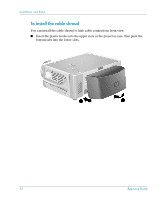
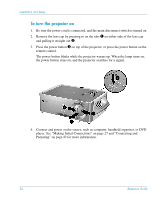
Installation and Setup If you do not use an HP ceiling mount, mount the projector according to the following dimensions: ■ X = 176 mm (6.93 in.) ■ Y = 188 mm 7.40 in.) ■ Z = 86 mm (3.39 in.) ■ Thread size = M6 To install for rear projection 1. Place the projector 1.5 to 14 m (5 to 46 ft) behind a translucent screen that is designed for rear projection. See "To install on a table" on page 18 or "To install on the ceiling" on page 18 for more instructions. 2. Open the on-screen menu and select setup > Projector position. Then select Rear Table or Rear Ceiling from the drop-down list. If the projector is not visible to the remote control, you can use one of two techniques to enable them to communicate. See "To connect control equipment" on page 33. Reference Guide 21
-
 1
1 -
2
-
3
-
4
-
5
-
6
-
7
-
8
-
9
-
10
-
11
-
12
-
13
-
14
-
15
-
 16
16 -
 17
17 -
 18
18 -
 19
19 -
 20
20 -
 21
21 -
 22
22 -
 23
23 -
 24
24 -
 25
25 -
 26
26 -
27
-
28
-
29
-
30
-
31
-
32
-
33
-
34
-
35
-
36
-
37
-
38
-
39
-
40
-
41
-
42
-
43
-
44
-
45
-
46
-
47
-
48
-
49
-
50
-
51
-
52
-
53
-
54
-
55
-
56
-
57
-
58
-
59
-
60
-
61
-
62
-
63
-
64
-
65
-
66
-
67
-
68
-
69
-
70
-
71
-
72
-
73
-
74
-
75
-
76
-
77
-
78
-
79
-
80
-
81
-
82
-
83
-
84
-
85
-
86
-
87
-
88
-
89
-
90
-
91
-
92
-
93
-
94
-
95
-
96
-
97
-
98
 |
 |