HP xp8000 HP xp8000 series digital projector - (English) Reference Guide - Page 40
Adjusting the Picture, To adjust the image according to type of picture
 |
View all HP xp8000 manuals
Add to My Manuals
Save this manual to your list of manuals |
Page 40 highlights
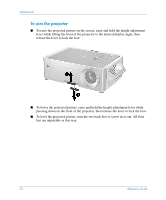
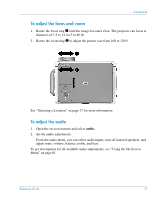
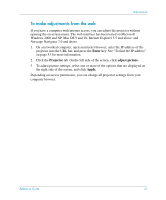
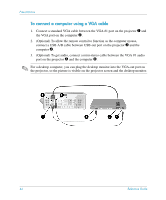
Adjustments Adjusting the Picture This section provides the following instructions: ■ "To adjust the image according to type of picture" on page 40 ■ "To adjust other image settings" on page 40 ■ "To make adjustments from the web" on page 41 To adjust the image according to type of picture Use the picture mode buttons on the projector or the remote control to optimize the image. ■ To optimize the picture for data presentations, press the business graphics button. ■ To optimize the picture for video images, press the theatre video button. ■ To maximize brightness, press the super-bright button (not available on the remote control). With this mode, the image is displayed in black and white. To adjust other image settings The on-screen menu provides many settings that allow you to fine-tune the picture. 1. Open the on-screen menu and select adjust picture. 2. Change the picture adjustments as needed. From the adjust picture menu, you can change basic and advanced picture options, such as brightness, contrast, white intensity, aspect ratio, and keystone correction. To get descriptions for all available picture adjustments, see "Using the On-Screen Menu" on page 61. ✎ To exit from any on-screen menu or adjustment, press the back button one or more times. 40 Reference Guide
-
 1
1 -
2
-
3
-
4
-
5
-
6
-
7
-
8
-
9
-
10
-
11
-
12
-
13
-
14
-
15
-
16
-
17
-
18
-
19
-
20
-
21
-
22
-
23
-
24
-
25
-
26
-
27
-
28
-
29
-
30
-
31
-
32
-
33
-
34
-
 35
35 -
 36
36 -
 37
37 -
 38
38 -
 39
39 -
 40
40 -
 41
41 -
 42
42 -
 43
43 -
 44
44 -
 45
45 -
46
-
47
-
48
-
49
-
50
-
51
-
52
-
53
-
54
-
55
-
56
-
57
-
58
-
59
-
60
-
61
-
62
-
63
-
64
-
65
-
66
-
67
-
68
-
69
-
70
-
71
-
72
-
73
-
74
-
75
-
76
-
77
-
78
-
79
-
80
-
81
-
82
-
83
-
84
-
85
-
86
-
87
-
88
-
89
-
90
-
91
-
92
-
93
-
94
-
95
-
96
-
97
-
98
 |
 |