IBM 17011RS Maintenance Manual - Page 50
Installing, removing, bezel, DS300, Models, DS400
 |
UPC - 000435304971
View all IBM 17011RS manuals
Add to My Manuals
Save this manual to your list of manuals |
Page 50 highlights
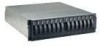
To reduce the possibility of damage from electrostatic discharge, observe the following precautions: v Limit your movement. Movement can cause static electricity to build up around you. v Wear an electrostatic-discharge wrist strap, if one is available. v Handle the device carefully, holding it by its edges or its frame. v Do not touch solder joints, pins, or exposed circuitry. v Do not leave the device where others can handle and damage it. v While the device is still in its static-protective package, touch it to an unpainted metal part of the storage subsystem for at least 2 seconds. This drains static electricity from the package and from your body. v Remove the device from its package and install it directly into the storage subsystem without setting down the device. If it is necessary to set down the device, put it back into its static-protective package. Do not place the device on the storage subsystem cover or on a metal surface. v Take additional care when handling devices during cold weather. Heating reduces indoor humidity and increases static electricity. Installing and removing the bezel on DS300 Models 1700-1RS and 1700-2RD, and DS400 Note: Before installing the bezel on the storage subsystem, install it in the rack. For more information, see the Rack Mounting Instructions that come with the storage subsystem. Complete the following steps to install the storage subsystem bezel: 1. Position the bezel directly in front of the storage subsystem. 2. Insert the three tabs on the bottom of the bezel into the matching holes on the storage subsystem chassis. Figure 18. Installing the bezel on the DS300 and DS400 36 IBM TotalStorage DS300 and DS400: Hardware Maintenance Manual
-
 1
1 -
2
-
3
-
4
-
5
-
6
-
7
-
8
-
9
-
10
-
11
-
12
-
13
-
14
-
15
-
16
-
17
-
18
-
19
-
20
-
21
-
22
-
23
-
24
-
25
-
26
-
27
-
28
-
29
-
30
-
31
-
32
-
33
-
34
-
35
-
36
-
37
-
38
-
39
-
40
-
41
-
42
-
43
-
44
-
 45
45 -
 46
46 -
 47
47 -
 48
48 -
 49
49 -
 50
50 -
 51
51 -
 52
52 -
 53
53 -
 54
54 -
 55
55 -
56
-
57
-
58
-
59
-
60
-
61
-
62
-
63
-
64
-
65
-
66
-
67
-
68
-
69
-
70
-
71
-
72
-
73
-
74
-
75
-
76
-
77
-
78
-
79
-
80
-
81
-
82
 |
 |
