IBM 17011RS Maintenance Manual - Page 52
Installing, hot-swap, drive
 |
UPC - 000435304971
View all IBM 17011RS manuals
Add to My Manuals
Save this manual to your list of manuals |
Page 52 highlights
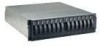
Installing a hot-swap hard disk drive The storage subsystem supports up to 14 IBM Ultra320 SCSI hard disk drives. These IBM drives come preassembled in a drive tray, ready for installation. (Do not detach the drive from the tray.) Be sure to record the location information for each drive in Appendix A of the DS300 and DS400 Hardware Installation and User's Guide. The storage subsystem comes with filler panels in the drive bays. Before installing a new hard disk drive, remove the filler panel and save it for future use. Each of the 14 bays must contain either a filler panel or a hard disk drive. Complete the following steps to install a hard disk drive in the storage subsystem. You can install drives while the storage subsystem is turned on. Note: If you are replacing a drive, see "Replacing a hot-swap hard disk drive" on page 39 for more information. 1. Read the instructions that come with the hard disk drive. 2. Read the safety information beginning on page iii and "Installation guidelines" on page 35. 3. Determine the bay into which you want to install the hard disk drive. 4. Remove the filler panel: a. Insert a finger into the square hole at the top of the filler panel to grip and pull the filler panel out of the drive bay. b. Save the filler panel for future use. 5. Install the hard disk drive. Note: The hard disk drive comes with a tray already attached. Do not attempt to detach the drive from the tray. Drive tray Tray handle Latch Hard disk drive Figure 20. Installing a hard disk drive a. Press the latch on the bottom of the tray handle to release it. b. Pull out the tray handle to the open position. c. Gently slide the drive into the empty bay until the tray handle touches the expansion-unit bezel. d. Push down the tray handle into the closed (latched) position. 6. Check the hard disk drive LEDs: v When a drive is ready for use, the green activity LED is off and the amber drive-fault LED is off. v If the amber drive-fault LED is lit and not flashing, remove the drive from the unit and wait 10 seconds; then, reinstall the drive. 38 IBM TotalStorage DS300 and DS400: Hardware Maintenance Manual
-
 1
1 -
2
-
3
-
4
-
5
-
6
-
7
-
8
-
9
-
10
-
11
-
12
-
13
-
14
-
15
-
16
-
17
-
18
-
19
-
20
-
21
-
22
-
23
-
24
-
25
-
26
-
27
-
28
-
29
-
30
-
31
-
32
-
33
-
34
-
35
-
36
-
37
-
38
-
39
-
40
-
41
-
42
-
43
-
44
-
45
-
46
-
 47
47 -
 48
48 -
 49
49 -
 50
50 -
 51
51 -
 52
52 -
 53
53 -
 54
54 -
 55
55 -
 56
56 -
 57
57 -
58
-
59
-
60
-
61
-
62
-
63
-
64
-
65
-
66
-
67
-
68
-
69
-
70
-
71
-
72
-
73
-
74
-
75
-
76
-
77
-
78
-
79
-
80
-
81
-
82
 |
 |
