IBM 17011RS Maintenance Manual - Page 63
Replacing, hardware
 |
UPC - 000435304971
View all IBM 17011RS manuals
Add to My Manuals
Save this manual to your list of manuals |
Page 63 highlights
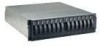
inside the RAID controller that you are replacing and install them in the replacement RAID controller. The steps to remove and install the battery and DIMM are included in the following procedure. 2. The RAID controller in the DS300 model 1701-1RL does not contain a cache battery. Replacing the hardware To replace a failed controller, complete the following steps: 1. For a single-controller DS300 or DS400 storage subsystem only: Turn off the storage subsystem. 2. Label each cable that is connected to the failed controller to be sure that all cables are reconnected correctly later in the procedure. 3. Remove all Ethernet cables from the failed controller. 4. For a Fibre Channel RAID controller only: Remove the fiber-optic cables and the SFP modules from the failed controller. For information about removing the fiber-optic cables and SFP modules, refer to the ″Hardware Installation and User's Guide″. 5. Remove the failed controller (the fault LED is lit): a. While squeezing together the latch and lever that are on each side of the controller, press down on the orange area on each latch. The controller slides out of the bay a short distance. b. Grasp both latches and pull the controller out of the bay. c. Place the controller on a dry, level surface. Attention: When you handle static-sensitive devices, take precautions to avoid damage from static electricity. For details about handling static-sensitive devices, see "Handling static-sensitive devices" on page 35. 6. Remove the cache battery from the failed controller. Battery Thumbscrew a. Loosen the thumbscrew that holds the battery in place. b. Hold down the edge of the controller base on the battery side (near the thumbscrew). c. Pull up on the blue lift tab on the battery to remove it from the connector. d. Slide the battery toward the open end of the controller to remove it. e. Place the battery on a dry, level surface. 7. Unpack the replacement controller and set it on a dry, level surface. Save the packing material and documentation in case you have to return the controller. 8. Install the battery (that you removed in step 6) into the replacement controller. Appendix A. Installing and replacing components 49
-
 1
1 -
2
-
3
-
4
-
5
-
6
-
7
-
8
-
9
-
10
-
11
-
12
-
13
-
14
-
15
-
16
-
17
-
18
-
19
-
20
-
21
-
22
-
23
-
24
-
25
-
26
-
27
-
28
-
29
-
30
-
31
-
32
-
33
-
34
-
35
-
36
-
37
-
38
-
39
-
40
-
41
-
42
-
43
-
44
-
45
-
46
-
47
-
48
-
49
-
50
-
51
-
52
-
53
-
54
-
55
-
56
-
57
-
 58
58 -
 59
59 -
 60
60 -
 61
61 -
 62
62 -
 63
63 -
 64
64 -
 65
65 -
 66
66 -
 67
67 -
 68
68 -
69
-
70
-
71
-
72
-
73
-
74
-
75
-
76
-
77
-
78
-
79
-
80
-
81
-
82
 |
 |
