IBM SAN40B-4 User Guide - Page 43
password, tsClockServer
 |
UPC - 883436031479
View all IBM SAN40B-4 manuals
Add to My Manuals
Save this manual to your list of manuals |
Page 43 highlights
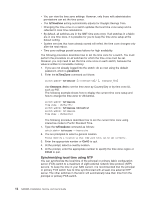
All switches in the fabric maintain the current clock server value in non-volatile memory. By default, this value is the local clock server of the principal or primary FCS switch. Changes to the clock server value on the principal or primary FCS switch are propagated to all switches in the fabric. When a new switch enters the fabric, the time server daemon of the principal or primary FCS switch sends out the addresses of all existing clock servers and the time to the new switch. If a switch with FOS 5.3.0 or later has entered the fabric it will be able to store the list and the active servers; pre-5.3.0 Fabric OS switches will ignore the new list parameter in the payload and will update only the active server address. For more information on using an NTP server, and IPv6 considerations, see the Fabric OS Administrator's Guide. 1. If you are not already logged into the switch; do so now using the default password, which is password. 2. Enter the tsClockServer command: switch:admin> tsclockserver "" where ntp1 is the IP address or DNS name of the first NTP server, which the switch must be able to access. The second ntp2 is the second NTP server and is optional. The operand "" is optional; by default, this value is LOCL, which uses the local clock of the principal or primary switch as the clock server. The tsClockServer command accepts multiple server addresses in either IPv4, IPv6, or DNS name formats. When multiple NTP server addresses are passed, tsClockServer sets the first obtainable address as the active NTP server. The others will be stored as backup servers that can take over if the active NTP server fails. The principal or primary FCS switch synchronizes its time with the NTP server every 64 seconds. switch:admin> tsclockserver LOCL switch:admin> tsclockserver "132.163.135.131" switch:admin> tsclockserver 132.163.135.131 switch:admin> The following example shows how to set up more than one NTP server using a DNS name: switch:admin> tsclockserver "10.32.170.1;10.32.170.2;ntp.localdomain.net" Updating Clock Server configuration...done. Updated with the NTP servers Changes to the clock server value on the principal or primary FCS switch are propagated to all switches in the fabric. Chapter 2. Installing and configuring the switch 19
-
 1
1 -
2
-
3
-
4
-
5
-
6
-
7
-
8
-
9
-
10
-
11
-
12
-
13
-
14
-
15
-
16
-
17
-
18
-
19
-
20
-
21
-
22
-
23
-
24
-
25
-
26
-
27
-
28
-
29
-
30
-
31
-
32
-
33
-
34
-
35
-
36
-
37
-
 38
38 -
 39
39 -
 40
40 -
 41
41 -
 42
42 -
 43
43 -
 44
44 -
 45
45 -
 46
46 -
 47
47 -
 48
48 -
49
-
50
-
51
-
52
-
53
-
54
-
55
-
56
-
57
-
58
-
59
-
60
-
61
-
62
-
63
-
64
-
65
-
66
-
67
-
68
-
69
-
70
-
71
-
72
-
73
-
74
-
75
-
76
-
77
-
78
-
79
 |
 |
