JVC GRDA30US Instructions - Page 30
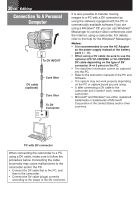
Connection To A Personal, Computer - software
 |
UPC - 046838032004
View all JVC GRDA30US manuals
Add to My Manuals
Save this manual to your list of manuals |
Page 30 highlights
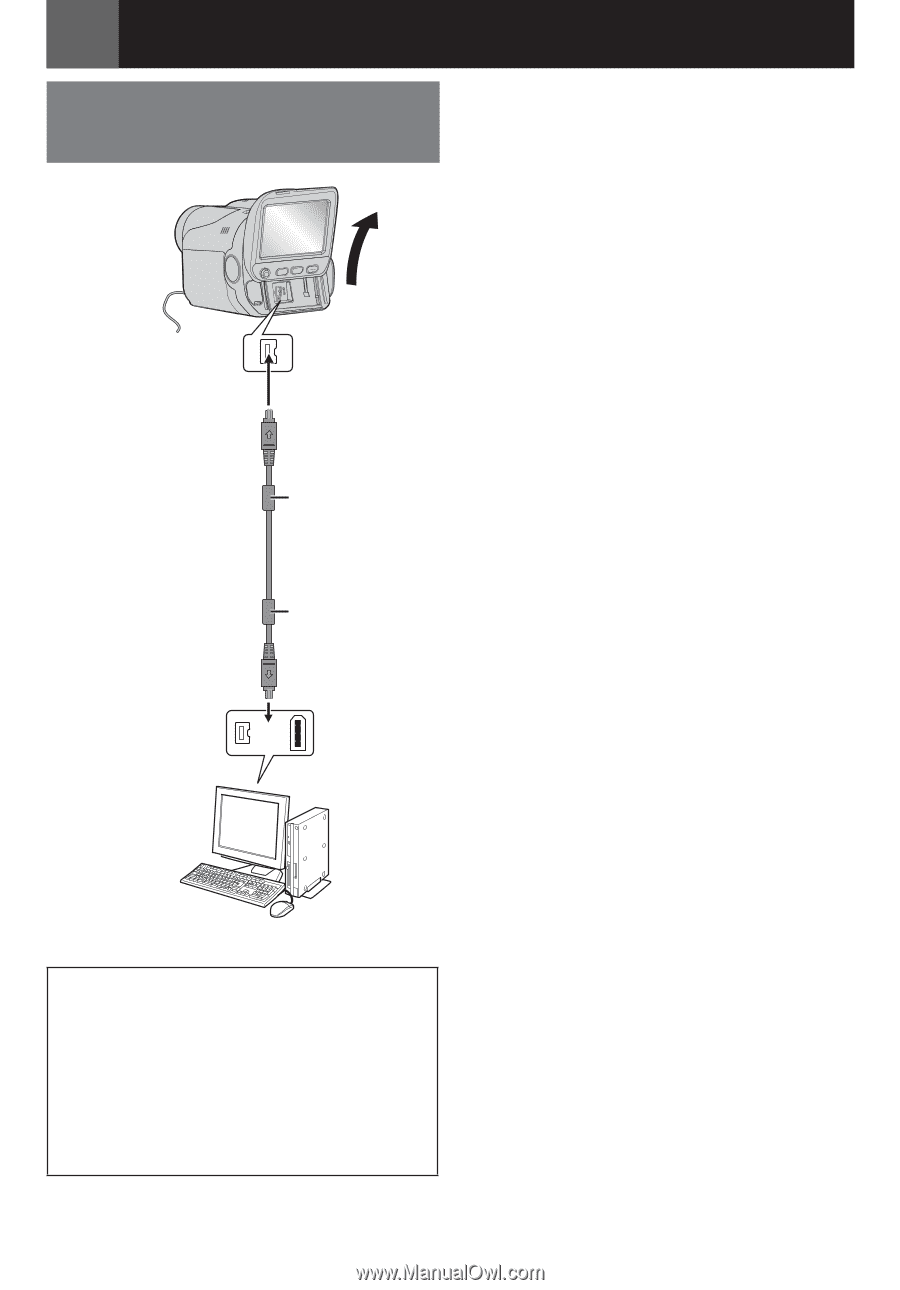
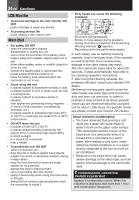
30 EN Editing Connection To A Personal Computer To DV IN/OUT DV cable (optional) Core filter Core filter To DV Connector or It is also possible to transfer moving images to a PC with a DV connector by using the software equipped with the PC or commercially available software.If you are using a Windows® XP, you can use Windows® Messenger to conduct video conferences over the Internet, using a camcorder. For details, refer to the help for the Windows® Messenger. Notes: • It is recommended to use the AC Adapter as the power supply instead of the battery pack (੬ 11). • When using a DV cable, be sure to use the optional JVC VC-VDV206U or VC-VDV204U DV cable depending on the type of DV connector (4 or 6 pins) on the PC. • The date/time information cannot be captured into the PC. • Refer to the instruction manuals of the PC and Software. • The system may not work properly depending on the PC or capture board you are using. • If, after connecting a DV cable to the camcorder and it doesn't work, restart the camcorder. • Microsoft® and Windows® are either registered trademarks or trademarks of Microsoft Corporation in the United States and/or other countries. PC with DV connector When connecting the camcorder to a PC using a DV cable, make sure to follow the procedure below. Connecting the cable incorrectly may cause malfunctions to the camcorder and/or the PC. • Connect the DV cable first to the PC, and then to the camcorder. • Connect the DV cable (plugs) correctly according to the shape of the DV connector.
-
 1
1 -
2
-
3
-
4
-
5
-
6
-
7
-
8
-
9
-
10
-
11
-
12
-
13
-
14
-
15
-
16
-
17
-
18
-
19
-
20
-
21
-
22
-
23
-
24
-
 25
25 -
 26
26 -
 27
27 -
 28
28 -
 29
29 -
 30
30 -
 31
31 -
 32
32 -
 33
33 -
 34
34 -
 35
35 -
36
-
37
-
38
-
39
-
40
-
41
-
42
-
43
-
44
-
45
-
46
-
47
-
48
-
49
-
50
-
51
-
52
-
53
-
54
-
55
-
56
-
57
-
58
-
59
-
60
-
61
-
62
-
63
-
64
-
65
-
66
-
67
-
68
-
69
-
70
-
71
-
72
-
73
-
74
-
75
-
76
 |
 |