JVC GY-HMZ1U GY-HMZ1U ProHD 3D Camcorder 138-page user guide - Page 31
Caution, Telephoto, Wide Angle
 |
View all JVC GY-HMZ1U manuals
Add to My Manuals
Save this manual to your list of manuals |
Page 31 highlights
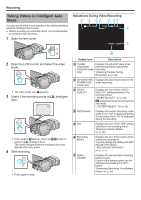
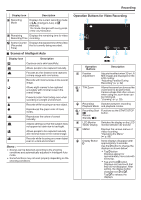
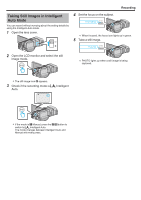
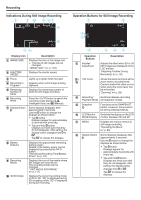
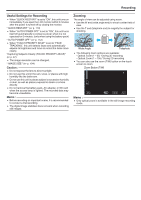
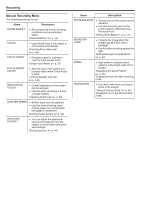
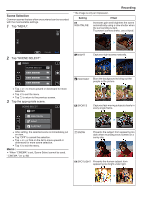
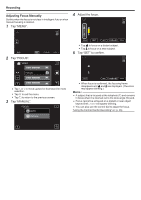
Recording Useful Settings for Recording 0 When "QUICK RESTART" is set to "ON", this unit turns on immediately if you open the LCD monitor within 5 minutes after the power is turned off by closing the monitor. " QUICK RESTART " (A p. 113) 0 When "AUTO POWER OFF" is set to "ON", this unit turns itself off automatically to conserve power when it is not operated for 5 minutes. (only when using the battery pack) " AUTO POWER OFF " (A p. 112) 0 When "TOUCH PRIORITY AE/AF" is set to "FACE TRACKING", this unit detects faces and automatically adjusts its brightness and focus to record the faces more clearly. "Capturing Subjects Clearly (TOUCH PRIORITY AE/AF)" (A p. 47) 0 The image resolution can be changed. " IMAGE SIZE " (A p. 104) Caution : 0 Do not expose the lens to direct sunlight. 0 Do not use this unit in the rain, snow, or places with high humidity like the bathroom. 0 Do not use this unit in places subject to excessive humidity or dust, as well as places exposed to steam or smoke directly. 0 Do not remove the battery pack, AC adapter, or SD card when the access lamp is lighted. The recorded data may become unreadable. Memo : 0 Before recording an important scene, it is recommended to conduct a trial recording. 0 The digital image stabilizer does not work when recording still images. Zooming The angle of view can be adjusted using zoom. 0 Use the W end (wide angle end) to shoot a wider field of view. 0 Use the T end (telephoto end) to magnify the subject for shooting. Wide Angle Telephoto 0 The following zoom options are available: - Optical Zoom (1 - 5x) *During 3D recording - Optical Zoom (1 - 10x) *During 2D recording 0 You can also use the zoom (T/W) button on the touch screen to zoom. Zoom Button (T/W) .. Memo : 0 Only optical zoom is available in the still image recording mode. 31
-
 1
1 -
2
-
3
-
4
-
5
-
6
-
7
-
8
-
9
-
10
-
11
-
12
-
13
-
14
-
15
-
16
-
17
-
18
-
19
-
20
-
21
-
22
-
23
-
24
-
25
-
 26
26 -
 27
27 -
 28
28 -
 29
29 -
 30
30 -
 31
31 -
 32
32 -
 33
33 -
 34
34 -
 35
35 -
 36
36 -
37
-
38
-
39
-
40
-
41
-
42
-
43
-
44
-
45
-
46
-
47
-
48
-
49
-
50
-
51
-
52
-
53
-
54
-
55
-
56
-
57
-
58
-
59
-
60
-
61
-
62
-
63
-
64
-
65
-
66
-
67
-
68
-
69
-
70
-
71
-
72
-
73
-
74
-
75
-
76
-
77
-
78
-
79
-
80
-
81
-
82
-
83
-
84
-
85
-
86
-
87
-
88
-
89
-
90
-
91
-
92
-
93
-
94
-
95
-
96
-
97
-
98
-
99
-
100
-
101
-
102
-
103
-
104
-
105
-
106
-
107
-
108
-
109
-
110
-
111
-
112
-
113
-
114
-
115
-
116
-
117
-
118
-
119
-
120
-
121
-
122
-
123
-
124
-
125
-
126
-
127
-
128
-
129
-
130
-
131
-
132
-
133
-
134
-
135
-
136
-
137
-
138
 |
 |
