Kenmore 8075 Use and Care Manual
Kenmore 8075 - 24 in. Laundry Center Manual
 |
View all Kenmore 8075 manuals
Add to My Manuals
Save this manual to your list of manuals |
Kenmore 8075 manual content summary:
- Kenmore 8075 | Use and Care Manual - Page 1
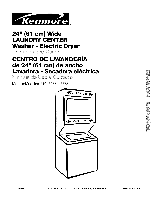
24" (61 cm) Wide LAUNDRY CENTER Washer- Electric Dryer i_,_dJ I__'!'_;7_ AI" CENTRO DE LAVANDERIA de 24" 161 cm) de ancho Lavadora - Secadora el_ctrica Vi3C J_;;;,+++,!,J# _J+,,_+,,J_,l%,_ Models/Modelos 1 10. 80714, 88752 I _V_i,.#ll, v i - _ -l_v W10034990 \ Sears Roebuck and Co., Hoffman - Kenmore 8075 | Use and Care Manual - Page 2
23 LAUNDRY CENTER CARE 24 Cleaning the Laundry Center Location 24 Cleaning Your Washer 24 Water Inlet Hoses 24 Cleaning the Lint Screen 24 Cleaning the Dryer Interior 25 Removing Accumulated Lint 25 Vacation, Storage and Moving Care 25 TROUBLESHOOTING WASHER 26 TROUBLESHOOTING DRYER 28 - Kenmore 8075 | Use and Care Manual - Page 3
than those recommended in all instructions supplied with the product. 7. Damage to or failure of parts or systems resulting from unauthorized or service more quickly whenever you contact Sears concerning your appliance. Model number Serial number Purchase date Save these instructions and - Kenmore 8075 | Use and Care Manual - Page 4
or use an open flame during this time. [] Do not repair or replace any part of the washer/dryer or attempt any servicing unless specifically recommended in this Use and Care Guide or in published user-repair instructions that you understand and have the skills to carry out. [] Do not use fabric - Kenmore 8075 | Use and Care Manual - Page 5
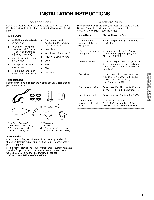
: Remove parts package from the washer basket. Check that all parts were included. B C D Parts listed are available from your local Sears store or Sears Service Center. For further information, please call 1-800-4-MY-HOME® (1-800-469-4663). If You Have You Will Need to Buy Laundry tub or - Kenmore 8075 | Use and Care Manual - Page 6
-amp circuit. • A grounded electrical outlet located within 2 ft (61 cm) of either side of the laundry center. See "Electrical Requirements." • A sturdy floor to support the laundry center weight (laundry center, water and load) of 500 Ibs (226.8 kg). A level floor with a maximum slope of 1" (2.5 cm - Kenmore 8075 | Use and Care Manual - Page 7
purchased separately. See "Alternate Parts." The siphon break must be a minimum of 28" (71 cm) from the bottom of the washer. Additional hoses might be laundry center, you must determine the type of electrical connection you will be using and follow the instructions provided for it here. • This dryer - Kenmore 8075 | Use and Care Manual - Page 8
5 ft (1.52 m) long. GROUNDING INSTRUCTIONS [] For a grounded, cord-connected washer/dryer: This washer/dryer must be grounded. In the event of Check with a qualified electrician or service representative or personnel if you are in doubt as to whether the washer/dryer is properly grounded. Do not - Kenmore 8075 | Use and Care Manual - Page 9
10 gauge solid copper wire. Use a UL listed strain relief. Disconnect power before making electrical connections. Connect neutral wire (white or center wire) to center terminal (silver). Ground wire (green or bare wire) must be connected to green ground connector. Connect remaining 2 supply wires to - Kenmore 8075 | Use and Care Manual - Page 10
(NEMA Type 14-30R) (_ A UL listed, 120/240-volt 30-amp, dryer mpoinwimerumsu, pply cord* 4-wire connection: Power supply cord 4-wire direct listed strain relief G. Ring terminals 4, Now complete installation following instructions for your type of electrical connection: 4-wire (recommended) 3- - Kenmore 8075 | Use and Care Manual - Page 11
of 3-wire connections. Direct wire cable must have 5 ft (1.52 m) of extra length so laundry center can be moved if needed. Strip 5" (12.7 cm) of outer covering from end of screws. 6. Insert tab of terminal block cover into slot of dryer rear panel. Secure cover with hold-down screw. 7. You have - Kenmore 8075 | Use and Care Manual - Page 12
relief screw. 6. Insert tab of terminal block cover into slot of dryer rear panel. Secure cover with hold-down screw. 7. You have completed wire. Direct wire cable must have 5 ft (1.52 m) of extra length so laundry center can be moved if needed. Strip 31/2'' (8.9 cm) of outer covering from end - Kenmore 8075 | Use and Care Manual - Page 13
not permit connecting cabinet-ground conductor to neutral wire. 1. Remove center, silver-colored terminal block screw. 2. Remove neutral ground wire from strain relief screw. 5. Insert tab of terminal block cover into slot of dryer rear panel. Secure cover with hold-down screw. 6. You have completed - Kenmore 8075 | Use and Care Manual - Page 14
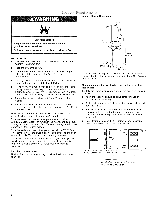
instructions can result in death or fire. WARNING: To reduce the risk of fire, this laundry center MUST BE EXHAUSTED OUTDOORS. IMPORTANT: Observe all governing codes and ordinances. The dryer metal vent. • Review Vent system chart. supported when the laundry center problems and health problems. 14 - Kenmore 8075 | Use and Care Manual - Page 15
it must be installed according to the following instructions: IMPORTANT: To ensure proper installation, this washer lid. The latch under the dryer will keep the lid open. 2. Pull the foam packing ring out of the washer. NOTE: Keep the foam ring and use it when transporting your laundry center - Kenmore 8075 | Use and Care Manual - Page 16
of water hoses and (on gas models) the flexible gas connector through the access area. Replace access panel upon completion of laundry center installation. Check for leaks 7. Turn on the water faucets and check for leaks. A small amount of water might enter the washer. You will drain this later - Kenmore 8075 | Use and Care Manual - Page 17
instructions provided with the vent system. r'[ .... : -i [....... r.....M.. Jr ....... , ..-ff ....... , ( ( B( ........ C _H A. Dryer B. Rigid metal or flexible metal vent C. Clamps D. Wall E. Elbow E Clamps G. Elbow H. Exhaust hood Optional exhaust installations This laundry center - Kenmore 8075 | Use and Care Manual - Page 18
laundry center into its final position. Do not crush or kink vent. Make sure laundry center is level. 1. Check that all parts are now installed, If there is an extra part any tape remaining on the laundry center. 10. Read "Washer Use" and "Dryer Use." 11. Wipe the dryer drum interior thoroughly with - Kenmore 8075 | Use and Care Manual - Page 19
INSTRUCTIONS before operating this appliance. The following is a guide to starting your washer. Periodic references to other sections of this manual to the wash cycle you want. Pull out the Cycle Control knob to start the washer. To stop or restart your washer: • To stop the washer at any time - Kenmore 8075 | Use and Care Manual - Page 20
throughout each cycle. These pauses are normal. Refer to "Normal Sounds" for sounds you may hear during a wash cycle. • Refer to "Understanding Washer Cycles" to learn what happens during a wash cycle. SPIN HEAVY DUTY RINSE 10 REGULAR PERMANENT PRESS RINSE REGULAR 10 SUPER 12 SPIN SOAK_ KNIT - Kenmore 8075 | Use and Care Manual - Page 21
the cycle changes. These sounds are part of normal washer operation. LAUNDRY TIPS Preparing clothes for washing Follow these recommendations to help you prolong , knits, delicate items). Loading suggestions (maximum size loads) Laundry Center Heavy Work Clothes 2 pair pants 3 work shirts Towels - Kenmore 8075 | Use and Care Manual - Page 22
it (even after washing). Failure to follow these instructions can result in death, explosion, or fire. Before using your dryer, wipe the dryer drum with a damp knob should point to an Off area when the dryer is not in use. 22 Fire Hazard No washer can completely remove oil. Do not dry anything that - Kenmore 8075 | Use and Care Manual - Page 23
care label directions when they are available. • If you use fabric softener sheets, use only ones labeled as dryer safe. Follow package instructions. • Remove the load from the dryer as soon as tumbling stops to reduce wrinkling. This is especially important for permanent press, knits and synthetic - Kenmore 8075 | Use and Care Manual - Page 24
LAUNDRY CENTER CARE Keep laundry center area clear and free from items that would obstruct the flow of combustion and ventilation air. To clean 1. Pull out the lint screen and its cover. Explosion Hazard Keep flammable materials and vapors, such as gasoline, away from dryer. Failure to do so can - Kenmore 8075 | Use and Care Manual - Page 25
edge and into the basket. 11. Use masking tape to secure the washer lid and dryer door. Reinstalling your laundry center 1. Follow the "Installation Instructions" to locate, level and connect the laundry center. 2. Run the washer through a complete cycle with 1 scoop or capful of detergent to clean - Kenmore 8075 | Use and Care Manual - Page 26
See "Level Laundry Center." • Is the load balanced? Evenly distribute the load in the washer basket and make sure the height of the load does not exceed the top row of basket holes. • Are the gears engaging after the drain and before spin, or is the upper part of agitator clicking during wash? These - Kenmore 8075 | Use and Care Manual - Page 27
gap. See "Secure Drain Hose" in the Installation Instructions. Washer won't drain or spin, water remains in washer • Is the drain hose clogged, or the end of a dryer removes lint from the load. • Was paper or tissue left in the pockets? • Is your water colder than 60°F (15.6°C)? Wash water colder - Kenmore 8075 | Use and Care Manual - Page 28
unloading the washer (on some models). Do not use more than the manufacturer's recommended amount for a full load. • Did you follow the manufacturer's care label instructions? TROUBLESHOOTING DRYER First try the solutions suggested here and possibly avoid the cost of a service call... Dryer will - Kenmore 8075 | Use and Care Manual - Page 29
on load • Is the lint screen clogged? Lint screen should be cleaned before each load, Stains on load or drum Was dryer fabric softener properly used? Add dryer fabric softener sheets at the beginning of the cycle. Fabric softener sheets added to a partially dried load can stain your garments, Drum - Kenmore 8075 | Use and Care Manual - Page 30
DE PROBLEMAS DE LA SECADORA 58 CONTRATOS DE PROTECCION Contratos Maestros de Proteccibn iFelicitaciones por su inteligente adquisici6n! Su nuevo producto Kenmore ®ha sido diser_ado y fabricado para brindarle argos de funcionamiento confiable. Pero al igual que todos los productos, puede necesitar - Kenmore 8075 | Use and Care Manual - Page 31
GARANT[A DE LOS ELECTRODOMESTICOS KENMORE GARANT|A LIMITADA DE UN AI_IO Cuando este electrodomestico haya side instalado, operado y mantenido segOn las instrucciones provistas con el producto, si este electrodomestico falla por - Kenmore 8075 | Use and Care Manual - Page 32
importante. Hemos incluido muchos mensajes importantes de seguridad en este manual yen su electrodomestico. Lea y obedezca siempre todos los mensajes Areas adyacentes a esta abertura sin pelusa, polvo o suciedad. [] La parte interior de la mAquina y el ducto de escape se deben limpiar peri6dicamente - Kenmore 8075 | Use and Care Manual - Page 33
INSTRUCCIONES DE INSTALACION ReQna las herramientas y piezas necesarias antes de comenzar la instalaci6n. Lea y siga las instrucciones provistas con cualquiera de las herramientas enlistadas aqui. Herramientas necesarias Destornillador Phillips #2 y de cabeza plana Llave de tuercas ajustable que - Kenmore 8075 | Use and Care Manual - Page 34
la pared, de la puerta y del piso. Para la instalaci6n en cl6set, con una puerta, se requieren aberturas de ventilaci6n minimas en la parte superior e inferior de la puerta. Se aceptan puertas tipo persianas con aberturas de ventilaci6n equivalentes. Cuando el sistema de ventilaci6n de la casa esta - Kenmore 8075 | Use and Care Manual - Page 35
m) desde la base de la lavadora. A B Sistema de desagiie en un lavadero (ilustracibn C) El lavadero debe tener una capacidad mfnima de 20 gal. (76 L). La parte superior del lavadero debe estar a 34" (86,4 cm) de altura cuando menos sobre el piso y no podra estar a mas de 96" (2,4 m) de la base de - Kenmore 8075 | Use and Care Manual - Page 36
• Si los c6digos locales no permiten la conexi6n de un conector para conexi6n a tierra del equipo al alambre neutro, vea la secci6n "Conexi6n opcional de 3 hilos". Use un cable conductor de 4 alambres cuando se instale la secadora en una casa rodante o un Area donde los c6digos locales no permiten - Kenmore 8075 | Use and Care Manual - Page 37
Cable de suministro el_ctrico Cable directo Peligro de Incendio Use un cable de suministro eiectrico nuevo de 30 amperes que este en la lista de UL. Use un protector de cables que este en la lista de UL. Desconecte el suministro electrico antes de hacer las conexiones electricas. Conecte el - Kenmore 8075 | Use and Care Manual - Page 38
Haga pasar el cable de suministro de energ[a a traves del protector de cables. AsegQrese de que el aislamiento de cables del cable de suministro de energia este dentro del protector de cables. El protector de cables debera encajar bien con el gabinete de la secadora y estar en posicidn horizontal. - Kenmore 8075 | Use and Care Manual - Page 39
1= Saque el tornillo central de color plateado del bloque terminal. 2. Saque el hilo de tierra neutro del tornillo conductor de tierra interno. Conecte el hilo neutro de puesta a tierra y el hilo neutro (hilo blanco o central) del cable de suministro de energia debajo del tornillo central de color - Kenmore 8075 | Use and Care Manual - Page 40
3= Mueva el tornillo verde de la ubicaci6n del conductor a tierra interno a la del conductor a tierra externo. Conecte el hilo de tierra (verde o desnudo) del cable de suministro de energia al tornillo conductor de tierra extemo. Apriete el tornillo. B J 1. Afloje o saque el tornillo central de - Kenmore 8075 | Use and Care Manual - Page 41
AI conectar el hilo al bloque de terminal, coloque el extremo del hilo en forma de gancho debajo del tornillo del bloque de terminal (viendo hacia la derecha). Apriete y junte el extremo en forma de gancho y apriete el tornillo. 1= Afloje o saque el tornillo central de color plateado del bloque - Kenmore 8075 | Use and Care Manual - Page 42
c(®qs stos < de Ducto de escape de metal flexible • Los ductos de escape de metal flexible son aceptables Qnicamente si se puede acceder a los mismos para limpiarlos. • El ducto de escape de metal flexible debe extenderse y sostenerse per complete cuando la secadora esta en su ubicaci6n final. - Kenmore 8075 | Use and Care Manual - Page 43
Una capota de ventilaci6n debe tapar el ducto de escape para evitar el ingreso de roedores e insectos a la casa. La capota de ventilaci6n debe estar por Io menos a 12" (30,5 cm) de distancia del piso o de cualquier objeto que pudiese estar en el trayecto del ducto de escape (come (lores, rocas o - Kenmore 8075 | Use and Care Manual - Page 44
Para el sistema de desagiie en tina de lavadero o tubo vertical 1. Abra la abrazadera unifilar amarilla y desl[cela sobre el extreme de gancho de la manguera de desagQe para asegurar la secci6n de caucho y la corrugada juntas. 4. Apriete los acoplamientos con los alicates, girandolos dos tercios de - Kenmore 8075 | Use and Care Manual - Page 45
el panel de acceso desatornillando 3 tornillos Phillips y un tope, ubicados en la parte superior del panel de acceso. Deje a un lado el panel, el tornillo y instalaciones tipicas tienen la ventilaci6n de la secadora en la parte posterior del centre de lavander[a. Otras instalaciones son posibles. - Kenmore 8075 | Use and Care Manual - Page 46
juegos para instalaciones alternas en espacios limitados. Para mas informacidn, por favor Ilame al 1-800-4-MY-HOME ® (1-800-469-4663). • Instalaci6n en la parte superior: Pieza nQmero 26-49900 • Instalaci6n de periscopio (Para usar si hay desacoplo entre el ducto de escape de la secadora y el ducto - Kenmore 8075 | Use and Care Manual - Page 47
de funcionamiento u "On" (encendido), • Que se ha presionado con firmeza el bot6n de empuje para poner en marcha la secadora (PUSH TO START DRYER), • Que el centro de lavanderia este enchufado en un contacto y/o el suministro de energia electrica este encendido. • Que el fusible de la casa este - Kenmore 8075 | Use and Care Manual - Page 48
operar este aparato. La siguiente es una guia para poner su lavadora en marcha. Las consultas periCdicas a otras secciones de este manual proporcionaran informaci6n mas detallada. 1. Vierta la cantidad medida de detergente en polvo o ffquido en la lavadora. Agregue blanqueador en polvo o blanqueador - Kenmore 8075 | Use and Care Manual - Page 49
Empuje la perilla de control de ciclos y girela en la direcci6n de las manecillas del reloj hasta el ciclo de lavado que desee. Jab la perilla del control de ciclos para poner la lavadora en marcha. Para detener o volver a porter en marcha su lavadora: • Para detener la lavadora en cualquier momento - Kenmore 8075 | Use and Care Manual - Page 50
es empujado a traves de la bomba durante el final del desagQe o los engranajes que cambian cuando cambia el ciclo. Estos sonidos forman parte del funcionamiento normal de la lavadora. CONSEJOS DE LAVANDERiA Preparacibn de la ropa para lavar Siga estas recomendaciones para ayudarle a prolongar la - Kenmore 8075 | Use and Care Manual - Page 51
secar. Vea "Consejos de secado, ciclos y temperatura". 4. Presione el bot6n Empuje para poner en marcha la secadora (PUSH TO START DRYER). PUSH TO START DRYER O Peligro de Incendio Ninguna lavadora puede eliminar completamente el aceite. No seque ningun articulo que haya tenido alguna vez cualquier - Kenmore 8075 | Use and Care Manual - Page 52
Coloque la ropa en la secadora de modo suelto. No Ilene en exceso la secadora. Deje suficiente espacio para que la ropa rote con libertad. El cuadro a continuaci6n ilustra ejemplos de cargas balanceadas que permitiran el movimiento de tambor adecuado. Ropa de trabajo pesada 2 pantalones, 3 camisas - Kenmore 8075 | Use and Care Manual - Page 53
Secado al aire (Air Dry) Use el ciclo de secado al aire para artfculos que requieren secado sin calor, tales como articuios de goma, plastico y tejidos sensibles al caior. Este cuadro muestra ejemplos de articulos que pueden secarse usando el ciclo de secado al aire. Tipo de carga Minutes* Hub - Kenmore 8075 | Use and Care Manual - Page 54
3. Quite la pelusa enrollandola con los dedos. No enjuague o lave el filtro para quitar la pelusa. La pelusa mojada es dificil de quitar. 4. Vuelva a juntar el filtro y la tapa y emp@elos firmemente hasta que queden en su lugar. IMPORTANTE: • No ponga a funcionar la secadora con el filtro de pelusa - Kenmore 8075 | Use and Care Manual - Page 55
la Ifnea superior de orificios de la canasta. &Estan cambiando de velocidad los engranajes despu_s del desagLie y antes del exprimido, o esta la parte superior del agitador haciendo chasquidos durante el lavado? Estos ruidos de la lavadora son normales. &La lavadora produce un gorgoteo o zumbido - Kenmore 8075 | Use and Care Manual - Page 56
entrada del agua? Enderece las mangueras. &Parece que el nivel del agua est_ demasiado bajo, o parece que la lavadora no se Ilena per complete? La parte superior del agitador esta mucho mas alta que el nivel mas alto del agua. Esto es normal yes necesario para que la ropa se mueva - Kenmore 8075 | Use and Care Manual - Page 57
Ropademasiadomojada • &Ha empleado el ciclo correcto para la carga que est_ lavando? Seleccione un ciclo con una velocidad mas alta de exprimido (siesta disponible). &Ha lavado una carga muy grande? Una gran carga desequilibrada puede derivar en una menor velocidad de exprimido y ropa hQmeda al - Kenmore 8075 | Use and Care Manual - Page 58
con firmeza el bot6n de empuje para poner en marcha la secadora (PUSH TO START DRYER)? Sin calor &Se ha quemado un fusible de la casa o se ha disparado . &Hay una moneda, bot6n o sujetapapeles entre el tambor y la parte frontal o trasera de la secadora? Revise los bordes frontales y traseros del - Kenmore 8075 | Use and Care Manual - Page 59
un armario? Las puertas del armario deben tener aberturas de ventilaci6n en la parte superior e inferior de la puerta. La parte lateral y anterior de la secadora necesitan un minimo de 1" (2,5 cm) de espacio y la parte trasera necesita 51/2'' (14 cm). Vea las Instrucciones de instalaci6n. • &Se ha - Kenmore 8075 | Use and Care Manual - Page 60
cooling systems, no matter who made it, no matter who sold it! For the replacement parts, accessories and owner's manuals that you need to do-it-yourself. For Sears professional installation of home appliances and items like garage door openers and water heaters. 1-800-4-MY-HOME ® (1-800-469-4663
-
 1
1 -
 2
2 -
 3
3 -
 4
4 -
 5
5 -
 6
6 -
 7
7 -
8
-
9
-
10
-
11
-
12
-
13
-
14
-
15
-
16
-
17
-
18
-
19
-
20
-
21
-
22
-
23
-
24
-
25
-
26
-
27
-
28
-
29
-
30
-
31
-
32
-
33
-
34
-
35
-
36
-
37
-
38
-
39
-
40
-
41
-
42
-
43
-
44
-
45
-
46
-
47
-
48
-
49
-
50
-
51
-
52
-
53
-
54
-
55
-
56
-
57
-
58
-
59
-
60
 |
 |
24" (61 cm) Wide
LAUNDRY
CENTER
Washer-
Electric
Dryer
.........
_+_:
.........
++:_"+
_!i_,_J
d
_'"_'_°+'_
_ _:;_ _
_++I_!_;7_
'++' _ '_ _''
AI"
CENTRO
DE LAVANDERIA
de 24" 161 cm) de ancho
Lavadora
-
Secadora
el_ctrica
Vi3C)]+/
+,,,,+;:_ +++_
......
_J_;;;,+++,,#
!J
_J+,,_+,,J_,l%,_
Models/Modelos
1 10. 80714,
88752
I
v
i
_V_i,.#ll,
-
_
-l_v
\
W10034990
Sears
Roebuck
and Co., Hoffman
Estates,
IL
60179 U.S.A.
www.sears.com