Konica Minolta PKG-675i PKG-675i User Manual - Page 111
Print Quality, PQ Defects, Solution
 |
View all Konica Minolta PKG-675i manuals
Add to My Manuals
Save this manual to your list of manuals |
Page 111 highlights
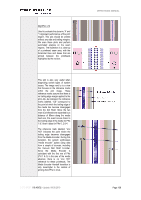
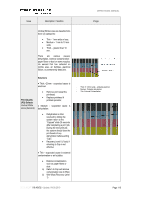
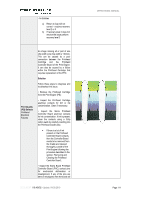
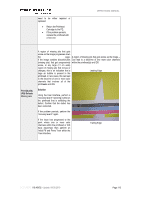
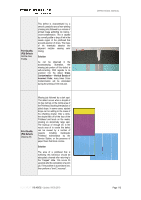
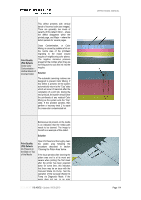
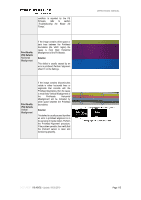
- Air Bubbles a) Return to Cap will not correct - requires recovery level 2 or 3 b) If recovery level 2 does not resolve the issue perform recovery level 3 Print Quality (PQ) Defects Printhead Electrical Failures An image missing all or part of one chip width (one chip width is ~20mm). This can be caused by a poor connection between the Printhead Cartridge and the Printhead Controller Board of the Print Engine. It can also be caused by a failure within the Printhead Cartridge that requires replacement of the PHC. Solution Follow these steps to diagnose and troubleshoot this issue: • Remove the Printhead Cartridge from the Print Engine (PE); • Inspect the Printhead Cartridge electrical contacts for dirt or ink contamination. Clean if necessary; • Inspect the Sierra Printhead Controller Board electrical contacts for ink contamination. If ink is present, clean the contacts using a Q-tip cotton swab by carefully reaching into the Printhead Cradle area: • If there is a lot of ink present on the Printhead Controller Board contacts, then the Controller Board needs to be removed from the Cradle and cleaned thoroughly outside of the Print Engine following the procedure described in the section, 'Removing and Cleaning the Printhead Controller Board'; • Inspect the Sierra Board Printhead Controller Board (PHC) contact pins for mechanical deformation or misalignment. If any of the pins are bent or misaligned, then the board will DOCUMENT I 18.40V02 - Update: 04.09.2019 OPERATIONAL MANUAL Page 111
-
 1
1 -
2
-
3
-
4
-
5
-
6
-
7
-
8
-
9
-
10
-
11
-
12
-
13
-
14
-
15
-
16
-
17
-
18
-
19
-
20
-
21
-
22
-
23
-
24
-
25
-
26
-
27
-
28
-
29
-
30
-
31
-
32
-
33
-
34
-
35
-
36
-
37
-
38
-
39
-
40
-
41
-
42
-
43
-
44
-
45
-
46
-
47
-
48
-
49
-
50
-
51
-
52
-
53
-
54
-
55
-
56
-
57
-
58
-
59
-
60
-
61
-
62
-
63
-
64
-
65
-
66
-
67
-
68
-
69
-
70
-
71
-
72
-
73
-
74
-
75
-
76
-
77
-
78
-
79
-
80
-
81
-
82
-
83
-
84
-
85
-
86
-
87
-
88
-
89
-
90
-
91
-
92
-
93
-
94
-
95
-
96
-
97
-
98
-
99
-
100
-
101
-
102
-
103
-
104
-
105
-
 106
106 -
 107
107 -
 108
108 -
 109
109 -
 110
110 -
 111
111 -
 112
112 -
 113
113 -
 114
114 -
 115
115 -
 116
116 -
117
-
118
 |
 |
