Konica Minolta bizhub C25 bizhub C25 Printer / Copier / Scanner User Guide - Page 186
If [scan To E-mail], [scan To Usb] Or [scan To Server] - scan to pc
 |
View all Konica Minolta bizhub C25 manuals
Add to My Manuals
Save this manual to your list of manuals |
Page 186 highlights
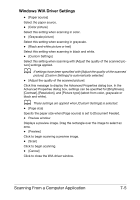
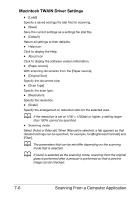
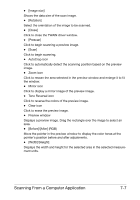
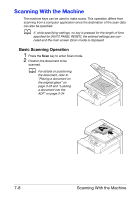
3 Specify the desired scan settings. d For details on specifying the destination of the data, refer to "Specifying the Data Location" on page 7-10 and "Specifying the Destination Address (Scan to E-mail/FTP/SMB)" on page 7-12. For details on selecting the data format, refer to "Selecting the Data Format" on page 7-27. For details on selecting the scan quality setting, refer to "Selecting the Scan Quality Setting" on page 7-28. For details on setting duplex (double-sided) scanning, refer to "Setting Duplex (Double-Sided) Scanning" on page 7-30. For details on setting the scan size, refer to "Setting the Scan Size" on page 7-31. For details on setting the color of the scan data, refer to "Setting the Scan Color" on page 7-31. For details on specifying the subject when sending data, refer to "Specifying the Subject" on page 7-31. 4 To scan color scans, press the Start (Color) key. To scan monochrome scans, press the Start (B&W) key. If the document was loaded in the ADF, scanning begins, and then the data is sent to the specified location. If the document was placed on the original glass, continue with step 5. d The Scan to PC operation can be used only if this machine is con- nected to a computer with a USB cable. d If [SCAN TO E-MAIL], [SCAN TO USB] or [SCAN TO SERVER] in [ADMIN. MANAGEMENT]/[PASSWORD SETTING]/[FULL FUNC. NO.] has been restricted, type in the number specified for [FULL FUNC. NO.] after pressing the Start key. 5 When [NEXT PAGE?] appears in the message window, place the second document page on the original glass, and then press the Select key. d When scanning with the Scan to PC operation, a multi-page doc- ument cannot be scanned with the original glass. To scan a multi-page document, load the document into the ADF. 6 Press the + or , key to select the size of the document positioned in step 5, and then press the Select key. Scanning With the Machine 7-9
-
 1
1 -
2
-
3
-
4
-
5
-
6
-
7
-
8
-
9
-
10
-
11
-
12
-
13
-
14
-
15
-
16
-
17
-
18
-
19
-
20
-
21
-
22
-
23
-
24
-
25
-
26
-
27
-
28
-
29
-
30
-
31
-
32
-
33
-
34
-
35
-
36
-
37
-
38
-
39
-
40
-
41
-
42
-
43
-
44
-
45
-
46
-
47
-
48
-
49
-
50
-
51
-
52
-
53
-
54
-
55
-
56
-
57
-
58
-
59
-
60
-
61
-
62
-
63
-
64
-
65
-
66
-
67
-
68
-
69
-
70
-
71
-
72
-
73
-
74
-
75
-
76
-
77
-
78
-
79
-
80
-
81
-
82
-
83
-
84
-
85
-
86
-
87
-
88
-
89
-
90
-
91
-
92
-
93
-
94
-
95
-
96
-
97
-
98
-
99
-
100
-
101
-
102
-
103
-
104
-
105
-
106
-
107
-
108
-
109
-
110
-
111
-
112
-
113
-
114
-
115
-
116
-
117
-
118
-
119
-
120
-
121
-
122
-
123
-
124
-
125
-
126
-
127
-
128
-
129
-
130
-
131
-
132
-
133
-
134
-
135
-
136
-
137
-
138
-
139
-
140
-
141
-
142
-
143
-
144
-
145
-
146
-
147
-
148
-
149
-
150
-
151
-
152
-
153
-
154
-
155
-
156
-
157
-
158
-
159
-
160
-
161
-
162
-
163
-
164
-
165
-
166
-
167
-
168
-
169
-
170
-
171
-
172
-
173
-
174
-
175
-
176
-
177
-
178
-
179
-
180
-
 181
181 -
 182
182 -
 183
183 -
 184
184 -
 185
185 -
 186
186 -
 187
187 -
 188
188 -
 189
189 -
 190
190 -
 191
191 -
192
-
193
-
194
-
195
-
196
-
197
-
198
-
199
-
200
-
201
-
202
-
203
-
204
-
205
-
206
-
207
-
208
-
209
-
210
-
211
-
212
-
213
-
214
-
215
-
216
-
217
-
218
-
219
-
220
-
221
-
222
-
223
-
224
-
225
-
226
-
227
-
228
-
229
-
230
-
231
-
232
-
233
-
234
-
235
-
236
-
237
-
238
-
239
-
240
-
241
-
242
-
243
-
244
-
245
-
246
-
247
-
248
-
249
-
250
-
251
-
252
-
253
-
254
-
255
-
256
-
257
-
258
-
259
-
260
-
261
-
262
-
263
-
264
-
265
-
266
-
267
-
268
-
269
-
270
-
271
-
272
-
273
-
274
-
275
-
276
-
277
-
278
-
279
-
280
-
281
-
282
-
283
-
284
-
285
-
286
-
287
-
288
-
289
-
290
-
291
-
292
-
293
-
294
-
295
-
296
-
297
-
298
-
299
-
300
-
301
-
302
-
303
-
304
-
305
-
306
-
307
-
308
-
309
-
310
-
311
-
312
-
313
-
314
-
315
-
316
-
317
-
318
-
319
-
320
-
321
-
322
-
323
-
324
-
325
-
326
-
327
-
328
-
329
-
330
-
331
-
332
-
333
-
334
-
335
-
336
-
337
-
338
-
339
 |
 |