Konica Minolta bizhub C654 bizhub C654/C754 Fax Operations User Guide - Page 110
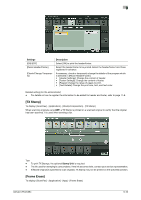
[Separate Scan], To display: [Scan/Fax] - [Application] - [No. of Originals] - [Separate Scan]
 |
View all Konica Minolta bizhub C654 manuals
Add to My Manuals
Save this manual to your list of manuals |
Page 110 highlights
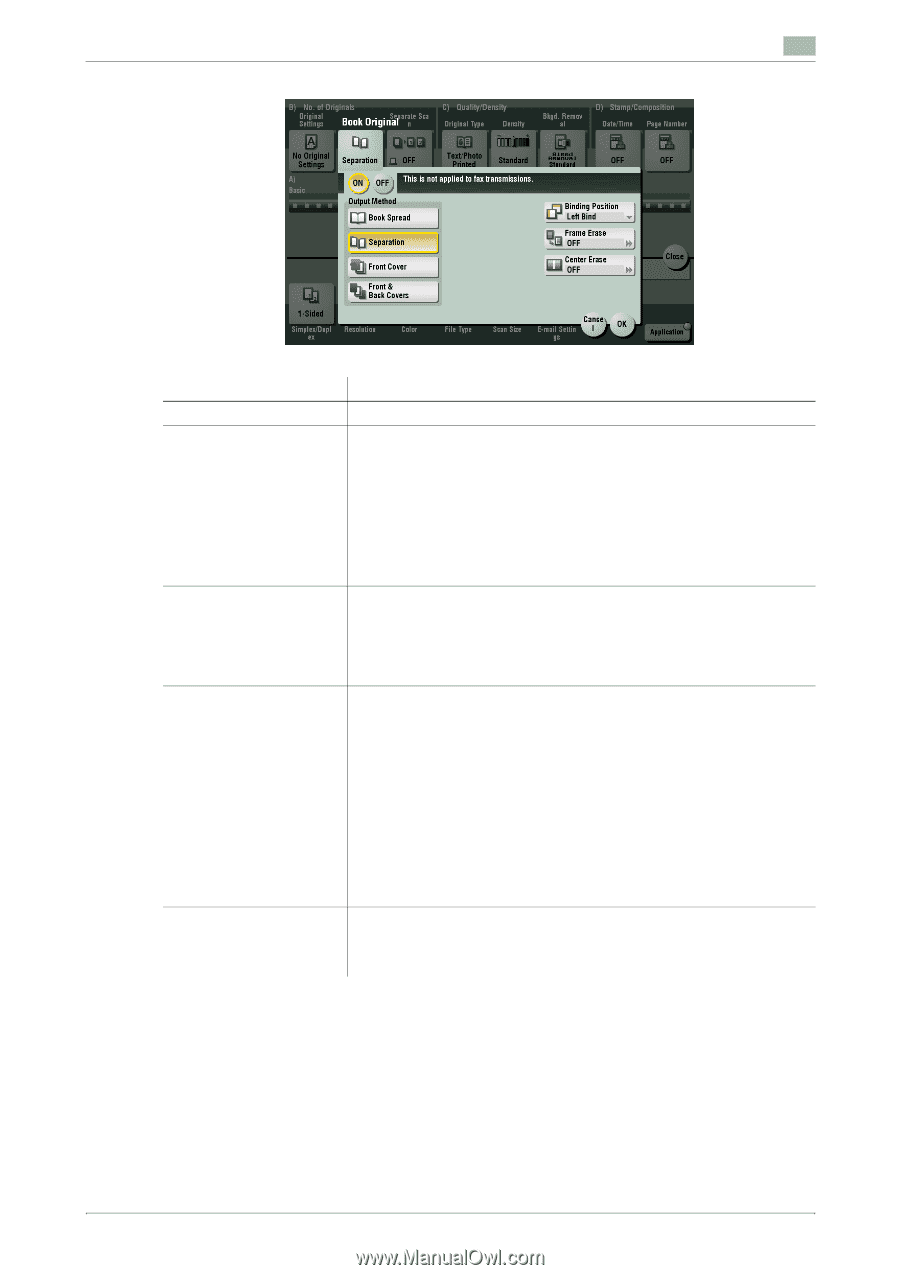
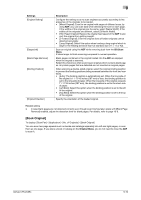
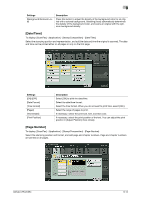
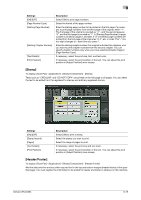
9 Settings [ON]/[OFF] [Output Method] [Binding Position] [Frame Erase] [Center Erase] Description Select [ON] to specify Book Original. Specify the scanning method for book spread originals. • [Book Spread]: Scans a book spread original as it is. • [Separation]: Scan the right and left pages of two-page spreads sepa- rately in the order of the page numbers. • [Front Cover]: Scans the front cover and two-page spreads according to the page order of the original (scans the front cover first and then two-page spreads). • [Front & Back Covers]: Scans the front and back covers and two-page spreads according to the page order of the original (scans the front cover first, then the back cover, followed by two-page spreads). If [Separation], [Front Cover] or [Front & Back Covers] is selected for [Output Method], select the spreading direction of the original to be scanned. Select [Left Bind] for two-page spreads of left binding, and [Right Bind] for two-page spreads of right binding. Note that if the binding position is incorrectly specified, the page order of the two-page spread is reversed between the left- and right-hand pages. Erases the shadow of the surrounding that is created when the original cover cannot be closed properly due to the thickness of the original. You can erase the four sides of the original to the same width. Additionally, you can erase the four sides of the original to different widths. • [Frame]: Select this option to erase the four sides of the original to the same width. In [Erase Amount], tap [+]/[-] for the inch area, or tap [+]/ [-] or press the keypad for the centimeter area to specify the width of the area to be erased. • [Individual]: Select this option to erase the four sides of the original by specifying different widths for different sides. Select a side ([Top], [Bottom], [Left] or [Right]) specify the width of the area to be deleted for each side in [Erase Amount] by tapping [+]/[-] for an inch area and by tapping [+]/[-] or pressing the keypad for a centimeter area. If you do not want to erase the side, cancel the setting for [Erase]. Erases the shadow created in the center when the original cover cannot be closed properly due to the thickness of the original. Specify the width of the area to erase by tapping [+]/[-] for the inch area, or by tapping [+]/[-] or pressing the keypad for the centimeter area. [Separate Scan] To display: [Scan/Fax] - [Application] - [No. of Originals] - [Separate Scan] If the number of original sheets is so large that they cannot be loaded into the ADF at the same time, you can load them in several batches and handle them as one job. You can also perform scanning of the original by switching between the ADF and the Original Glass as needed. bizhub C754/C654 9-11
-
 1
1 -
2
-
3
-
4
-
5
-
6
-
7
-
8
-
9
-
10
-
11
-
12
-
13
-
14
-
15
-
16
-
17
-
18
-
19
-
20
-
21
-
22
-
23
-
24
-
25
-
26
-
27
-
28
-
29
-
30
-
31
-
32
-
33
-
34
-
35
-
36
-
37
-
38
-
39
-
40
-
41
-
42
-
43
-
44
-
45
-
46
-
47
-
48
-
49
-
50
-
51
-
52
-
53
-
54
-
55
-
56
-
57
-
58
-
59
-
60
-
61
-
62
-
63
-
64
-
65
-
66
-
67
-
68
-
69
-
70
-
71
-
72
-
73
-
74
-
75
-
76
-
77
-
78
-
79
-
80
-
81
-
82
-
83
-
84
-
85
-
86
-
87
-
88
-
89
-
90
-
91
-
92
-
93
-
94
-
95
-
96
-
97
-
98
-
99
-
100
-
101
-
102
-
103
-
104
-
 105
105 -
 106
106 -
 107
107 -
 108
108 -
 109
109 -
 110
110 -
 111
111 -
 112
112 -
 113
113 -
 114
114 -
 115
115 -
116
-
117
-
118
-
119
-
120
-
121
-
122
-
123
-
124
-
125
-
126
-
127
-
128
-
129
-
130
-
131
-
132
-
133
-
134
-
135
-
136
-
137
-
138
-
139
-
140
-
141
-
142
-
143
-
144
-
145
-
146
-
147
-
148
-
149
-
150
-
151
-
152
-
153
-
154
-
155
-
156
-
157
-
158
-
159
-
160
-
161
-
162
-
163
 |
 |