Lacie d2 Network 2 User Manual - Page 28
STEP 2: Turn On the Drive
 |
View all Lacie d2 Network 2 manuals
Add to My Manuals
Save this manual to your list of manuals |
Page 28 highlights
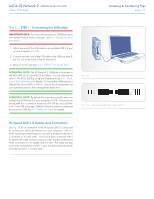
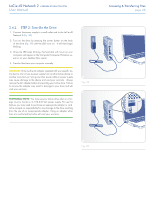
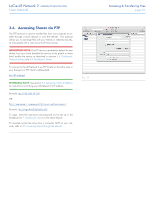
LaCie d2 Network 2 • DESIGN BY NEIL POULTON User Manual 3.4.2. STEP 2: Turn On the Drive 1. Connect the power supply to a wall outlet and to the LaCie d2 Network 2 (Fig. 28). 2. Turn on the drive by pressing the power button on the back of the drive (Fig. 29) until the LED turns on. It will then begin blinking. 3. Once the LED stops blinking, the hard disk will mount on your computer and appear in My Computer/Computer (Windows users) or on your desktop (Mac users). 4. Transfer files from your computer normally. CAUTION: Only use the AC adapter supplied with your specific LaCie device. Do not use a power supply from another LaCie device or another manufacturer. Using any other power cable or power supply may cause damage to the device and void your warranty. Always remove the AC adapter before transporting your LaCie drive. Failure to remove the adapter may result in damage to your drive and will void your warranty. TECHNICAL NOTE: You may use your LaCie drive when in a foreign country thanks to its 100-240 Volt power supply. To use this feature, you may need to purchase an appropriate adapter or cord. LaCie accepts no responsibility for any damage to the drive resulting from the use of an inappropriate adapter. Using an adapter other than one authorized by LaCie will void your warranty. Fig. 28 Accessing & Transferring Files page 28 Fig. 29
-
 1
1 -
2
-
3
-
4
-
5
-
6
-
7
-
8
-
9
-
10
-
11
-
12
-
13
-
14
-
15
-
16
-
17
-
18
-
19
-
20
-
21
-
22
-
 23
23 -
 24
24 -
 25
25 -
 26
26 -
 27
27 -
 28
28 -
 29
29 -
 30
30 -
 31
31 -
 32
32 -
 33
33 -
34
-
35
-
36
-
37
-
38
-
39
-
40
-
41
-
42
-
43
-
44
-
45
-
46
-
47
-
48
-
49
-
50
-
51
-
52
-
53
-
54
-
55
-
56
-
57
-
58
-
59
-
60
-
61
-
62
-
63
-
64
-
65
-
66
-
67
-
68
-
69
-
70
-
71
 |
 |
