Lexmark E352DN User's Guide - Page 27
Printing a network setup Printing a font sample list
 |
View all Lexmark E352DN manuals
Add to My Manuals
Save this manual to your list of manuals |
Page 27 highlights
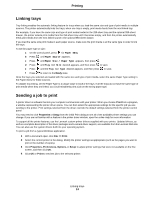
Printing Printing a network setup pag e If the printer is attached to a network, print a network setup page on the printer to verify the network connection. This page also provides important information that helps in configuring for network printing. 1 Make sure the printer is on and Ready appears. 2 From the control panel, press until Network Menu appears, and then press . Standard Network appears. 3 Press , and then press until Std Net Setup appears. 4 Press until Reports appears. 5 Press until Setup Page appears, and then press again. Busy Network appears. The indicator light flashes, and the printer prints the page. 6 Press to return to the Ready state. 7 Check the first section on the network setup page, and confirm that Status is "Connected." If Status is "Not Connected" the LAN drop may not be active, or the network cable may be malfunctioning. Consult a system support person for a solution, and print another network setup page to verify that the printer is connected to the network. Printing a font sample list To print samples of the fonts currently available for your printer: 1 Make sure the printer is on and Ready appears. 2 From the control panel, press until Utilities Menu appears, and then press . 3 Press until Print Fonts appears. 4 Press until List appears. The indicator light flashes, and the printer prints the pages. 5 Press to return to the Ready state. Printing a network setup page 27
-
 1
1 -
2
-
3
-
4
-
5
-
6
-
7
-
8
-
9
-
10
-
11
-
12
-
13
-
14
-
15
-
16
-
17
-
18
-
19
-
20
-
21
-
 22
22 -
 23
23 -
 24
24 -
 25
25 -
 26
26 -
 27
27 -
 28
28 -
 29
29 -
 30
30 -
 31
31 -
 32
32 -
33
-
34
-
35
-
36
-
37
-
38
-
39
-
40
-
41
-
42
-
43
-
44
-
45
-
46
-
47
-
48
-
49
-
50
-
51
-
52
-
53
-
54
-
55
-
56
-
57
-
58
-
59
-
60
-
61
-
62
-
63
-
64
-
65
-
66
-
67
-
68
-
69
-
70
-
71
-
72
 |
 |