Lexmark Pro4000c User's Guide - Page 60
Removing the background of a copy, Making a duplex copy
 |
View all Lexmark Pro4000c manuals
Add to My Manuals
Save this manual to your list of manuals |
Page 60 highlights
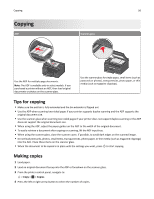
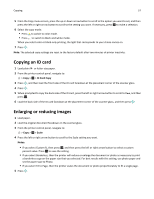
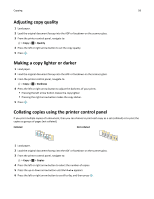
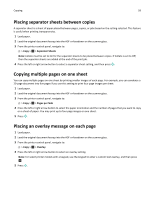
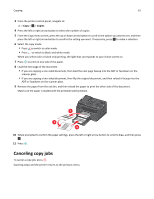
Copying 60 Removing the background of a copy The Background Removal feature adjusts the amount of background visible on a copy. 1 Load paper. 2 Load the original document faceup into the ADF or facedown on the scanner glass. 3 From the printer control panel, navigate to: > Copy > OK > Background Removal 4 Press the left or right arrow button to select the amount of background removal. 5 Press . Making a duplex copy Making a duplex (two‑sided) copy automatically The automatic duplex unit supports A4-, A5-, letter-, legal-, statement-, and executive-size paper. If you need to make two‑sided copies using other paper sizes, then see the instructions for making a two‑sided copy manually. Note: You cannot make two‑sided copies on envelopes, card stock, or photo paper. 1 Load paper. 2 Load the original document faceup into the ADF or facedown on the scanner glass. 3 From the printer control panel, navigate to: > Copy > OK > 2‑Sided Copies 4 Press the left or right arrow button to select a two‑sided copying option: • If you are copying a one‑sided document, then press the arrow buttons to scroll to 1‑sided to 2‑sided. • If you want to specify the page orientation and layout of the original document and the copy, then press the arrow buttons to scroll to Advanced. Press OK every time you make a selection, and then press until you reach the Copy menu screen. Notes: • For long-edged binding, pages are bound along the long edge of the page (left edge for portrait orientation and top edge for landscape orientation). • For short-edged binding, pages are bound along the short edge of the page (top edge for portrait orientation and left edge for landscape orientation). 5 Press , and then follow the instructions on the display. Making a duplex (two‑sided) copy manually 1 Load paper. 2 Load the original document faceup into the ADF or facedown on the scanner glass.
-
 1
1 -
2
-
3
-
4
-
5
-
6
-
7
-
8
-
9
-
10
-
11
-
12
-
13
-
14
-
15
-
16
-
17
-
18
-
19
-
20
-
21
-
22
-
23
-
24
-
25
-
26
-
27
-
28
-
29
-
30
-
31
-
32
-
33
-
34
-
35
-
36
-
37
-
38
-
39
-
40
-
41
-
42
-
43
-
44
-
45
-
46
-
47
-
48
-
49
-
50
-
51
-
52
-
53
-
54
-
 55
55 -
 56
56 -
 57
57 -
 58
58 -
 59
59 -
 60
60 -
 61
61 -
 62
62 -
 63
63 -
 64
64 -
 65
65 -
66
-
67
-
68
-
69
-
70
-
71
-
72
-
73
-
74
-
75
-
76
-
77
-
78
-
79
-
80
-
81
-
82
-
83
-
84
-
85
-
86
-
87
-
88
-
89
-
90
-
91
-
92
-
93
-
94
-
95
-
96
-
97
-
98
-
99
-
100
-
101
-
102
-
103
-
104
-
105
-
106
-
107
-
108
-
109
-
110
-
111
-
112
-
113
-
114
-
115
-
116
-
117
-
118
-
119
-
120
-
121
-
122
-
123
-
124
-
125
-
126
-
127
-
128
-
129
-
130
-
131
-
132
-
133
-
134
-
135
-
136
-
137
-
138
-
139
-
140
-
141
-
142
-
143
-
144
-
145
-
146
-
147
-
148
-
149
-
150
-
151
-
152
-
153
-
154
-
155
-
156
-
157
-
158
-
159
-
160
-
161
-
162
-
163
-
164
-
165
-
166
-
167
-
168
-
169
-
170
-
171
-
172
-
173
-
174
-
175
-
176
-
177
-
178
-
179
-
180
-
181
-
182
-
183
-
184
-
185
-
186
-
187
-
188
-
189
 |
 |