Miele Scout RX3 Operating instructions/Installation instructions - Page 17
clicks into place.
 |
View all Miele Scout RX3 manuals
Add to My Manuals
Save this manual to your list of manuals |
Page 17 highlights
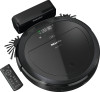
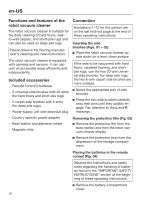
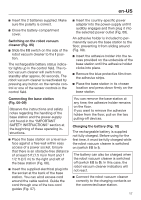
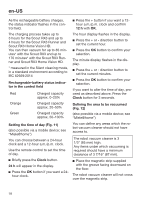
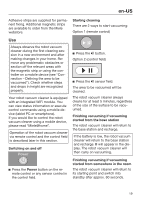
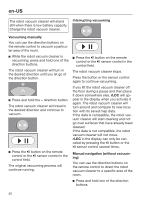
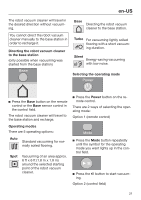
en-US Insert the 2 batteries supplied. Make sure the polarity is correct. Close the battery-compartment cover. Switching on the robot vacuum cleaner (Fig. 05) Slide the I/0 switch on the side of the robot vacuum cleaner to the I position. The rechargeable battery status indicator lights up in the control field. The robot vacuum cleaner will switch into standby after approx. 60 seconds. The robot vacuum cleaner is reactivated by pressing any button on the remote control or one of the sensor controls in the control field. Insert the country-specific power adapter into the power-supply until it audibly engages and then plug it into the selected power outlet (Fig. 08). An adhesive holder is included to permanently secure the base station to the floor, preventing it from sliding around (Fig. 09). Insert the adhesive holder into the recess provided on the underside of the base station until the adhesive holder clicks into place. Remove the blue protective film from the adhesive strips. Place the base station in its chosen location and press down firmly on the base station. Connecting the base station (Fig. 06-09) Observe the instructions and safety notes regarding the handling of the base station and the power-supply unit found in the "IMPORTANT SAFETY INSTRUCTIONS" section at the beginning of these operating instructions. Place the base station on a level surface against a free wall within easy access of a power socket. Ensure that there is an obstacle-free distance of at least 5 ft (1.5 m) in front and 1 1/2 ft (0.5 m) to the right and left of the base station (Fig. 06). Insert the supplied electrical plug into the socket at the back of the base station. You can wind excess cord around the cable rewind. Guide the cord through one of the two cord guides (Fig. 07). You can remove the base station at any time; the adhesive holder remains on the floor. If you want to remove the adhesive holder from the floor, pull on the two pulling-off devices. Charging the battery (Fig. 10) The rechargeable battery is supplied not fully charged. Before using for the first time, it must be fully charged while the robot vacuum cleaner is switched on (switch I/0 to I). The battery can also be charged when the robot vacuum cleaner is switched off (switch I/0 to 0). In this case, the robot vacuum cleaner indicators will not react. Connect the robot vacuum cleaner correctly to the charging contacts on the connected base station. 17
-
 1
1 -
2
-
3
-
4
-
5
-
6
-
7
-
8
-
9
-
10
-
11
-
 12
12 -
 13
13 -
 14
14 -
 15
15 -
 16
16 -
 17
17 -
 18
18 -
 19
19 -
 20
20 -
 21
21 -
 22
22 -
23
-
24
-
25
-
26
-
27
-
28
-
29
-
30
-
31
-
32
-
33
-
34
-
35
-
36
-
37
-
38
-
39
-
40
-
41
-
42
-
43
-
44
-
45
-
46
-
47
-
48
-
49
-
50
-
51
-
52
-
53
-
54
-
55
-
56
-
57
-
58
-
59
-
60
-
61
-
62
-
63
-
64
-
65
-
66
-
67
-
68
-
69
-
70
-
71
-
72
-
73
-
74
-
75
-
76
-
77
-
78
-
79
-
80
-
81
-
82
-
83
-
84
-
85
-
86
-
87
-
88
-
89
-
90
-
91
-
92
-
93
-
94
-
95
-
96
-
97
-
98
-
99
-
100
-
101
-
102
-
103
-
104
-
105
-
106
-
107
-
108
-
109
-
110
-
111
-
112
-
113
-
114
-
115
-
116
-
117
-
118
-
119
-
120
-
121
-
122
-
123
-
124
-
125
-
126
-
127
-
128
-
129
-
130
-
131
-
132
 |
 |
