Netgear RN3138 Software Manual - Page 65
Hide a Shared Folder, Network Access, Enable DFS Root, Address, Remote Folder, Apply
 |
View all Netgear RN3138 manuals
Add to My Manuals
Save this manual to your list of manuals |
Page 65 highlights
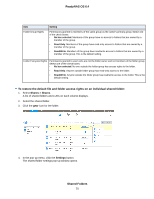
ReadyNAS OS 6.4 6. Click the Network Access tab. 7. Click the SMB file-sharing protocol button. The window adjusts. 8. Select the DFS tab button on the left side of the pop-up window. 9. Select the Enable DFS Root check box. 10. Click the + button above the list of remote shared folders. The New External Folder page opens. 11. Enter the following information: • Name. The name of the remote shared folder, as you want it to appear on your ReadyNAS. • Address. The IP address of the network-attached device where the remote shared folder resides. • Remote Folder. The name of the remote shared folder, as it appears on the network-attached device. 12. Click the Add button. The new remote shared folder appears on the list. 13. Click the Apply button. 14. Click the OK button. Your settings are saved and the pop-up window closes. 15. Make sure that the remote shared folder on the network-attached device is configured for file sharing. You can now access the remote shared folder from your ReadyNAS system using the SMB protocol. For information about how to access your system using the SMB protocol, see Use a Windows Device on page 72 or Use a Mac OS X Device on page 73. Hide a Shared Folder This feature is available for SMB only. Hiding a folder prevents users from discovering the folder unless they explicitly specify the folder name in the browse path. Shared Folders 65
-
 1
1 -
2
-
3
-
4
-
5
-
6
-
7
-
8
-
9
-
10
-
11
-
12
-
13
-
14
-
15
-
16
-
17
-
18
-
19
-
20
-
21
-
22
-
23
-
24
-
25
-
26
-
27
-
28
-
29
-
30
-
31
-
32
-
33
-
34
-
35
-
36
-
37
-
38
-
39
-
40
-
41
-
42
-
43
-
44
-
45
-
46
-
47
-
48
-
49
-
50
-
51
-
52
-
53
-
54
-
55
-
56
-
57
-
58
-
59
-
 60
60 -
 61
61 -
 62
62 -
 63
63 -
 64
64 -
 65
65 -
 66
66 -
 67
67 -
 68
68 -
 69
69 -
 70
70 -
71
-
72
-
73
-
74
-
75
-
76
-
77
-
78
-
79
-
80
-
81
-
82
-
83
-
84
-
85
-
86
-
87
-
88
-
89
-
90
-
91
-
92
-
93
-
94
-
95
-
96
-
97
-
98
-
99
-
100
-
101
-
102
-
103
-
104
-
105
-
106
-
107
-
108
-
109
-
110
-
111
-
112
-
113
-
114
-
115
-
116
-
117
-
118
-
119
-
120
-
121
-
122
-
123
-
124
-
125
-
126
-
127
-
128
-
129
-
130
-
131
-
132
-
133
-
134
-
135
-
136
-
137
-
138
-
139
-
140
-
141
-
142
-
143
-
144
-
145
-
146
-
147
-
148
-
149
-
150
-
151
-
152
-
153
-
154
-
155
-
156
-
157
-
158
-
159
-
160
-
161
-
162
-
163
-
164
-
165
-
166
-
167
-
168
-
169
-
170
-
171
-
172
-
173
-
174
-
175
-
176
-
177
-
178
-
179
-
180
-
181
-
182
-
183
-
184
-
185
-
186
-
187
-
188
-
189
-
190
-
191
-
192
-
193
-
194
-
195
-
196
-
197
-
198
-
199
-
200
-
201
-
202
-
203
-
204
-
205
-
206
-
207
-
208
-
209
-
210
-
211
-
212
-
213
-
214
-
215
-
216
-
217
-
218
-
219
-
220
-
221
-
222
-
223
-
224
-
225
-
226
-
227
-
228
-
229
-
230
-
231
-
232
-
233
-
234
-
235
-
236
-
237
-
238
-
239
-
240
-
241
-
242
-
243
-
244
-
245
 |
 |
