Netgear XSM4324FS Hardware Installation Guide - Page 47
Installation
 |
View all Netgear XSM4324FS manuals
Add to My Manuals
Save this manual to your list of manuals |
Page 47 highlights
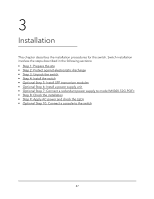
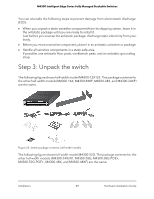
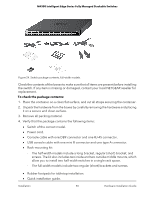
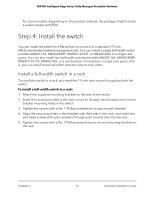
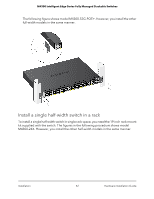
3 Installation This chapter describes the installation procedures for the switch. Switch installation involves the steps described in the following sections: • Step 1: Prepare the site • Step 2: Protect against electrostatic discharge • Step 3: Unpack the switch • Step 4: Install the switch • Optional Step 5: Install SFP transceiver modules • Optional Step 6: Install a power supply unit • Optional Step 7: Connect a redundant power supply to model M4300-52G-POE+ • Step 8: Check the installation • Step 9: Apply AC power and check the LEDs • Optional Step 10: Connect a console to the switch 47
-
 1
1 -
2
-
3
-
4
-
5
-
6
-
7
-
8
-
9
-
10
-
11
-
12
-
13
-
14
-
15
-
16
-
17
-
18
-
19
-
20
-
21
-
22
-
23
-
24
-
25
-
26
-
27
-
28
-
29
-
30
-
31
-
32
-
33
-
34
-
35
-
36
-
37
-
38
-
39
-
40
-
41
-
 42
42 -
 43
43 -
 44
44 -
 45
45 -
 46
46 -
 47
47 -
 48
48 -
 49
49 -
 50
50 -
 51
51 -
 52
52 -
53
-
54
-
55
-
56
-
57
-
58
-
59
-
60
-
61
-
62
-
63
-
64
-
65
-
66
-
67
-
68
-
69
 |
 |
3
Installation
This chapter describes the installation procedures for the switch. Switch installation
involves the steps described in the following sections:
•
Step
1:
Prepare
the
site
•
Step
2:
Protect
against
electrostatic
discharge
•
Step
3:
Unpack
the
switch
•
Step
4:
Install
the
switch
•
Optional
Step
5:
Install
SFP
transceiver
modules
•
Optional
Step
6:
Install
a
power
supply
unit
•
Optional
Step
7:
Connect
a
redundant
power
supply
to
model
M4300-52G-POE+
•
Step
8:
Check
the
installation
•
Step
9:
Apply
AC
power
and
check
the
LEDs
•
Optional
Step
10:
Connect
a
console
to
the
switch
47