Nikon 25515 User Manual - Page 27
The Built-in Speedlight, Digital Zoom, When Lighting Is Poor, Viewfinder Focus
 |
View all Nikon 25515 manuals
Add to My Manuals
Save this manual to your list of manuals |
Page 27 highlights
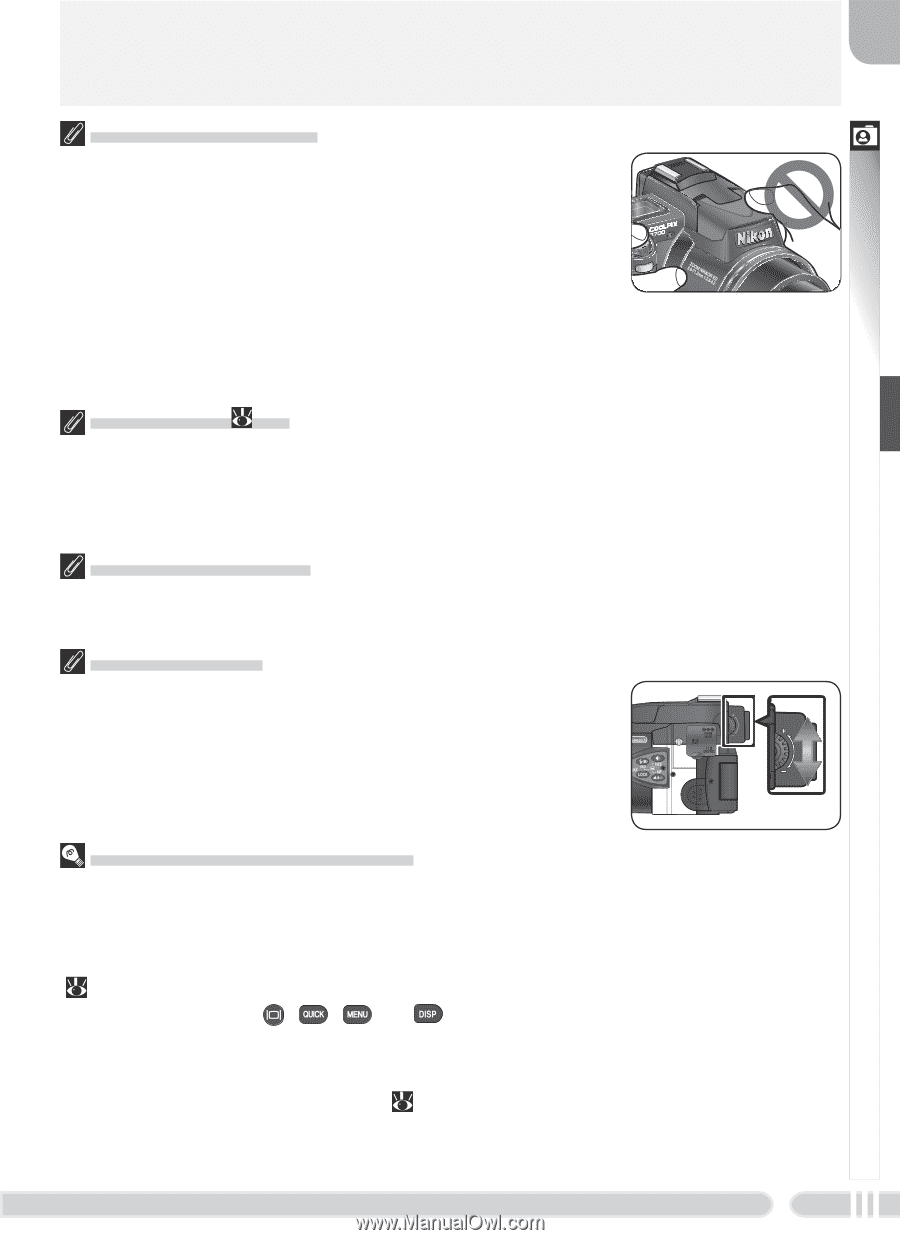
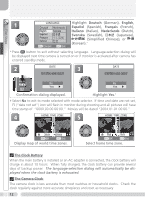
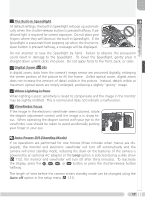
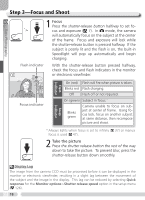
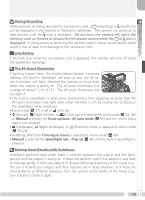
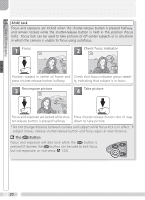
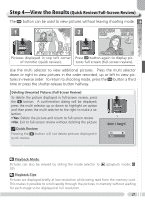
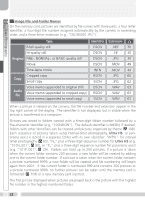
Basic Photography The Built-in Speedlight At default settings, the built-in Speedlight will pop up automatically when the shutter-release button is pressed halfway if additional light is required for correct exposure. Do not place your fingers where they will obstruct the built-in Speedlight. If the Speedlight is prevented from popping up when the shutter-release button is pressed halfway, a message will be displayed. Do not attempt to raise the Speedlight by hand. Failure to observe this precaution could result in damage to the Speedlight. To lower the Speedlight, gently press it straight down until it clicks into place. Do not apply force to the front, back, or sides. Digital Zoom ( 95) In digital zoom, data from the camera's image sensor are processed digitally, enlarging the center portion of the picture to fill the frame. Unlike optical zoom, digital zoom does not increase the amount of detail visible in the picture. Instead, details visible at maximum optical zoom are simply enlarged, producing a slightly "grainy" image. When Lighting Is Poor When lighting is poor, sensitivity is raised to compensate and the image in the monitor may be slightly mottled. This is normal and does not indicate a malfunction. Viewfinder Focus If the image in the electronic viewfinder seems blurred, rotate the diopter adjustment control until the image is in sharp focus. When operating the diopter control with your eye to the viewfinder, care should be taken to avoid accidentally putting your finger in your eye. Auto Power Off (Standby Mode) If no operations are performed for one minute (three minutes when menus are displayed), the monitor and electronic viewfinder will turn off automatically and the camera will enter standby mode, reducing the drain on the batteries (if the camera is powered by an optional AC adapter or the Loop option is selected during a slide show [ 112], the monitor and viewfinder will turn off after thirty minutes). To reactivate the display, press the , , , or button or press the shutter-release button halfway. The length of time before the camera enters standby mode can be changed using the Auto off option in the setup menu ( 131). 17
-
 1
1 -
2
-
3
-
4
-
5
-
6
-
7
-
8
-
9
-
10
-
11
-
12
-
13
-
14
-
15
-
16
-
17
-
18
-
19
-
20
-
21
-
 22
22 -
 23
23 -
 24
24 -
 25
25 -
 26
26 -
 27
27 -
 28
28 -
 29
29 -
 30
30 -
 31
31 -
 32
32 -
33
-
34
-
35
-
36
-
37
-
38
-
39
-
40
-
41
-
42
-
43
-
44
-
45
-
46
-
47
-
48
-
49
-
50
-
51
-
52
-
53
-
54
-
55
-
56
-
57
-
58
-
59
-
60
-
61
-
62
-
63
-
64
-
65
-
66
-
67
-
68
-
69
-
70
-
71
-
72
-
73
-
74
-
75
-
76
-
77
-
78
-
79
-
80
-
81
-
82
-
83
-
84
-
85
-
86
-
87
-
88
-
89
-
90
-
91
-
92
-
93
-
94
-
95
-
96
-
97
-
98
-
99
-
100
-
101
-
102
-
103
-
104
-
105
-
106
-
107
-
108
-
109
-
110
-
111
-
112
-
113
-
114
-
115
-
116
-
117
-
118
-
119
-
120
-
121
-
122
-
123
-
124
-
125
-
126
-
127
-
128
-
129
-
130
-
131
-
132
-
133
-
134
-
135
-
136
-
137
-
138
-
139
-
140
-
141
-
142
-
143
-
144
-
145
-
146
-
147
-
148
-
149
-
150
-
151
-
152
-
153
-
154
-
155
-
156
-
157
-
158
-
159
-
160
-
161
-
162
-
163
-
164
 |
 |