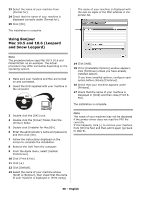
Oki MC361MFP MC361, MC561 Setup Guide (English, Fran栩s, Espa?ol, Po - Page 32
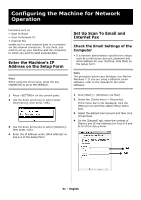
Set the Email Address for Your Machine, Con The Machine for Scan To Email and to Internet Fax
 |
View all Oki MC361MFP manuals
Add to My Manuals
Save this manual to your list of manuals |
Page 32 highlights
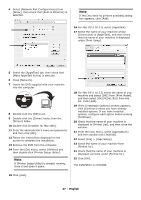
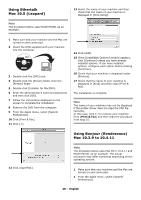
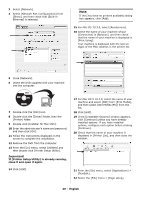
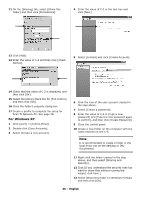
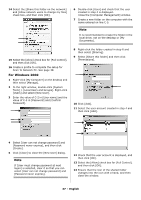
5 Click the [Server] tab, and then enter each setting in the corresponding lines of the Setup Form. • If the [My server requires authentication] check box is selected, enter "SMTP" on line B-4 of the Setup Form. • If it is not selected, enter "POP" on line B-4. 6 Select the [My server requires authentication] check box and click [Settings]. 7 In the [Outgoing Mail Server] dialog box: Set the Email Address for Your Machine Enter an email address to be used by your machine on line B-1 of the Setup Form. • If the email address for your machine is specified by the network administrator, enter the email address on line B-1. • If you are using an internet service provider, obtain an email address for your machine from the provider and then enter the email address on line B-1. • If the email address for your machine is neither specified nor obtained, determine the email address according to the value you entered on line B-4 (authentication method): - If B-4 is "SMTP", determine an email address and enter it on line B-1. - If B-4 is "POP", enter the same email address as B-12 on line B-1. • If you want your machine to receive email, you must obtain an email address for your machine from a network administrator or your internet service provider. Configure The Machine for Scan To Email and to Internet Fax Set up the machine for Scan To Email and Internet Fax using the information in the Setup Form. • If [Use the same settings as my incoming mail server] is selected, enter - the value from line B-7 on line B-5 and - the value from line B-8 on line B-6 of the Setup Form. • If [Log on using] is selected, enter - the [Account name] on line B5 and - The [Password] on line B-6 of the Setup Form. Note When using the arrow keys, press the key repetitively to go to the selection. Press the key on the control panel. 8 Use the down arrow key to select [Easy Setup] and press . 9 Enter the administrator password, then use the arrow keys to select [Enter] and press . 32 - English
-
 1
1 -
2
-
3
-
4
-
5
-
6
-
7
-
8
-
9
-
10
-
11
-
12
-
13
-
14
-
15
-
16
-
17
-
18
-
19
-
20
-
21
-
22
-
23
-
24
-
25
-
26
-
 27
27 -
 28
28 -
 29
29 -
 30
30 -
 31
31 -
 32
32 -
 33
33 -
 34
34 -
 35
35 -
 36
36 -
 37
37 -
38
-
39
-
40
-
41
-
42
-
43
-
44
-
45
-
46
-
47
-
48
-
49
-
50
-
51
-
52
-
53
-
54
-
55
-
56
-
57
-
58
-
59
-
60
-
61
-
62
-
63
-
64
-
65
-
66
-
67
-
68
-
69
-
70
-
71
-
72
-
73
-
74
-
75
-
76
-
77
-
78
-
79
-
80
-
81
-
82
-
83
-
84
-
85
-
86
-
87
-
88
-
89
-
90
-
91
-
92
-
93
-
94
-
95
-
96
-
97
-
98
-
99
-
100
-
101
-
102
-
103
-
104
-
105
-
106
-
107
-
108
-
109
-
110
-
111
-
112
-
113
-
114
-
115
-
116
-
117
-
118
-
119
-
120
-
121
-
122
-
123
-
124
-
125
-
126
-
127
-
128
-
129
-
130
-
131
-
132
-
133
-
134
-
135
-
136
-
137
-
138
-
139
-
140
-
141
-
142
-
143
-
144
-
145
-
146
-
147
-
148
-
149
-
150
-
151
-
152
-
153
-
154
-
155
-
156
-
157
-
158
-
159
-
160
-
161
-
162
-
163
-
164
-
165
-
166
-
167
-
168
-
169
-
170
-
171
-
172
-
173
-
174
-
175
-
176
-
177
-
178
-
179
-
180
-
181
-
182
-
183
-
184
-
185
-
186
-
187
-
188
-
189
-
190
-
191
-
192
-
193
-
194
-
195
-
196
-
197
-
198
-
199
-
200
-
201
-
202
-
203
-
204
-
205
-
206
-
207
-
208
-
209
-
210
-
211
-
212
-
213
-
214
-
215
-
216
 |
 |
